


boognish
-
Posts
375 -
Joined
-
Last visited
-
Days Won
11
Content Type
Profiles
Forums
Store
Gallery
Events
Local Fish Stores
FAQ
Blogs
Downloads
Posts posted by boognish
-
-
Thanks. I have found a couple that are just enough flow till I figure out what I am going to use in the end. This community rocks!
-
Thanks, Patrick. I will touch base with you if I can make it out there. I've been over once before for the heat-pump, so I know the way.
-Chris
-
I need powerheads/pumps for in-tank flow in my 175. I am putting rock in today or tomorrow and need some flow. Any old powerheads will do as this won't be my final setup. I just need some movement asap.
-
Thanks to those that came by. Hope the Xenia and GSP likes your tank as good as it did mine. That ball of macro was bigger than I thought. Filled a salt bucket about 1/2 full. That and handfuls of Xenia are making my trashcan smell wonderful.
-
I have a large ball of Halimeda that has grown under a pretty large colony of Pulsing Xenia and separated it from the rock for me. I am replacing all of the bulbs today and cleaning this out whie it's easy to grab.
I also have plenty of bright green GSP I can pull out if anyone is interested.
I'll be elbows deep soon, so calling me would be best. I am in Leander.
512.56(zero).39(zero)2

-
Have you been working on this since 2010? Looks great. The hood is very nice and well thought out.
Yup... been at it a while. When I got the tank and old water-damaged stand, I didn't plan to rush it, but it has taken a bit longer than I expected. Running a business, an entire family that plays hockey, and life in general kinda slows things down. I have the 75 gallon running so my fix is somewhat satisfied while I get this going.
The good thing is... I'm getting close!!
-
 1
1
-
-
I admire your build quality and attention to detail. Kudos.
Thanks! Really, that is the only way it's going to get the boss's (wife) approval since I'm drilliing several holes through the wall to the garage and takiing over essentially 1/4 of the living room. That is onlty compounded by the fact that the other living room has been turned into a gameroom with arcade, foosball, airhockey, darts and is temporary storage for my 75 gallon, all its refill equip and bucket, chiller, and calc reactor. Ultimately, I owe quite a bit to her understanding and acceptance of my 'hobbies'.
-
I am planning to attend this one. Looks like there should be good turnout so far!
-
Actual progress!
Canopy is skinned, painted, and stained, and lights are finished. I made an air intake box so that fresh air was pulled through the lights/ducts.


I filled the tank with fresh water again to test out the Reeflo Dart and I was getting too much noise at the sump, so I re-did all of the drain plumbing except the dursos.
Tonight i drained it and no wI need to clean it, put a sandbed in, and fill er up with saltwater.
I got half of my live rock order in today. I set up "The Cycler" made from an old 55gal aquarium and 27gal tub, a couple pumps and a skimmer. I put the live rock in with the marco rock and a few old pieces I either collected from members or pulled from my other tank and dried out for a year or so. Once I get the rest of my order in, it will be about 1/2 live rock and 1/2 dry rock. I have pretty good flow across all of it and I'm setting up powerheads tomorrow. The skimmer has already started to produce. As the live rock cycles, the plan is for the life to spread to the dry/dead rock.
The maro rock is nice. Very good range of shapes and sizes.

Live and marco rocks starting their liffe together.


Hopefully I'll be posting some pics of the pillar building process soon. I have started re-thinking it and need to test out some stands of PVC and some bases of Acrylic plates to support the acrylic rods. I want to make sure the pillers aren't going to topple and break the tank...
-
I have been able to get it about as quiet as can be expected with what seems to be a good flow. I did the following:
- Re-engineered the drain plumbing so that each dump into the sump independently. Before, they joined in the middle and the drain diameter increased. This was causing quite a bit of the turbulence.
- Closed the ball valves under each overflow to a bit more than half open which reduced the overflow draining rate. I thought it would affect the water levels in the tank or overflow boxes, but it didn't seem to. just calmed the water and reduced bubbles.

Thanks the community and I hope this helps you guys with noisy sumps.
- Re-engineered the drain plumbing so that each dump into the sump independently. Before, they joined in the middle and the drain diameter increased. This was causing quite a bit of the turbulence.
-
Nice! Gonna have to see these in person soon.
-
PM sent on rubbermaid containers
-
1
-
-
I had enough PVC parts to make the reverse derso and it helped a little. I have ball valves under each overflow. I closed each side about 1/2 way. The added pressure of the reverse durso and closing the ball valves caused each overflow to fill over the top of the dersos. It was completely silent at that point, but flowing pretty well... I think that is essentially the 'herbie' method. Can't leave it that way, but I'm getting closer.
-
Thanks - Heading up to Lowes now. Reverse durso makes the most sense as a starting point.
-
Thanks for your reply. That is exactly what I had before this. This isn't glued - just testing a design I saw out there on the innerwebs - so re-working is no issue. The noise/aeration/agitation is orginating in the line, so I'm thinking the solution will be somewhere before the final exit to the sump.
-
I'm looking for advice on how to quiet down the water returning to my sump. I have a 175 gallon bowfront with dual overflows - one on each end. This is my first tank with dual overflows.
I have 1 1/4" durso standpipes connected to 1" pvc and meet in the middle underneath the tank. From there, it expands to a 1.5" pvc return to the sump. The overflows aren't noisy and the water level in each remains constant without any sucking sounds form water or air. The noise is coming from agitated / aerated water near the end of the 1.5" and bubbles in the water where it enters the sump. I can get it quiet(er) if I dial the return pump down to nearly nothing, but that is not enough flow at all.
Flow diagram/image

Dursos


Sump at return

The current setup I have at the end helped a little, but you can see the amount of air that is coming out. My first thought is to NOT increase the diameter where the two sides of the return meet in the middle. Thoughts?
-
Looking for Ranco ETC-111-000 ETC with integrated sensor (or equivalent).
The thermostat on my 1/3HP chiller has been messing up a lot lately and has finally gone down for the count. It would kick on then within 10 seconds cut off - displaying "E2". From what I have read, this is a result of the memory going bad.
-
I am breaking down my FW Hex to make room for the drum kit closer to the piano and need a home for this guy. I can't remember what kind he is, but he's about 2.5 in long and a couple years old.

I am in Leander.
512-5(six)0-39(zero)2
-
I have some for ya. I'm not home right now, but Mollie is. Let me know and I'll let her know to grab them for you. I'll give you a call, also.
-
What a monster build, I'm impressed. ... What are you doing to protect the metal parts (I'm hoping to steal some ideas)?
Thanks - It has definitely proven to be a pretty big undertaking and turned into quite the piece of functional furniture. I always end up over-building. So far this looks good in the living room, which keeps the wife happy... At least until I punch more holes through to the garage.
I painted the 2 steel supports from the lift with Rustoleum. As an added measure, I am probably going to coat them with oil-based white Killz. Not sure if that is going to be enough to completely prevent rusting or not. The only metal from the lift are the 2 horizontal supports that stick through the back of the canopy. Other than that, the only other metal is the shelf rack and the hardware used to mount it. I'm not sure that I am keeping that yet, but the hardware is stainless steel. If the rack rusts too much too quickly, I will find a way to mount the lights directly to the wood. By then, I'll know exactly where I want them and thus, not have a need to adjust height and position forward or back inside the canopy.
Any recommendations to prevent rusting are greatly appreciated.
-
I didnt want to go through the trouble of bowing the front either. Guess I took the easy way out.
Your stand looks great. The bowfront has definitely been a hurdle in this build.
Lighting, lift, and canopy update:
Jeremy (offroad) and I brainstormed a way to squeeze 3 t5's in for supplemental light. Mounting 2 in the canopy door and 1 across the back between the overflows.


I ended up going with a lift system using pulleys and a hand-wench instead of hydraulic lifts. I was unsure what the final weight would be, so I didn't want to guess which to buy. I probably won't be getting hired on as a welder anywhere, but it's definitely going to hold. I can always replace the hand-wench with an electric wench if I come across the right one.


Once I got the lift figured out, I was able to skin the beast. Here are some pics of the progress so far. No trim, stain, or paint yet, but I'm getting closer...


Hinged bowfront door open. I'm using a stick to prop it open here, but will end up with gas springs eventually. This will do for now...


I only have about 12 inches of clearance when lifted to the ceiling. I would have liked more clearance, but I prefer the taller stand and needed the canopy height for the 400w MHs. This will get the lights up for changing and out of the way when I need to lean in to get deeper into the tank for any reason.


I've never said "That's what she said..." more often in one weekend than this past one. Every time my wife or friends saw it the first reaction was "thats so big" or "that's huge"... What else would one say?
This week, I'll be coating the inside with Killz, staining the oak panels, painting and putting on the black trim. Unfortunately, I don't have a compound miter saw... Once that's done, I need to get the lights and fans installed, holes cut in the back for wiring and ventilation, then the main airflow for the MHs figured out. so close, yet so far away.
-
Great woodworking! This looks like it is going to be a beast. Looking forward to seeing it all come together.
Thanks! I wanted to make it as lightweight and small as possible, but I think I've maxed out both of those parameters. I need the height to get the lights more than 6" off the water. I used Poplar so isn't really that heavy, but is sturdy enough to handle it's own weight and that of the lights, etc going into it.
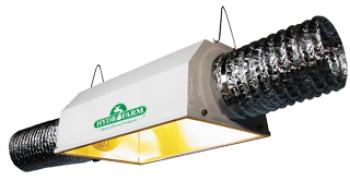
As far as venting it... I am planning on daisy-chaining the MH lights with 6" duct with an exhaust fan in the garage pulling air from one end of the canopy in the house, past each light, then to the garage. I don't think I will need *too* much flow, so I am going to experiment with the different fan strengths. I don't want a windstorm or tornado sound. Hydro? Any input as to what fan I should start with? The total distance will be the length of tank (6') plus about another 4 - 6 feet to the fan. Total of 12' max. Ideally, I'd like to be able to redirect the exhaust into the garage OR the house if I wanted heat, but that would require either a fan in the house or another hole back into the house from the fan in the garage.... I am considering pulling air from the garage and through, but not sure the wife will be happy with duct and holes on each side of the tank. Not sure I would either, but sending all my AC to the garage might not be a good idea either. I am going to extend the canopy on the exhaust end to hide the duct coming out the side. That side is closer to a wall on the far side of the room and shouldn't really be noticeable.
Here's a 'not-to-scale' mockup I made:

I am designing a pulley system to raise it. I don't want to afford the actuators that will lift this beast. Two anchored on each end and one at the bottom of the stand. I will be able to slide it off the front of the lift system for maintenance, light changing, etc. I'll diagram that soon. I need to get all the lights figured out first so I know what I have to work with.
-
Canopy and lighting update...
I couldn't have asked for a better New Year. My dad was able to come up after Christmas and help me architect and start to build the canopy. He's a master woodworker & wood artist who loves a challenge and I value the time and woodworking knowledge I get out of it. Between my work and his 'Grand-dad time' with the kids, we managed to make some good progress.
Reminder: The main functional features of this canopy are:
- Hold a lot of light: (3 400W MH + as much supplementary light as I can stuff in)
- Ventilate to the garage behind via 6" air duct
- Ability to easily maintain tank on a daily basis (feeding, etc so front should open). Also, the entire canopy needs to lift out of the way when I really need to dive in.
- Match the custom design of the stand: three faced front instead of curved like the bow-front of the tank.
Much appreciation to my neighbor, Jeremy for letting us invade his home and inspect his awesome build setup and lift system, as well as doing the leg-work in Austin to find the metal suppliers.
There's very little out there on custom canopies for bow-front aquariums so I'll post some pictures in hopes they help others looking for some ideas/direction in their build. Sorry I don't have 'plans'... My dad and I just don't work that way. We build using the agile method. We know where it needs to end up and get there in sprints.
Sorry for the grainy/blurry iphone photos. My wife the photographer is a bit busy:

This is the molding that rests on the top of the tank. The template I used to cut the tank impression out of the stand's molding is clamped to it. I used it as a guide to router out the bevel that would overlap the front of the tank.

Molding cut and joined to the front 'door'.


Front of the canopy propped open. I plan to attach a couple T5's in the front hinged door.

The beginnings of the lift system behind the tank - We welded these steel tubes for the lift system. More on that later... I need to get the lights figured out first...

Canopy upside-down with the rack system I will hang the 3 400W MH lights from. I used a 6' closet shelf and cut out the part I needed. Using chains, I'll be able to raise and lower the lights within a range of about 5 - 10 inches above the water.
...That pretty much leaves you room for 3 quality reflectors.
Yes I would say the canopy should have 3 faces like the stand. You got your work cut out making that canopy and lighting work, I went through the same thing. Every screw and bolt is custom.
You hit the nail on the head, Hydro!
Air cooled reflectors hung to see how much room I have for T5s. This is about the lowest they might ever be. They're just hung for horizontal spacing in this picture. I can only fit 3 of the long t5s with reflectors. Two in the front door and one behind. these reflectors are designed to be air cooled via the 6" duct flanges. I'll pull air from the house or garage and pump it into the garage or house depending on the time of year.


Lights hung and front open.
I'm hoping to have time to work on the lift system and to skin this canopy soon. With the workload, it wont be this week or next week...
- Hold a lot of light: (3 400W MH + as much supplementary light as I can stuff in)
-
Yeah, where's the update?
Funny you should ask... Growing and expanding my company this year has left me barely enough time to maintain the 75 gallon, so the 175 was put on hold. Gotta love an empty tank in the living room reminding me every day that I could have a bigger, better tank...
Well the company made money this year and we don't want to pay taxes on profits, so... BONUSES!! That means I get a tank controller, reflectors, and to build a canopy finally! I got the the 3 reflectors yesterday from a local hydroponics supply warehouse here in Austin and I'm planning to start canopy construction soon. (If you are looking for great lighting or hydro equipment, contact me. These guys went WAY down on price to match an online price I found without my asking. I was happy to be able to support the local economy.)
 Are there any simple tricks to your math on the stand front? How much larger is the stand from the tank (not counting the top trim that makes it look inset)?
Measure twice, cut once... The biggest challenge was getting the curve exactly right. I have an image on the first page of the template I created to cut the bow into the trim. I set the tank on plywood, bent a slat across the front and superglued/nailed it to the plywood in the curve. I kept it to use on the canopy.
Also, I was noticing that the framework is doubled in the front with the angled frame and the straight frame behind it. Is that necessary?No that is not necessary. The stand build was not done with any plans and I always tend to over-build. That is something I am trying to avoid on the canopy since it needs to be as light and streamlined as possible so it is easily lifted with the lift system.
Magnets - I used fairly small magnets and so far that is the only thing I think I am going to change. We have a new puppy and he got rambunctious and knocked off a door playing.
I added approximately 6 inches of depth to the stand in anticipation of creating a lift system and possibly a shadowbox type of backlit area behind the tank instead of painting it black. I'll let you know if that comes to fruition...
I will definitely document the canopy build here. I cannot find any info online about a custom bowfront canopy, so I hope it turns out good and helps anyone looking to build something similar. Hoping to incorporate a lift system, hinged bow area, and a way to easily replace bulbs. So far all of those plans are only in my head...


Cloudy Tank Water
in Emergency Discussion
Posted
Chiming in late on this one... Did you find the problem yet? If not, what are your parameters? Specifically alk, calcium, and magnesium. Before using a calcium reactor, I was dosing turbo calcium and buffering my topoff water. I could never get my calc over 300. At one point, the calcium precipitated into the water column making the tank pretty cloudy. Through research, I found this article which details the relationship between alk, calcium, and mg.
http://reefkeeping.com/issues/2006-06/rhf/index.php
I started dosing magnesium and the water column cleared up and my calcium began to rise to over 400. Added bonus... I used Kent mg and it cleared up some bryopsis I had growing.