


gibs
-
Posts
186 -
Joined
-
Last visited
Content Type
Profiles
Forums
Store
Gallery
Events
Local Fish Stores
FAQ
Blogs
Downloads
Posts posted by gibs
-
-
Yeah I forgot to add that to the list I already got that
 Thanks for the reminder!
 -
THANKS FOR ALL THE RESPONSES GUYS THIS HAS BEEN EXTREMELY HELPFUL!
Ok well I came home last night and put my drill on the counter...which promptly fell off and landed on my newly cleaned up 25g tank. Broke one side and bottom. I was planning on just repairing it but after a trip to Home Depot to get prices, I decided to go check out a new tank at petsmart across the street. Picked up a new 20g with a cover for 50$. So here is what I have
20g tank with cover and light
Heater
Thermometer
Will use a shallow sand bed and probably either a large piece of rock or a couple of smaller pieces
Aquaclear hang on the back sponge filter (got this cheap so I am going to use it)
Air pump w/airstone.
Going to order a few medications on case by case basis as I order fish (i.e. if I am going to get a ick prone fish I will pick up some ick dip/medication doing research on said fish and what works best. before I get fish)
Also picking up a uv sterilizer tomorrow from a fellow club member breaking his tank down.
What am I missing? Anything I am no thinking of?
THANKS FOR ALL THE RESPONSES GUYS THIS HAS BEEN EXTREMELY HELPFUL!
-
Hey guys getting ready for last part of my setup, drained the tank today haven't had one drop leak so did my final clean up and getting ready to start filling up with RO water.
Have read a couple of great articles the last few days that have talked about using DSB's in their DT. It prompted me to start doing some research and I am really liking the idea. However I would like to hear from some people that have been actually doing it and see what their thoughts are. A few questions for those same folks, where did you get your DSB fauna at? What types of fauna are you using? Any types of CUC, or fish I should stay away from if using a DSB?
Also I keep seeing and hearing about this miracle mud to put in sumps/refugiums instead of a regular sand bed anyone got any experience/thoughts on this?
Thanks guys!
-
I love your tank man looks awesome! Hope mine turns out that well
-
PM'd last night on ATO, apex, koralia, and uv light.
-
Hey guys I am getting close to getting my 85 setup and I want to start doing some highly recommended procedures such as quarintine and dipping corals and fish. However while I know I just need a bare bottom tank (I have a 25g tank for qt), with some like pvc for hiding places and such...my question is do I need some live rock for filtration? I have read that just using a filter with a sponge is fine and just keep it in your main tanks sump in between uses this doesnt seem like much? Also what about corals? I no that there are products out there for dipping and such and even some postings on just using hydrogen peroxide which is what most of these dips are? Also some corals evidently can't be dipped? Is there a easy way to find out somewhere what can and cannot be used with certain corals? What about Inverts like starfish and nems and what have you? Are these quarantined or use like some kind of dip for fish? Do my fish need to be quarantined and dipped? Every book and research article I have read says it must be done but they don't cover most of these little questions? Any good articles or research you guys can point me to?
TIA you guys are the best!
-
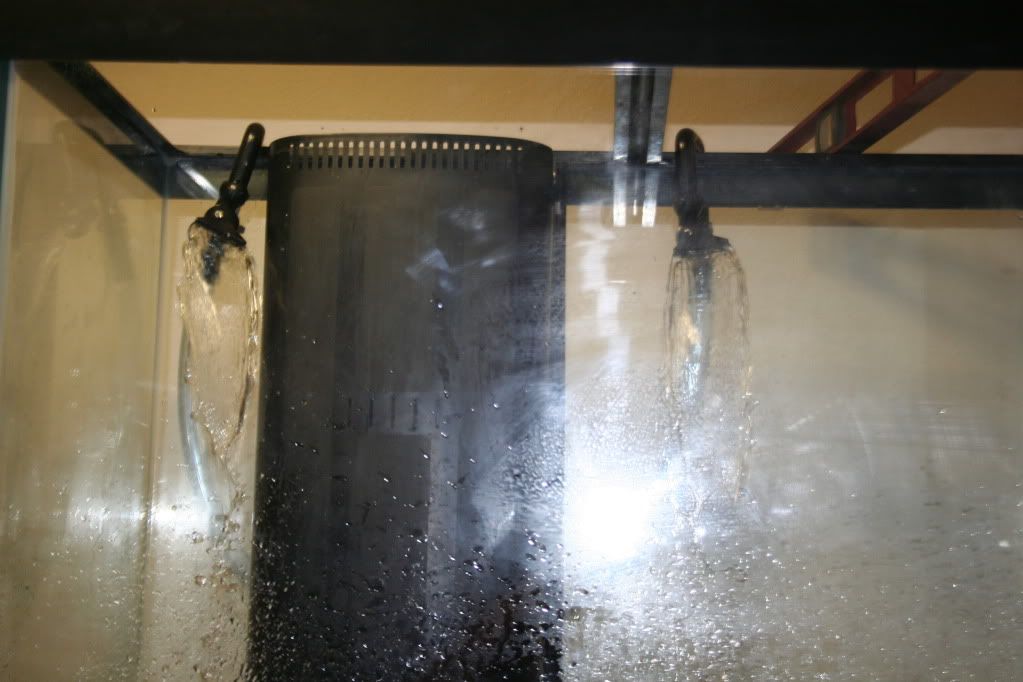
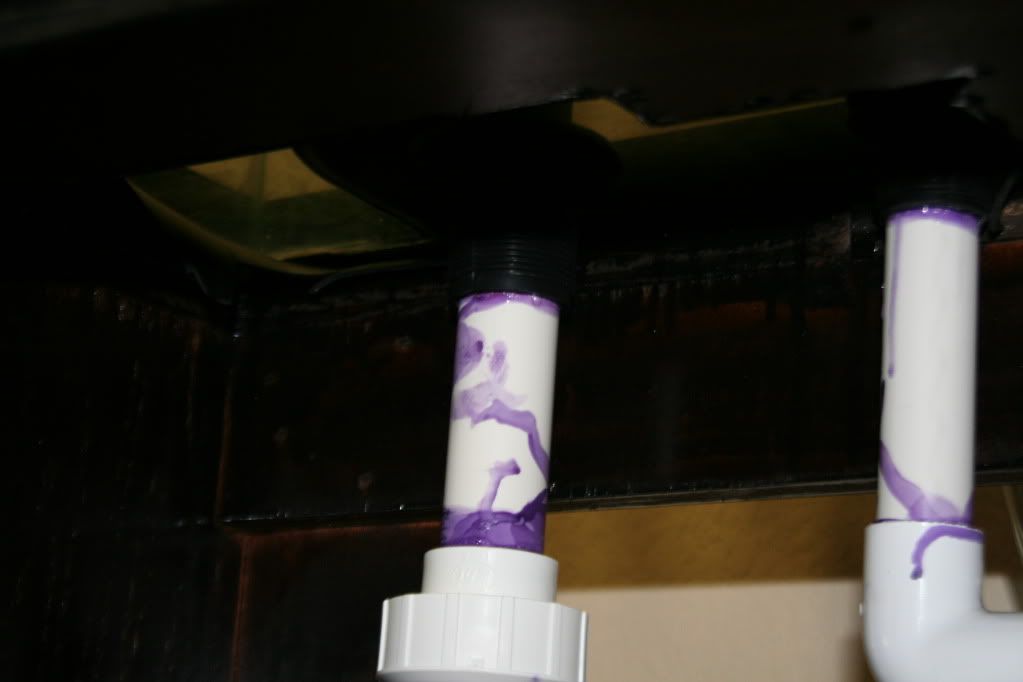
Ok I spent a lot of time yesterday researching and making multiple trips to Home Depot. I built myself a dursos pipe and a stock man pipe. Both helped but it was still pretty loud..a friend told me today that probably the holes I was drillling was to small or to big but most people use a valve and airline tubing to control it. I didn't ready anything about that in my research but that does make more sense since both of these use air to control the fall of the water. However what I ended up doing late in the day was going to home depot and purchasing 2 ball valves. The purpose of this is to slow the flow down to the exact amount of your pump. It took a little bit of doing and both of the ones I bought from home depot are really hard to adjust (bought some off brs to fix this), but the tank is 100% silenced. It's almost quieter than my nano now! Here is a pic
Tip of the day! Dry fit all of your plumbing and if possible don't glue any of it until you do your freshwater testing so it's alot easier to take apart and cut up if needed!
-
 1
1
-
-
Looks great man! I like sump setup.
Thanks for the info on the PS. I have a reef octo HOB PS on my tank now, and I really like it. So I will probably go with that one.
Hey no problem man hope it was helpful. Thanks for the comment!
Looks awesome! One thought - can you zip-tie the return lines together behind the overflow so you don't see the tubing?
If you search sump, overflow, noise, I'm sure you'll find plenty of threads on how to silence an overflow. There's a lot of info about it on the web as well.
Thanks Teresa! Hmm haven't thought about that but yes I could...will probably wait a few days and make sure I am 100% with my plumbing before doing though.
-
Nice job!
-
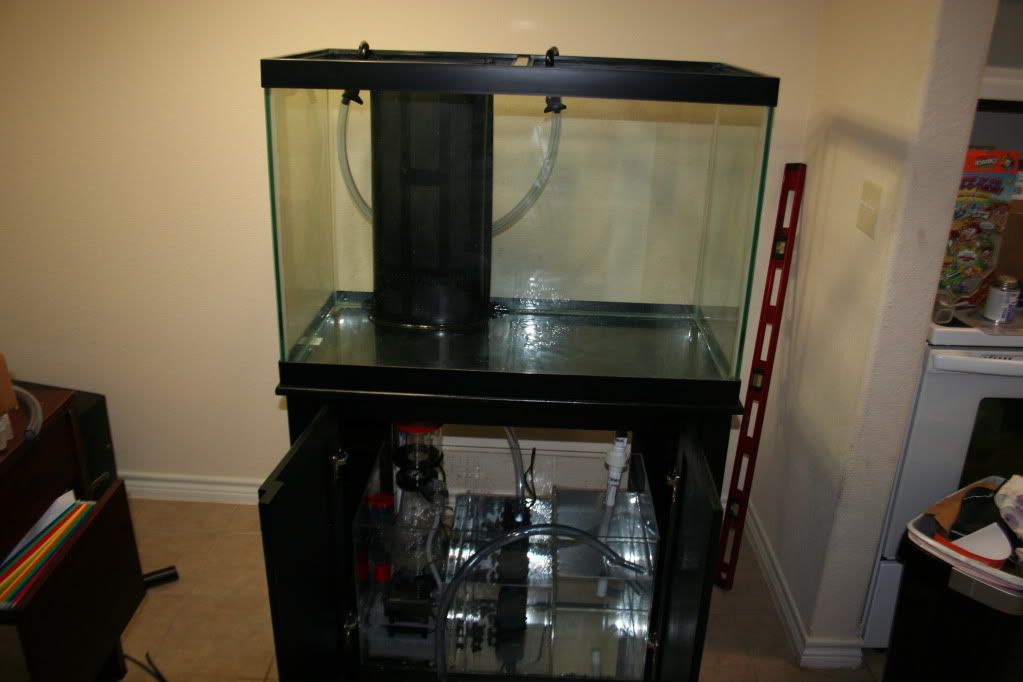
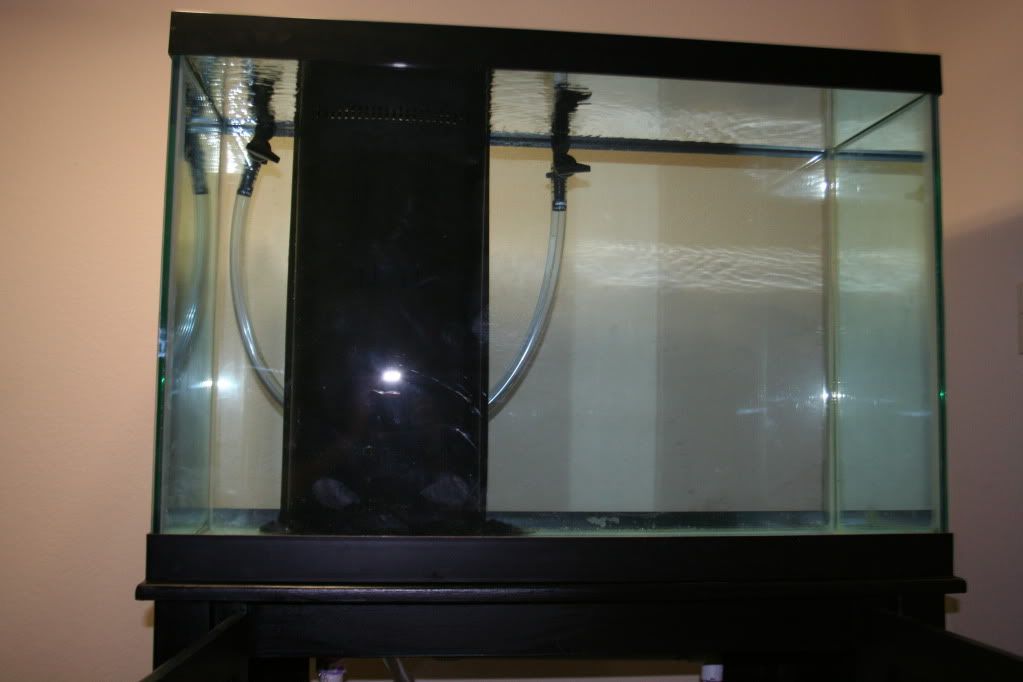
Here it is up on it's stand and looking beautiful!
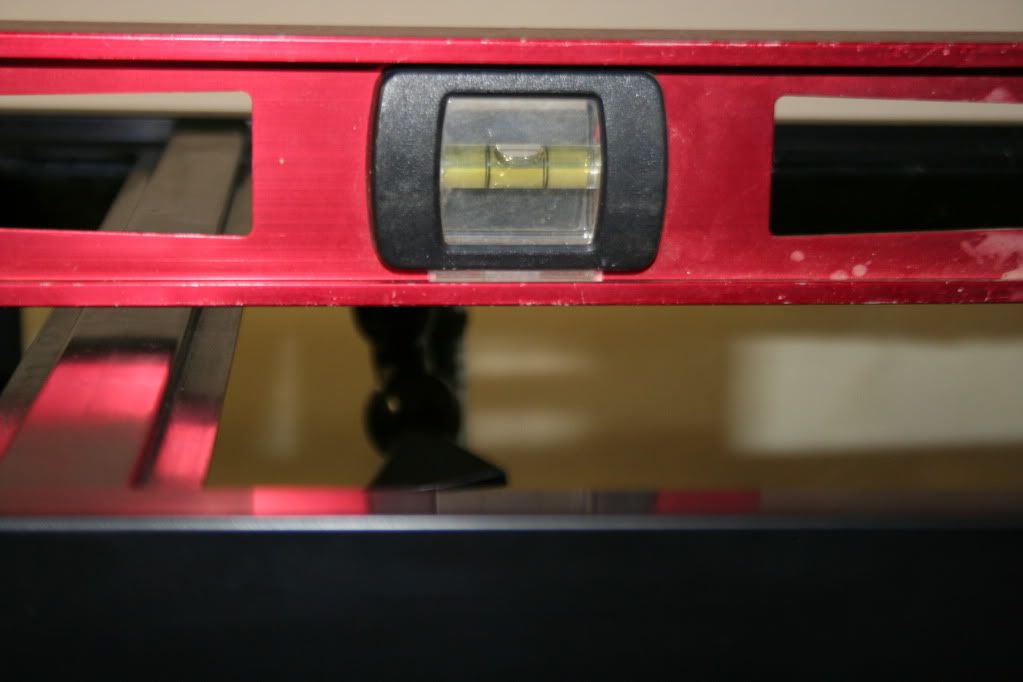
Length ways
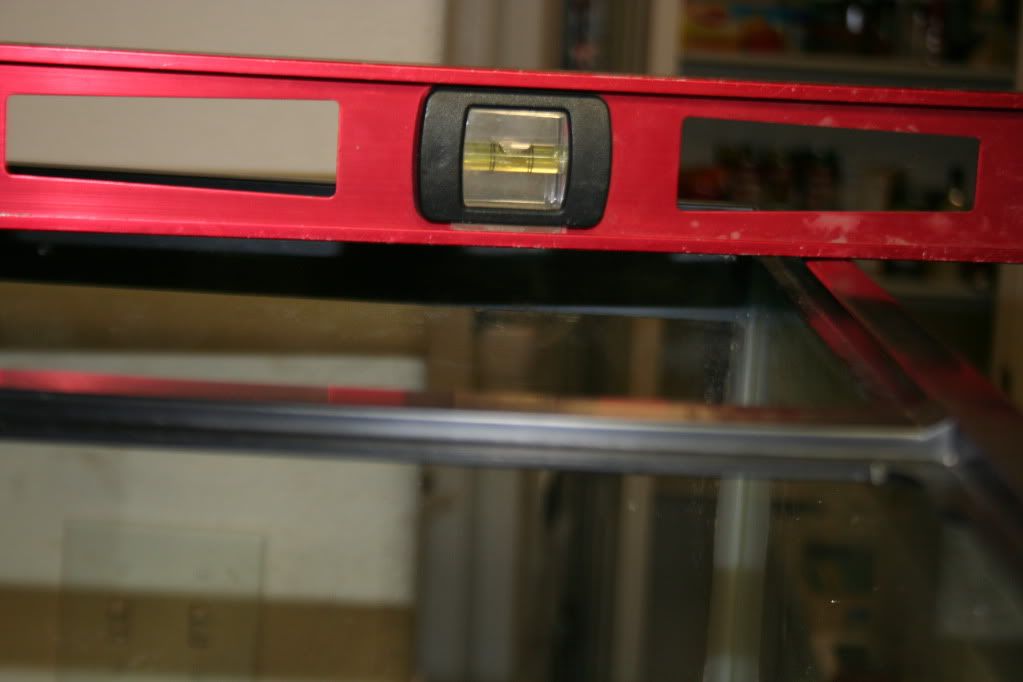
Width ways its not 100% level but from what I can gather I am in the money.
Holy crap water! /crossfingers
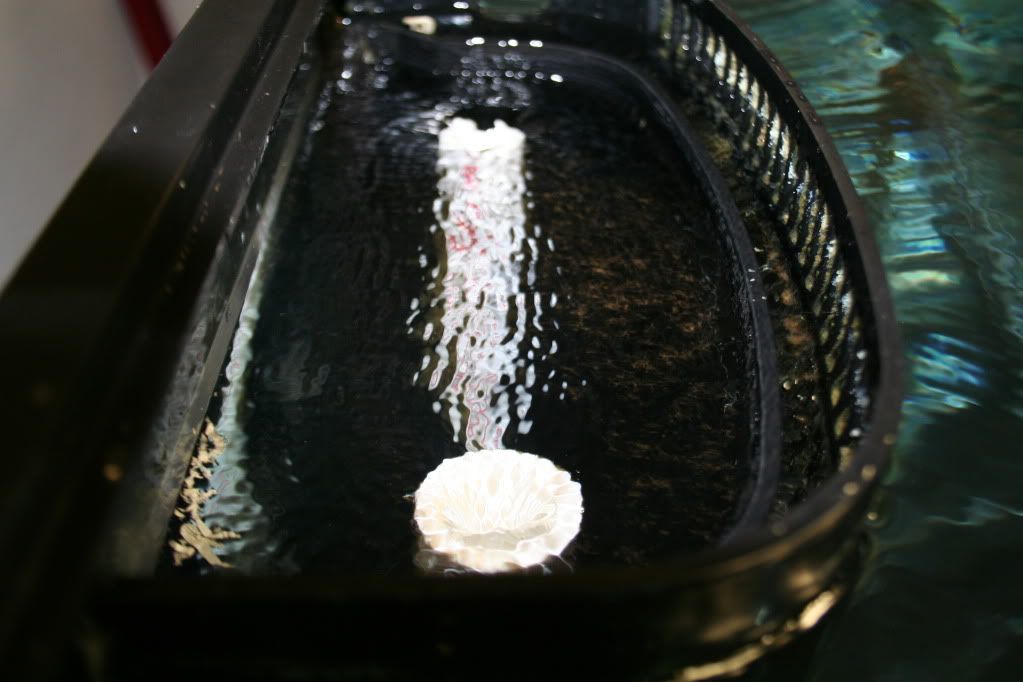
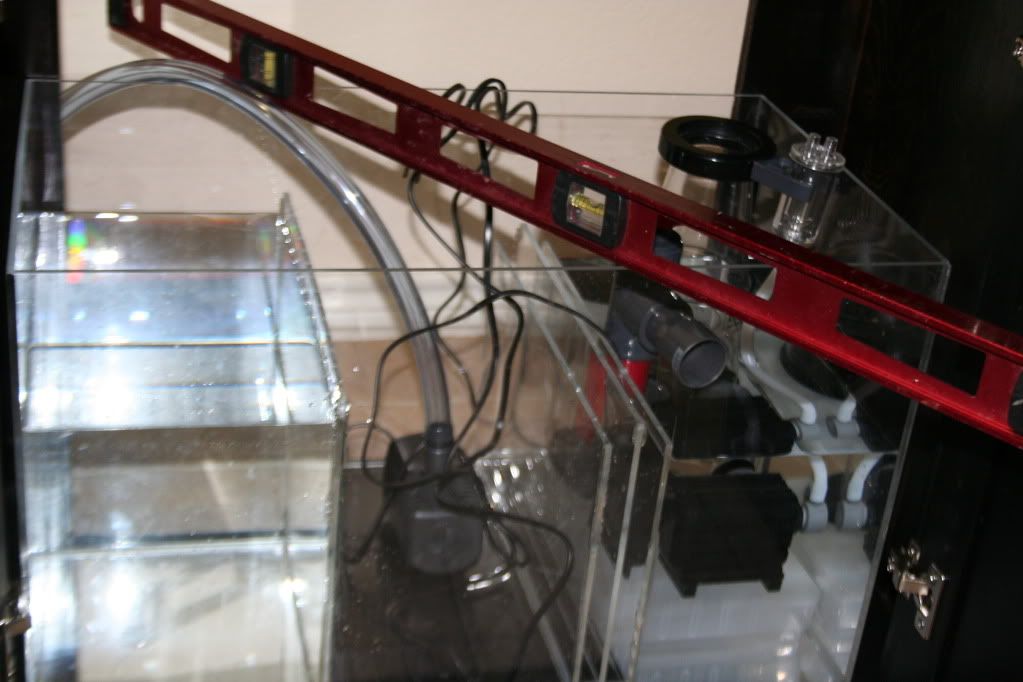
Nice shot of the refugium overflow working.
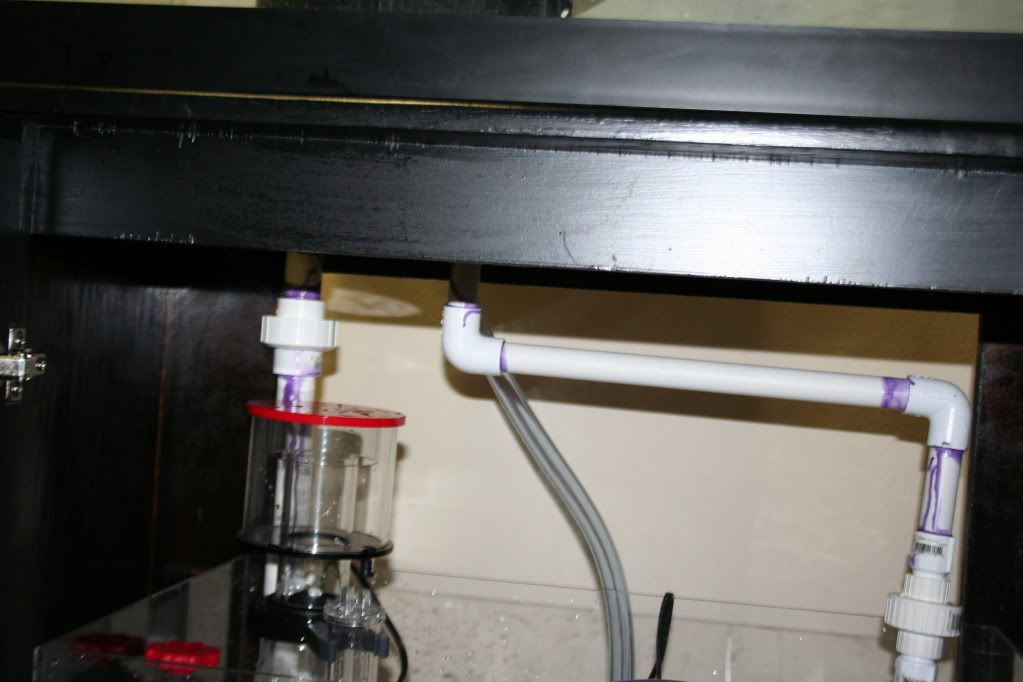
Discerning readers will notice here that, that is not the Eheim I posted I ordered in a earlier post. I got this 152-620gph tunze off another guy for 50$. I was planning on saving it as a spare pump or for another project, but the Eheim I needed to go buy another adapter for to make it work with my plumbing....So I used this one. I may still get the eheim up, but this one is adjustable and seems to be working quite nice.
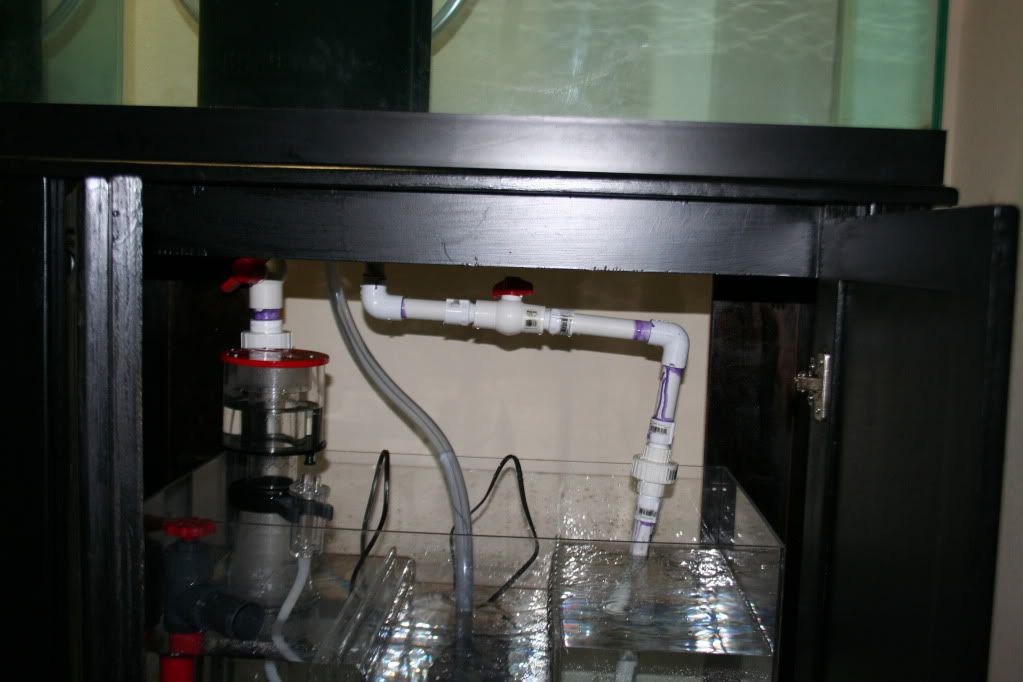
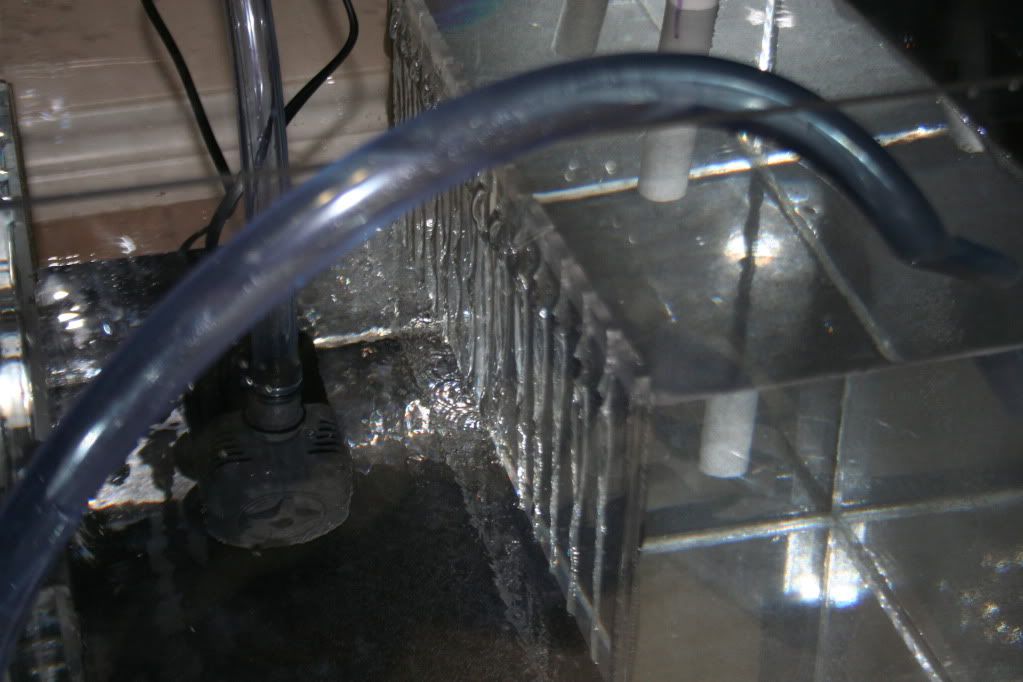
Tip on plumbing when you put your over flow pipes in...don't glue them till your one hundred percent sure they are the same height...the 3/4 was just high enough that it wasn't getting any flow so it's hard to see in the picture but the one furthest away I had to use some snips and metal shears to get it cut down enough to get some flow in it to my refugium. This brings up a BIG point that I need you guys to help me figure out where I screwed up....this thing works beautifully but man those drains going to the sump.....sound louder than my bathtub draining. It is BAD please help, I am thinking that I am making it work to hard because I have the PVC running to below the water line in the sumps. I did this so it would make very little noise but I am refraining from doing anything till I get some advice on how to quiet this down....again please advice?
Final shot with all the water put in siphon out of the way and pump chugging along.
Here it is full of water!
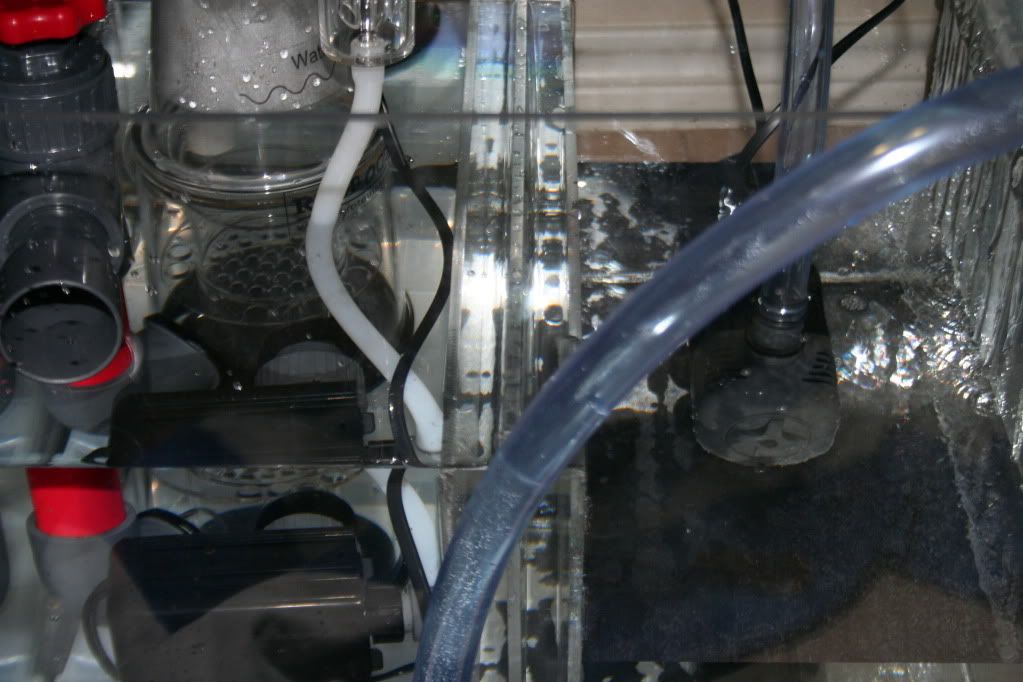
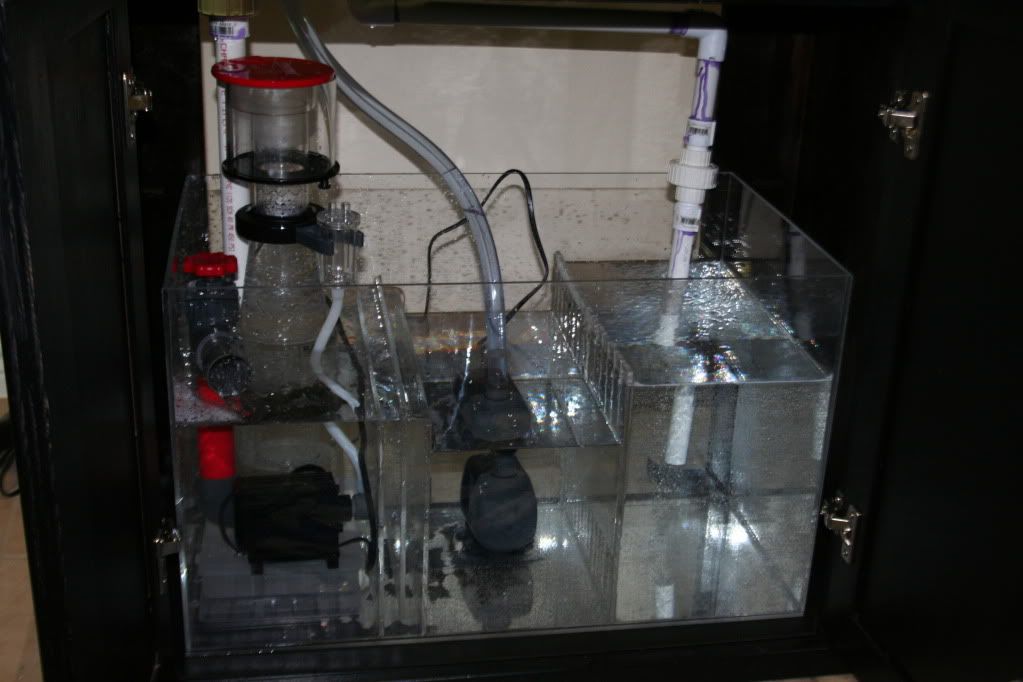
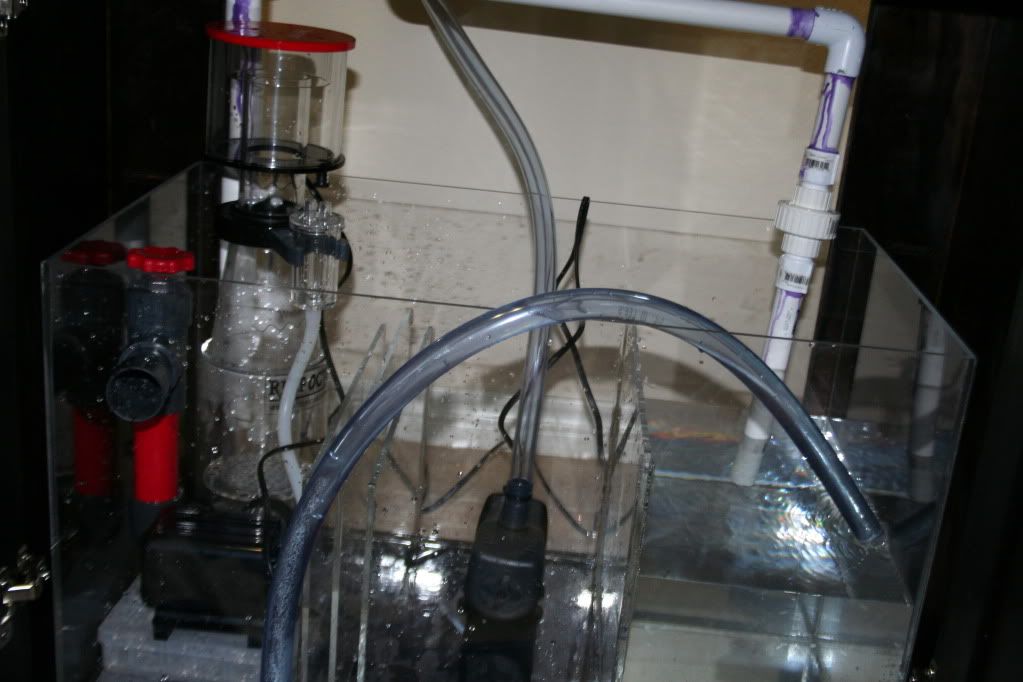
Ok final thoughts of the day before sleep. Other than the noise I have no leaks and everything is working great. The protein skimmer which says it's foot print is 6" x 10" is a little off. My skimmer area is 8" x 15", the 10" on the skimmer is perfectly fine, saying 6" will work though is a bit of a stretch even though it does measure 6".....However in my 8" sump the inlet for the pump barely has any clearance from the baffle or side of sump. In fact when I first started it up it wasn't working to well and after looking it over realized that it was almost touching the baffle. I turned as far as I could to get it back and I have a little more than a inch of clearance now. It's working great but I am going to have to work on a wedge or something to make sure it doesn't accidently get turned back and stop up the inlet. Just something to think about for anyone else wanting to use this skimmer. I also had to raise mine up a bit with a old tackle box....probably get some eggcrate underneath it as a permanent solution. Water level on the tank is as much as I can measure it the same all the way around with maybe a 1/8" difference but with the water moving it's hard to get a really accurate reading.... LMK what you guys think I am super excited to get this thing started cycling, plan is to let it run all weekend, and Monday I have to go out of town when I get back on Tuesday going to do a final cleaning of the tank (after it was filled I found a few spots I missed), and start filling with RO water and looking for some live rock!
-
Ok so I went this evening to drop off some stuff to a fellow club member and I got so inspired by his tank I came home and worked on it all night since the GF canceled. Or I was just impatient and really wanted to see water in this thing. Your choice I am happy with either LOL. So here goes.
So first off I had ordered some weldon #16 to fix the small tiny leaks in my baffles in my sump I made. Worked very well it's much thicker and I just ran a bead of it around all the problem areas and let sit (I actually did this about noon today so it has about 9 hours cure time....recommended is 24..I am impatient sue me!). As you can see refugium and overflow/skimmer areas now hold water like a champ and I have no leaks in the return at all! I did however put the sump in backwards and had to siphon all the water out and flip it around.
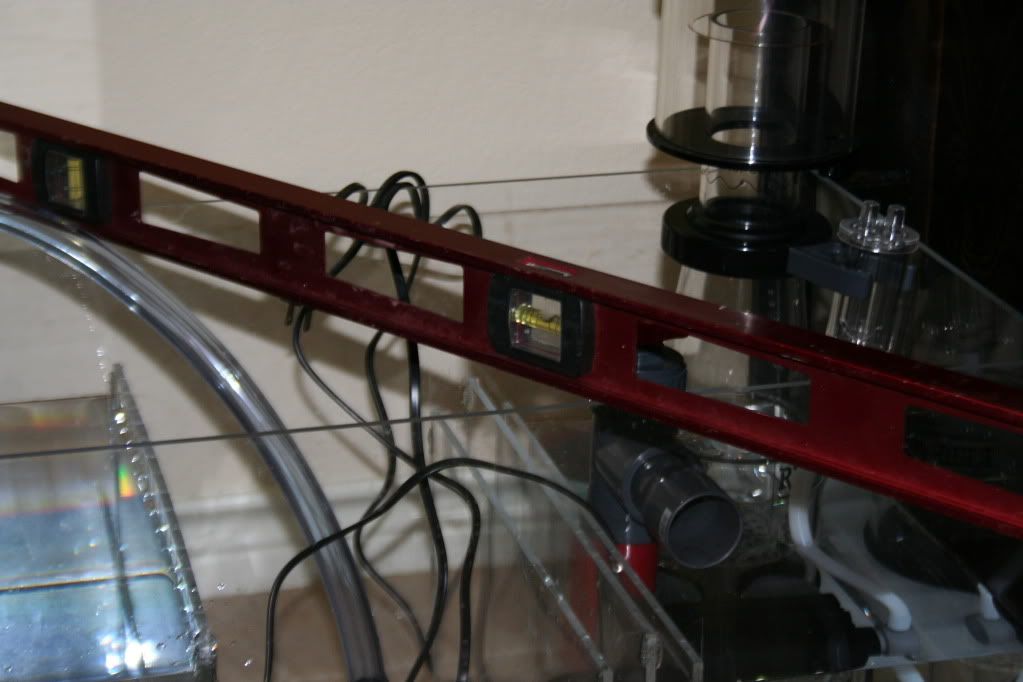
The sump is pretty level even though it looks off from the pic but I think that is more the angle than anything.
Next was plumbing I went into Fishy business the other day and talked to Shane. Pretty nice guy even though he is a little rough around the edges. He had the idea instead of using ball valves and splitting off my over flow to run the pump to 2 over hang nozzles and run my 3/4 bulkhead to my refugium and the 1" to the skimmer. Seemed like a good idea to me so I did it! Pretty straightforward plumping and I put a union high on both of the PVC so I could disconnect and make it easy to remove sump if needed. I ran both lines below the water level ( more on that in a minute).
This is my lines coming up to my nozzles from my return pump in the sump. I have to figure out a way to stick these where I want and keep them in one place. Any ideas?
-
Ok so got my stuff yesterday so first thing to set up was my ro/di. So here it is.
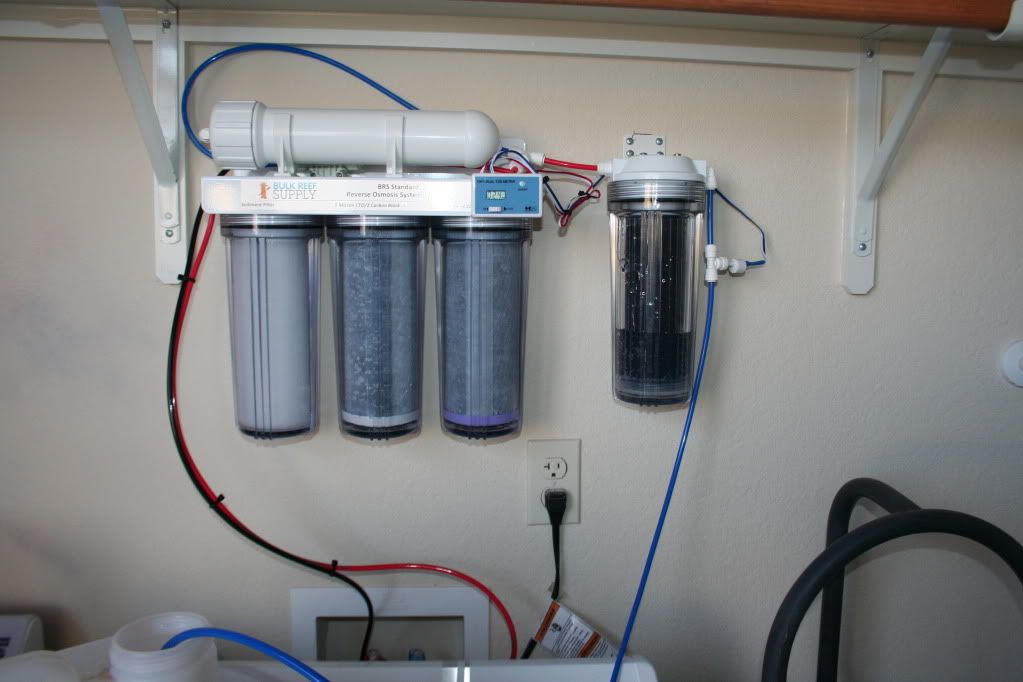
Mounted to the wall added a few tie wraps and hooked up everything. This kit for 159.00 from BRS is awesome I had tons of extra hose and connectors left over and I am really impressed with it.
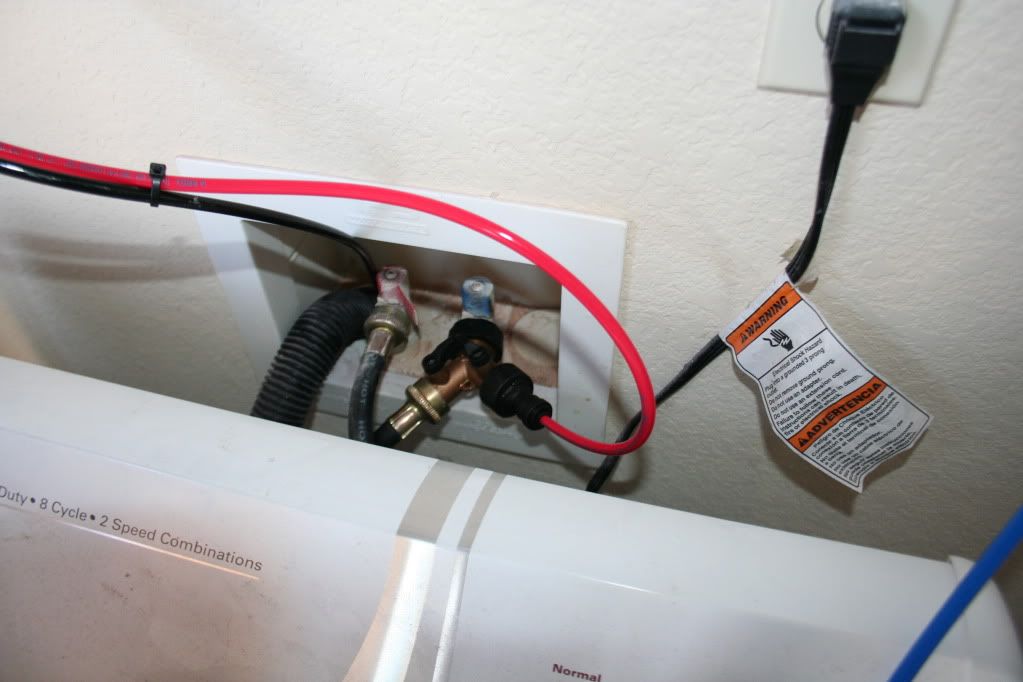
Attached to the cold side (don't use the hot it kills the ro membrane), on my washer dryer hook up using a water hose y valve. No leaks and everything works well.
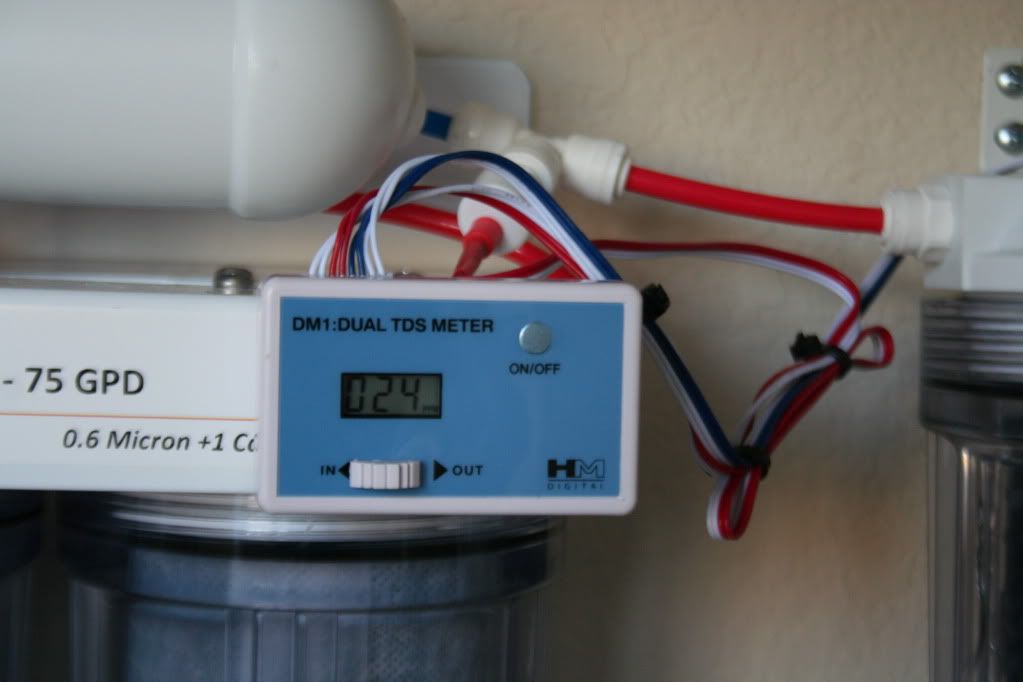
This is my #1 line between the RO and the DI on the tds meter, as per BRS's recommendations. If it's put between the RO and DI you can see when your TDS starts coming up out of the RO and know it's time to start looking at replacing the filters and membrane. I did hook it up first to my main line coming in and it was 256.
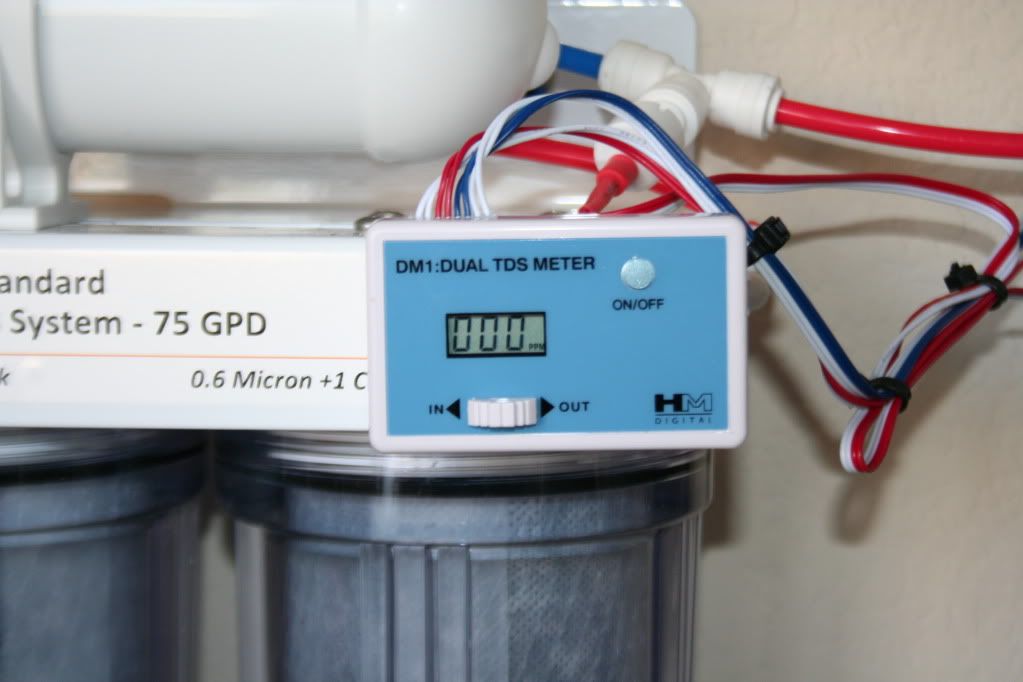
This was line #2 coming out of the DI unit. 0 is good all day long

Filled up my 5 gallon jug in about 30 minutes and no leaks and everything looks awesome I am completely happy with this system so far!
-
Going to be looking for about a hundred pounds of live rock by Tuesday or Wednesday PM me by Monday afternoon if you decide to part out.
-
You can also look through their scrap pile and pick out some nice pieces for 20$ to meet the minimum.
-
Welcome Tyler! As you have already found out finding frags is really easy in this club! I bought a frogspawn and some zoas for my 16g nano, and everything else except a 2 inch clam in the last few months has been frags from this club and most of them just given to me even though I offered some money! I really like the sustainability aspect of that also! Anyways I don't have any frags yet or I would offer you some. Welcome to Texas and the club!
-
Ahh, thanks guys. I think you guys pointed me in the right direction. The problem is not the function itself (well maybe, it's more complicated then needed)... the problem is with the testing. The OSC was set up to restart/refresh at midnight and so 510 minutes later, it should turn on at 8:30. Since I programmed this morning expecting it to turn on at 8:30, that wasn't going to happen.. because it will turn on and cycle 510 minutes after I set it up.
However, at midnight tonight, it should reset and turn on at 8:30 tomorrow morning. Is this a correct assumption?
Thanks for all the help guys. I really need to delve into this code a bit more.
-Ty
Also remember the 510 is just the initial time out from then on it will turn on for 25 seconds every 930 minutes or ever 15.5 hours by my calculations. So it won't be a 24 hour cycle, it will be a twice every 31 hours.
-
That'd be awesome! Im following along, so ill keep watch.
Also, is the footprint that is posted online accurate?
I will have to get back to you on that haven't even unpacked it yet!
Great build bud....keep up the good work!!!
Thanks!
This guy does some good work! And hes part of the apex cult....HAHAHAHA
LOL thanks Derrick
-
I am going to try to come also I would like to meet some of you guys in person and very interested in listening to the topic! My work schedule fluxuates and I may have kids also but we shall see!
-
NIce! I am hoping to start cycling the tank by the end of next week I will let you know how it works!
-
As a side note both Derricks and your programming should both work, I just think it would be simpler to use a time on/off programming.
-
Still think the time one is simpler than trying to go with a oscillating program. That OSC programming is just for making oscillation programming. We aren't doing that here. Just set it up to come on at x time and go off 25 seconds later. Added benefit that you can watch the time on the Apex and it should come on at that time. If it doesn't you got a problem.
-
Ok go even simpler set it up as a light or just copy this (adjust your time accordingly I have this to come on at 8:00)
Fallback OFF
Set OFF
If Time 08:00 to 08:25 Then ON
-
Ok well first off looking at yours and comparing it to mine you have 3 sections of timing.
OSC First section/second section/third section.
First section is the initial time off so looking at yours once you start it Its off for 510 minutes
Second sections is time on so yours comes on for 25 seconds.
Last one is off time and yours is off for 930.00.
So what are you trying to accomplish with this? If you want it on only for 25 seconds I think setting it up as a feeder would be a better idea. And how do you know it's not working? You have to wait for 8.5 hours before it will come on for the 25 seconds? Just curious with all the delay how you are monitoring whether it is coming on or not.
-
Which oct skimmer did you go with? Needle Wheel?
Yes it's the NWB110

85g oceanic tank build
in Tank Builds
Posted
Small update! I drained all the water out today and did a bunch of last minute cleaning (90% of it was fine but man with water in it, I really saw a ton of little spots I missed) got all that done repositioned it to it's final spot and started filling with RO water. Thanks to Derrick who had some extra line and unions I was able to run the RO line directly to the tank and slowly filling it up. Also blacked out the back today with the seaview tank background stuff, also used their adhesive on it. Looks good thinking of running a bead of silicone on the whole back edge to double up on keeping it in place and getting no water behind it. Anyways here is a pic of it in it's current state, picked up 50 lbs of live rock tonight and picking up another 50 tomorrow. Got it stored in my saltwater mixing trash can right now, til I get saltwater going in the tank.
Also got a small delay with finishing up my led's and my canopy, I was using some fans I had laying around in storage, which was fine, but one didn't work and one had broken shroud and made a ton of noise. So I ordered some new ones from newegg and some fan grill/filters. Should be here tomorrow or Thursday so I will finish that up also. Got a Tunze 6212 wave box for flow in the tank, (thanks VU deezy!) so ready to see that in action. Also had to order some floats from BRS to finish up my ATO. Plans over the next couple of days are to move my apex, get the saltwater mixed in tank, start adding live rock, and finish up ATO and canopy.
Again any advice or just general comments are always appreciated. Thanks guys!