


mojo
-
Posts
204 -
Joined
-
Last visited
Content Type
Profiles
Forums
Store
Gallery
Events
Local Fish Stores
FAQ
Blogs
Downloads
Posts posted by mojo
-
-
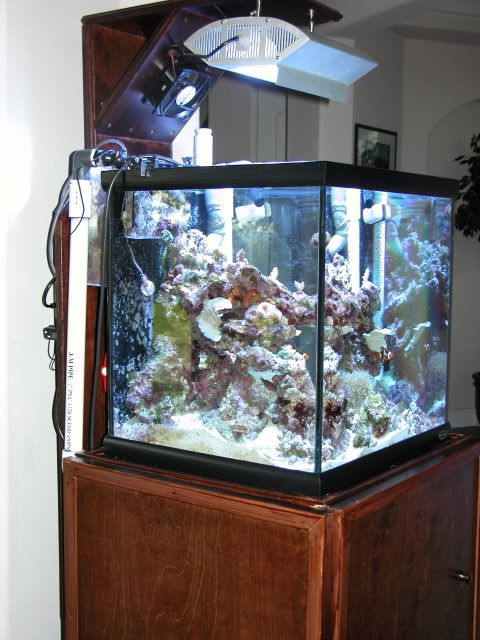
The sandstorm has abated and the aquascape is visible! I had previously removed the drum from the 4-way so it wouldn't be damaged by the suspended sand, and this has been left on so that I could see where any sand voids would develop. In total there's 195 lb. of Lalo live rock, which as I understand it is a deep Tonga rock. There's also 120 lb. of CaribSea Ocean Direct live sand. The aquascape has 3 separate zones. On the far left an alcove was created, and I concealed the CL returns reasonably well. Adjacent to this is a valley that extends to the back of the tank, offering some depth to the 'scape. Centrally is the tallest peak which nearly breaches the water surface. Then, to the right of this is a separate rock mass that hides the CL strainer from view. The photos don't show it, but from above there is actually a meandering gap between the center rock mass and the one on the right. I'm very happy with it, especially since it's the 1st aquascape I've ever done alone, but I'm not closed to criticisms, so please be honest if you don't like it. Of course the pictures don't truly portray the depth that's been created in the tank, but at least you'll get an idea. Enough typing, here's the pics.
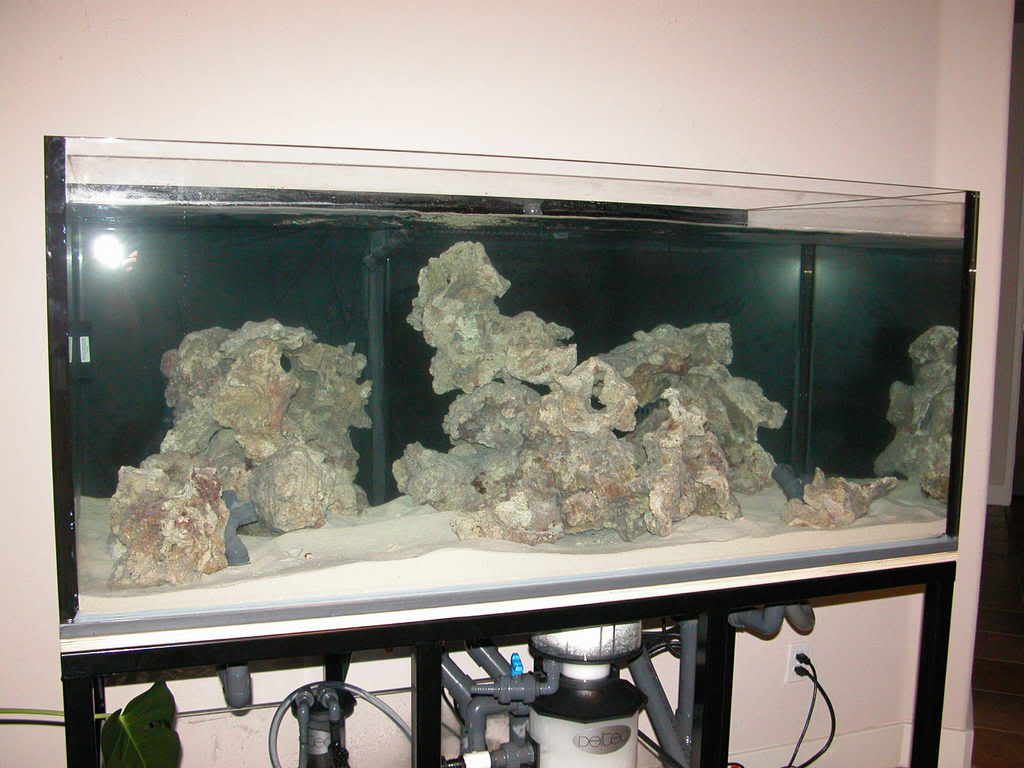
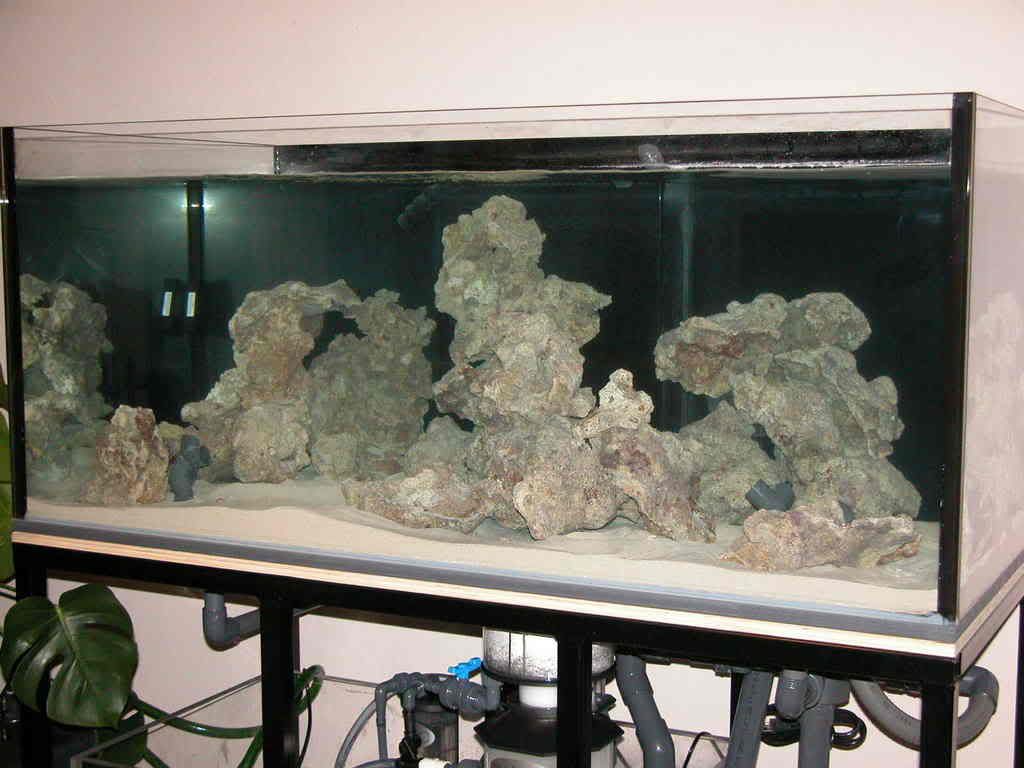
This one's taken from the right side of the tank.
-
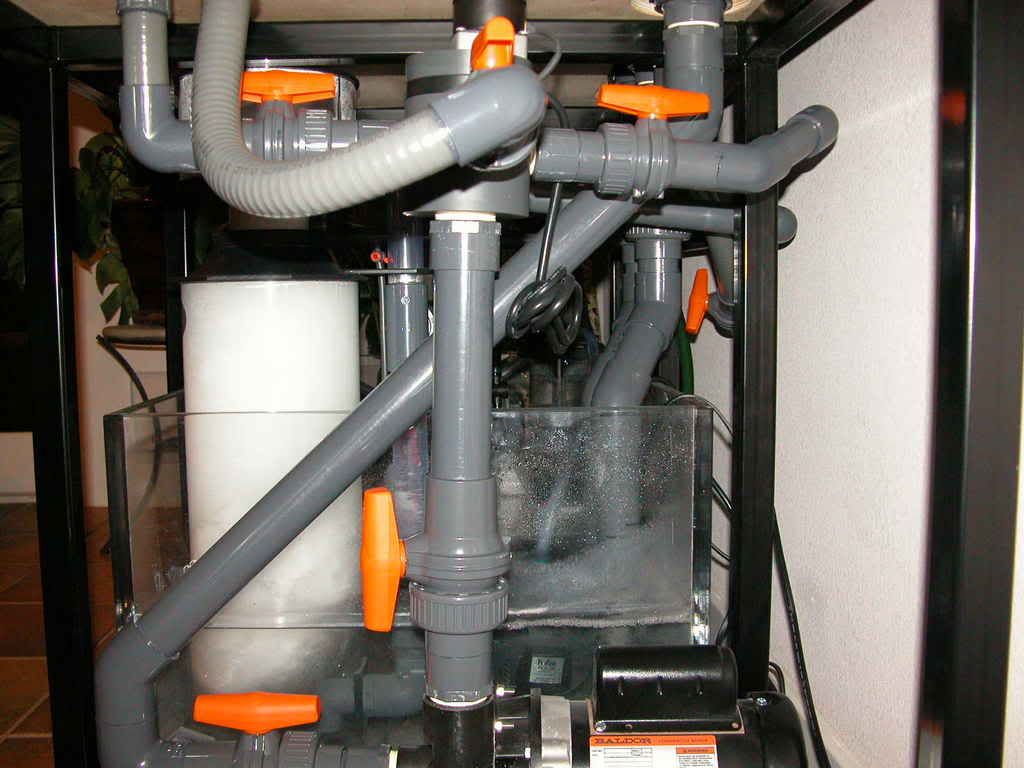
OK, a little catch up. First off, I finished the plumbing from the overflow box to the sump. Here you can see the two 1.5" drains. The lowest section of PVC was cut in a spiral spray bar fashion (not pictured) so that if the water level rises in the sump for any reason, water would still drain out fairly quietly from the drains. Eventually I will attach filter socks to these drains for mechanical filtration, since I don't want to have to siphon out the sump very often. You can also see that I've been running carbon since introducing the LR.
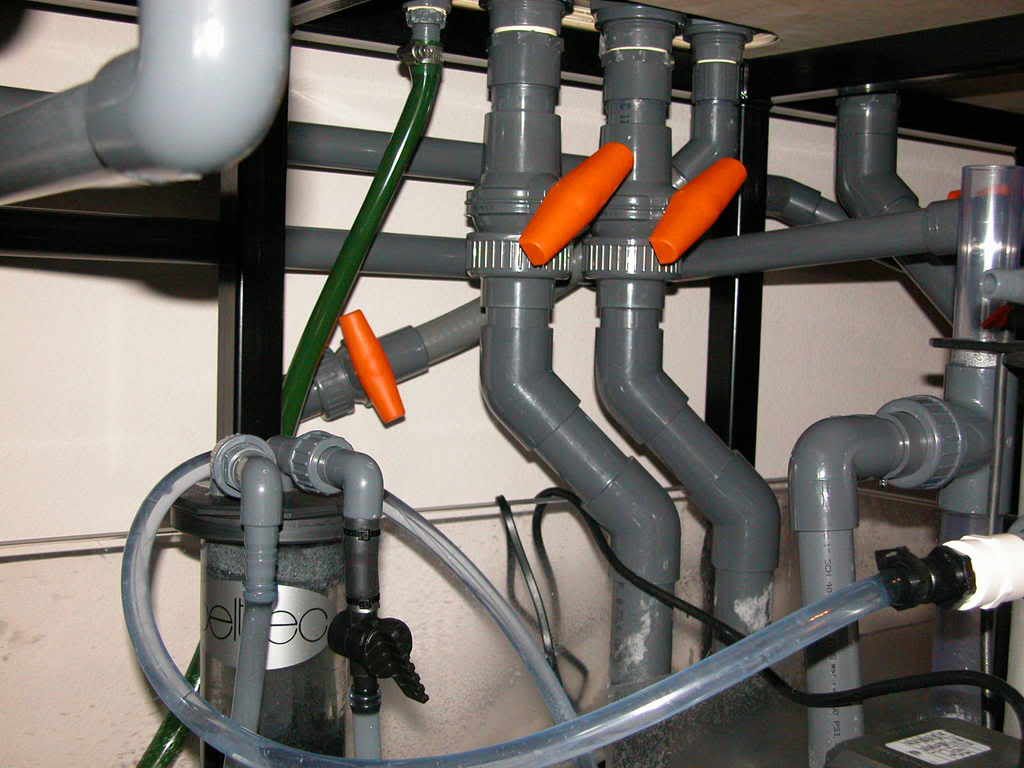
The green hose is Eheim tubing returning water back from the chiller via an Eheim 1262, and this ascends through the overflow box and into the tank via LocLine. The right-most return under the overflow is 1" plumbing that currently dead-ends with a SUBV. That will eventually connect to the primary sump return pump, which to date I still do not posess.
I also received my skimmer feed pump, a Hydor L35, and the skimmer was fired up 3 nights ago. I placed the pump in the chamber just beneath the overflow drains. The clear 1/2" vinyl tubing connects the pump to the Deltec skimmer, which you can see better in this next photo.
Here it is from the side, showing also how I had to angle the overflow drains so that they'd place the water more centrally in the sump chamber as opposed to directly against the sump's back wall.
The skimmer has pulled out what I would describe as clay. There's almost no odor, and I'm wondering if this is just proteinaceous material released from the live sand? At any rate, here's what it looked like when I cleaned it out tonight for the 1st time.
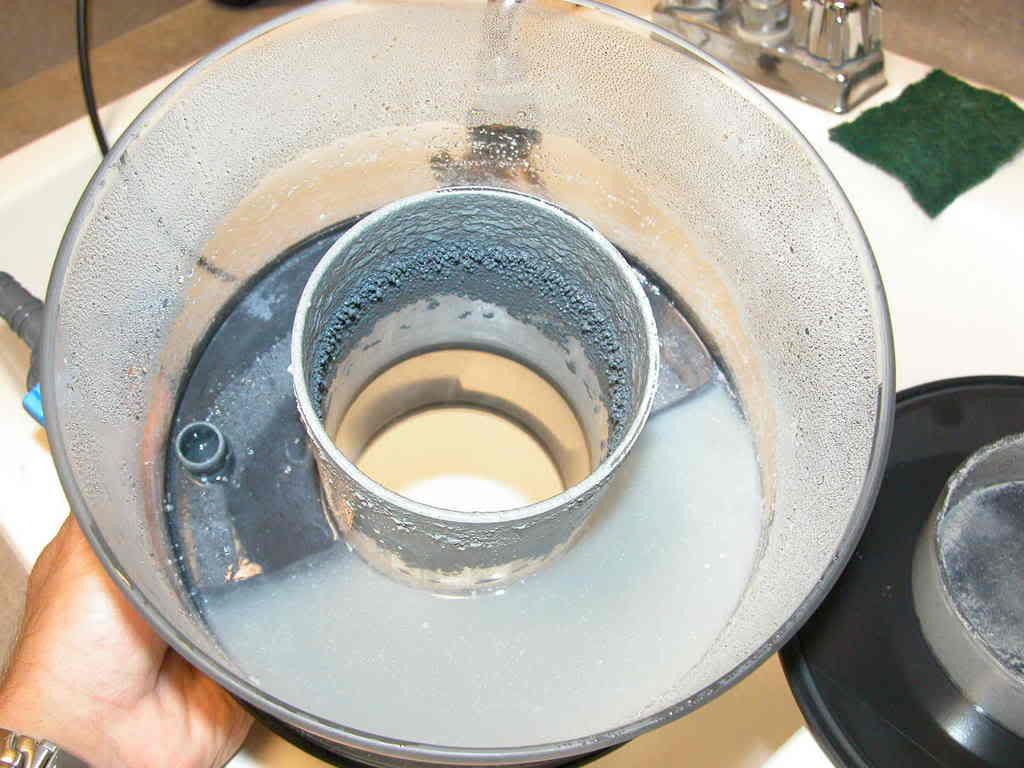
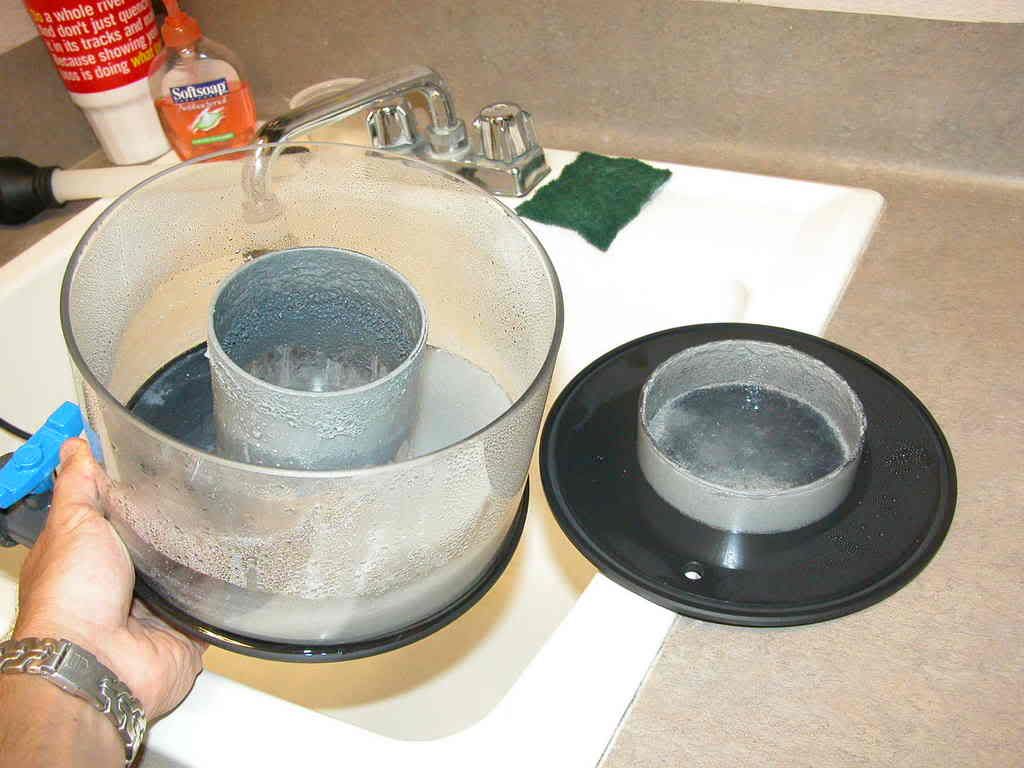
Now that it's been cleaned, I'm starting to see what I think is the real deal skimmate -- nog!! A 3-day break in period seems about right to me, eh?
-
For more pics than you care to see, check out this thread.
http://www.reefcentral.com/forums/showthre...ht=step+by+step
Here are a few quick shots to share:
For sale includes the Oceanic 30 gallon cube tank, modded AquaC Remora Protein Skimmer with surface prefilter box, Mag12 closed loop pump, SCWD, 1" OmniFlex nozzle, Jager 50W heater (2), Tunze Calcium Dispenser, Shock Buster GFCI, CPR CS-90 overflow box with Aqua Lifter vacuum pump and prefilters, Mag5 return pump, 3/4" Loc-line return plumbing, custom Trigger Systems sump/refugium, Current USA Lunar Light: Nocturnal Blue, Captive Sun 4" fan (mounted in light rack), custom birch stand and light rack, and of course all plumbing on the system.
Total = $650.00.
I'd rather not part it out, and I'm not particularly motivated to sell it. I'll also throw in a gigas clam, a crocea clam, some zoanthids, a few frogspawns, 3 polyps of green/purple ricordea, and all of the LR in the refugium. But be warned, there's bryopsis on those corals and even on the clam shells, so if you do want them, be sure you have something that eats it or plan on doing a hyper-magnesium treatment or system reef-resh to eliminate the bryopsis. All of the LR (30 lb. Tonga) from the tank display has been pulled and is sitting outdoors so that all of the life (including bryopsis) would perish, and you can have that too if you want.
-
You can always drain the sump and add them later, Andrew.
-
Take my advice! Buy a Brute on rollers! It is so worth the money. I have the 32g one and fill it up to the line where it gets a little wider. That is about 25g. I have a Maxi-jet 1200 with tubing attached. I turn off the return pump and empty the sump (about 25g). Then I move the maxi-jet into the new SW and pump it into the sump. Turn the return pump back on and it is done.
Did you get the rock in?
I actually have a Brute on a roller, but so far it's been stationary. Since I'll be using Zeovit I'll be doing 10g water changes (5%) each week, so that's only 2 buckets of water. It'll be just as easy for me to carry those 2 buckets as it would be to have to empty the trash can. But I appreciate your input, Gabriel!
The rock is in. No updates to the blog as I've been more than a little under the weather the past 3 days and I haven't had the motivation or energy to take pics, upload them, etc. But pics will follow eventually.
-
I like taking photos, not only so I can share with y'all but also so that I can remember what I've done. Thanks!
-
Thanks a lot for your continued praise.
-
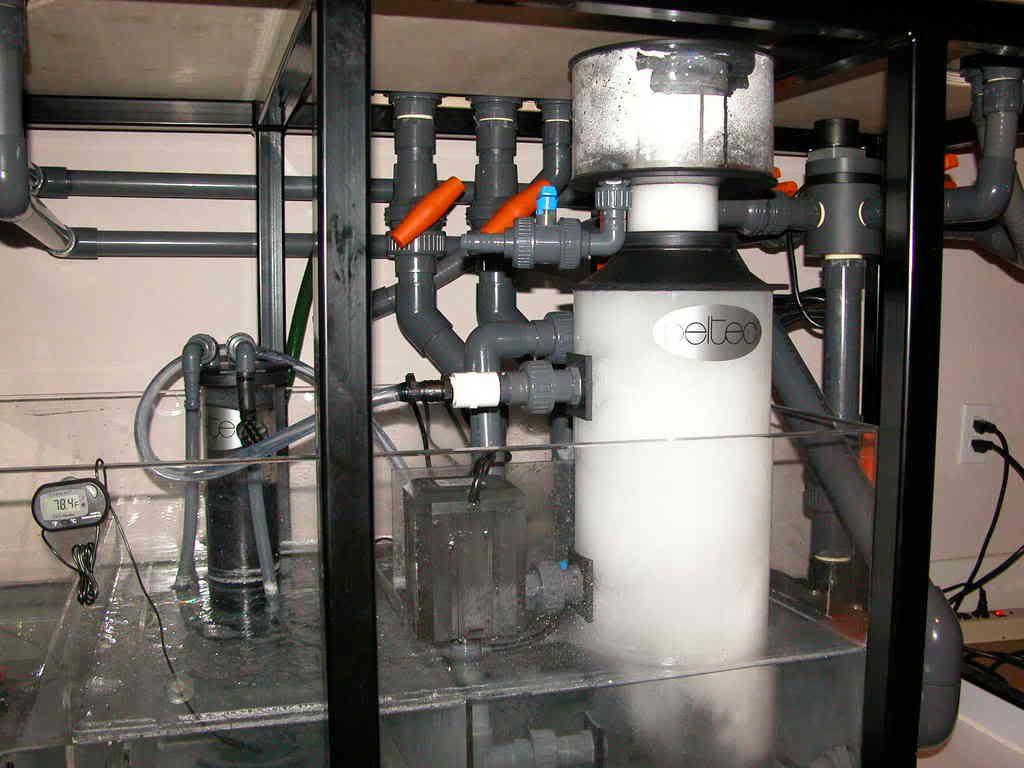
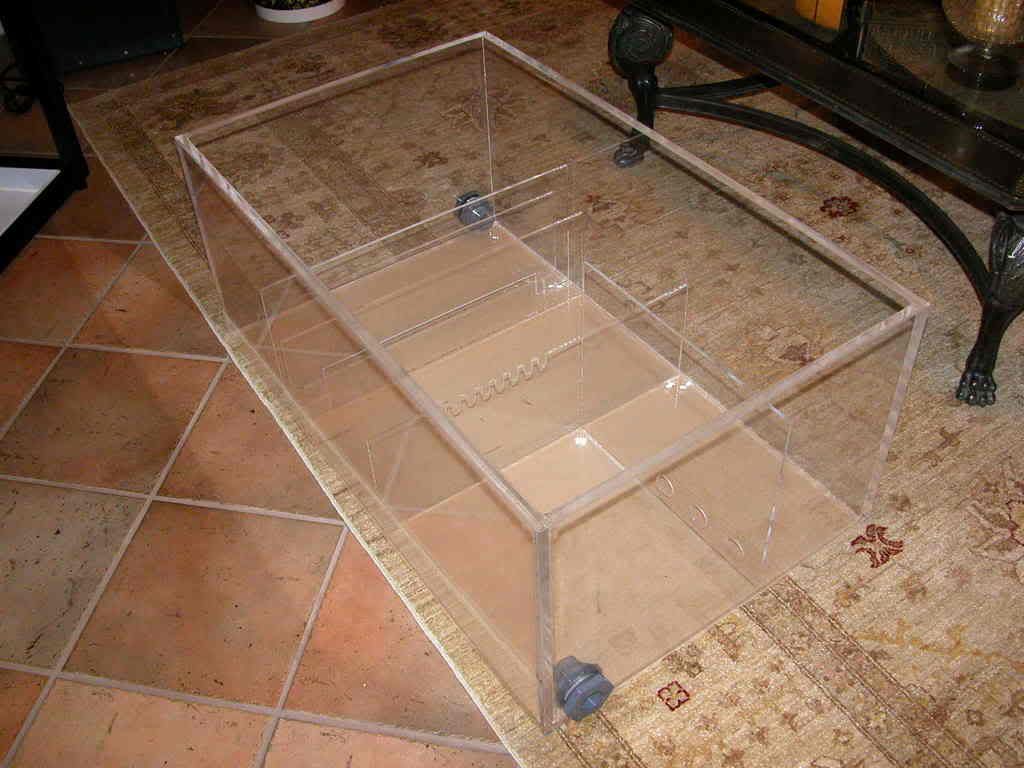
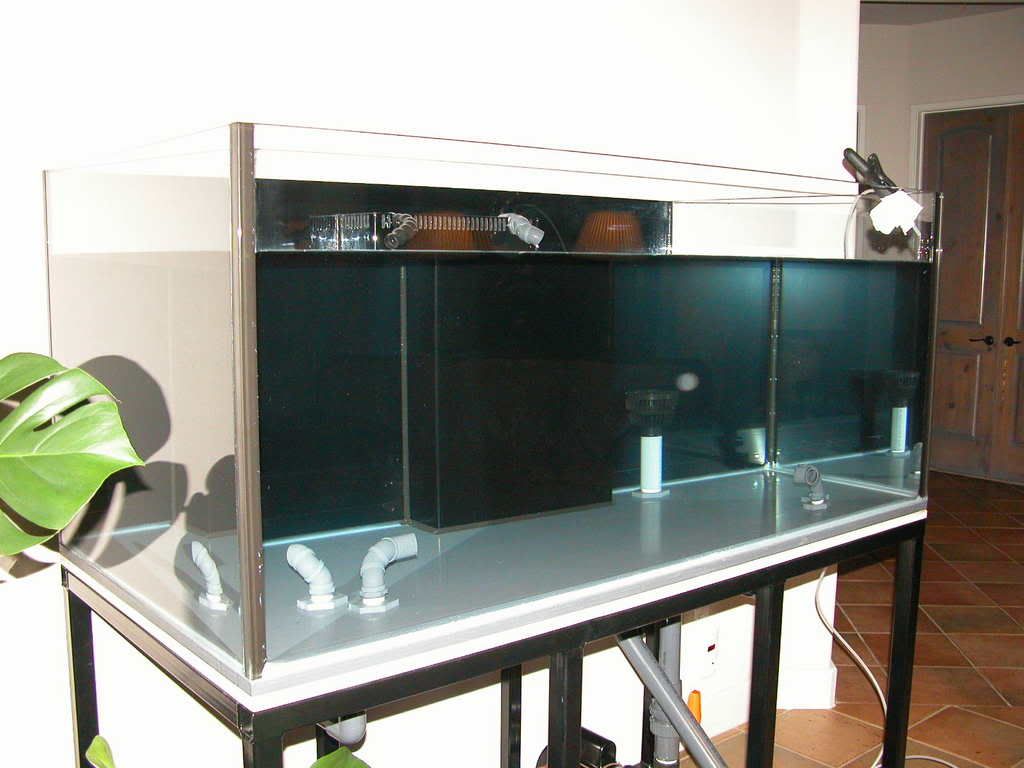
I got a few more things done last night. Brian at Kingfish finished baffling the sump, and it turned out just great! Thanks a ton, Brian! Here it is, with the bottom covered by the adhesive material to protect the acrylic. Man this thing is solid, and heavy! For anyone who was worried before, I have no concerns for this thing ever bowing.
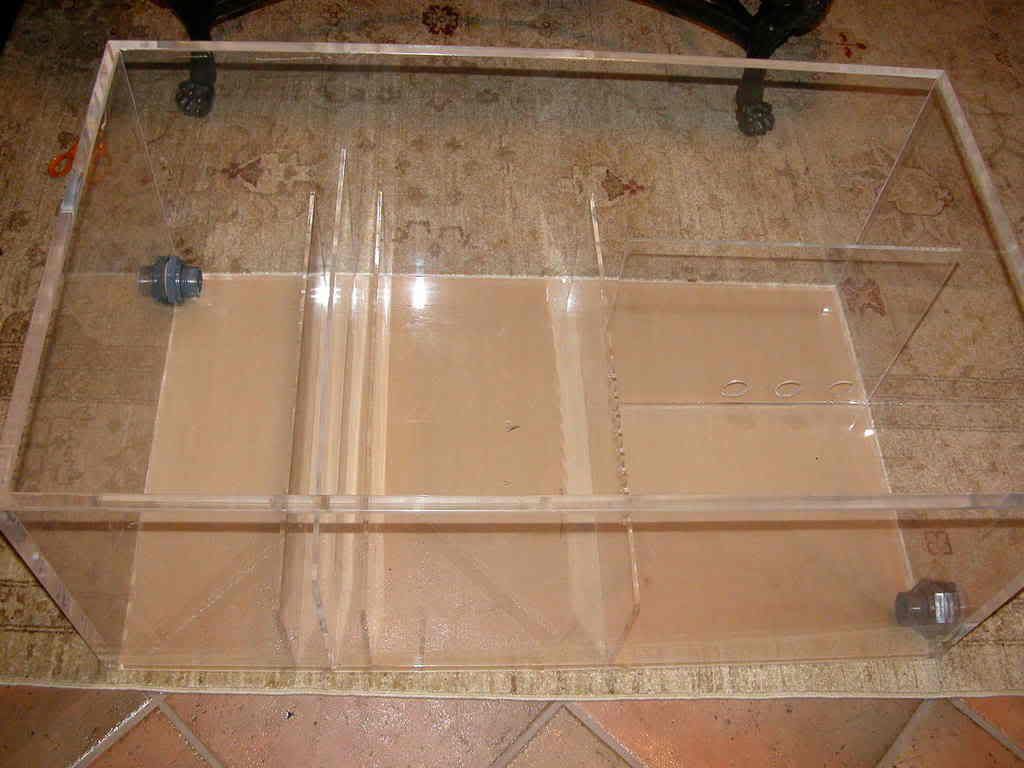
You'll notice that there are 2 bulkheads. They've been placed for possible future expansion in the event that I plumb in a frag tank or something. Anyway, the rear right chamber receives water from dual 1.5" overflow drains. It then passes to the front which is the skimmer chamber. Moving to the left it crosses some teeth to an equipment chamber which will house the calcium reactor (PF601S), carbon reactor, and kalk stirrer. It then passes across the over-under-over baffles to reach the return chamber. This is where I'll keep the Zeovit reactor, the sump return pump, and the chiller feed pump. Here's another view.
Here's how it looked when I put it inside the cabinet. It sits on top of 1 layer of the drawer liner material I used beneath the CL pump, just in case any of the pumps inside the sump would cause some vibration. Probably not necessary but oh well.
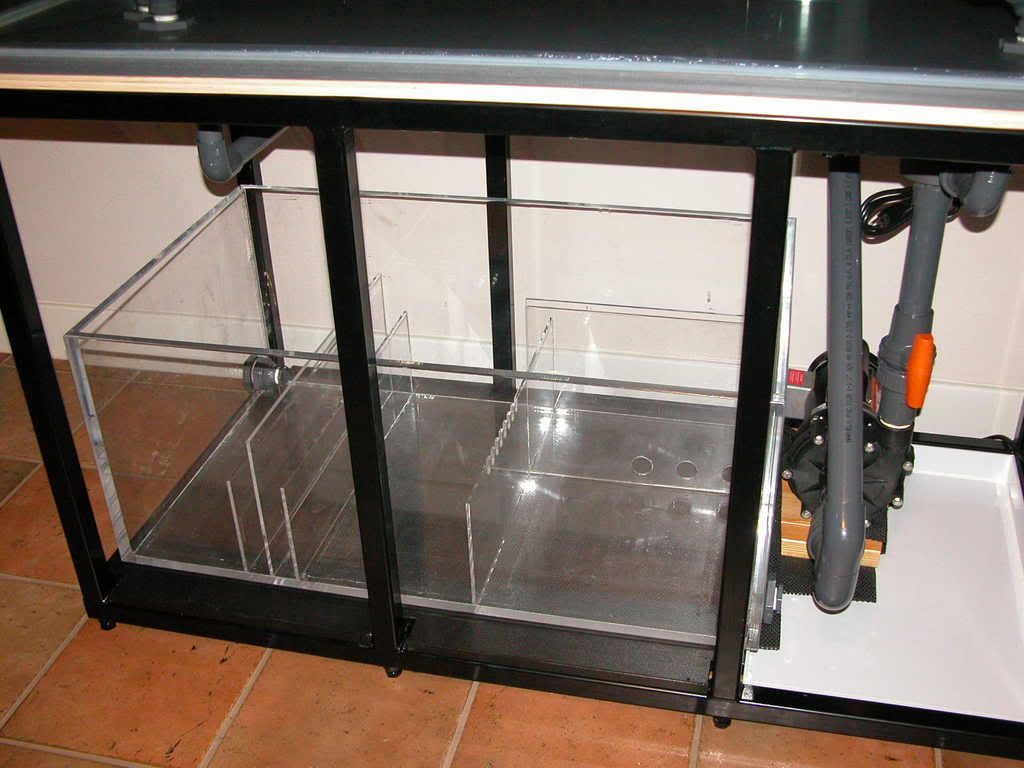
Here I got lucky! Notice how close the sump is to the Barracuda pump
 . When I planned the size I didn't account for the fact that I'd have a bulkhead on both ends of the sump, and it actually hangs off the starboard just a little and over the drip pan. The sump is literally 2 or 3 mm from the pump!
Lucky move #2: I almost couldn't get the equipment into the sump when it was inside the cabinet, and due to the CL plumbing I wouldn't have been able to slide the equipped sump into the stand. When planning out the sump, each chamber size was determined based on the equipment. The measurements were spot on, but in retrospect it may have been wiser to go with equipment that wasn't so large, as it will be tight when working in the sump. There's about 1/2" of clearance to get the skimmer collection cup off, and there's no way I'll be able to remove the entire skimmer unless I first take the calcium reactor out. While I'm discussing the skimmer, that brings up Lucky move #3: Look how close the 4-way plumbing comes to the skimmer's collection cup. The photo makes it look like they're right on top of one another, but there's actually a couple of inches to play with (which isn't a lot). On the bright side, I have very reliable equipment so those sorts of maintenance items shouldn't come up very often. Anyway, look how crowded it looks now! This just goes to show you, it's better to be lucky than good
 .
.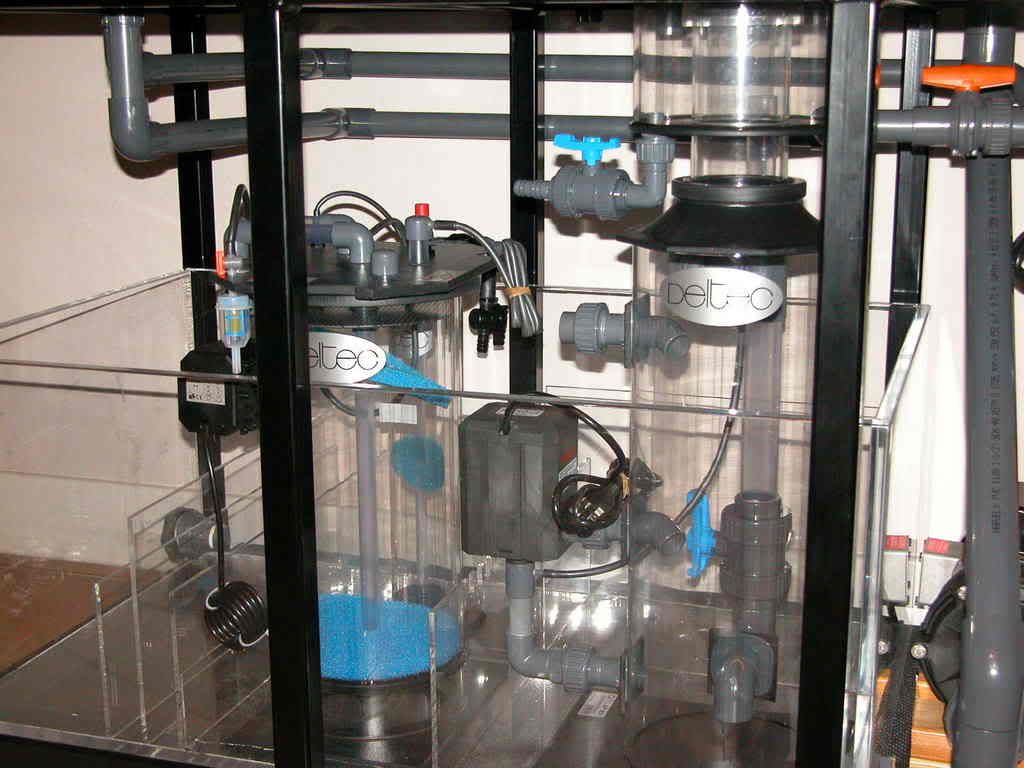
Here it is from the side, and you can see the FR509 that I'll use for carbon. The kalk reactor isn't in there yet (it's a Deltec KM500).

Here's how the entire system is as of last night.
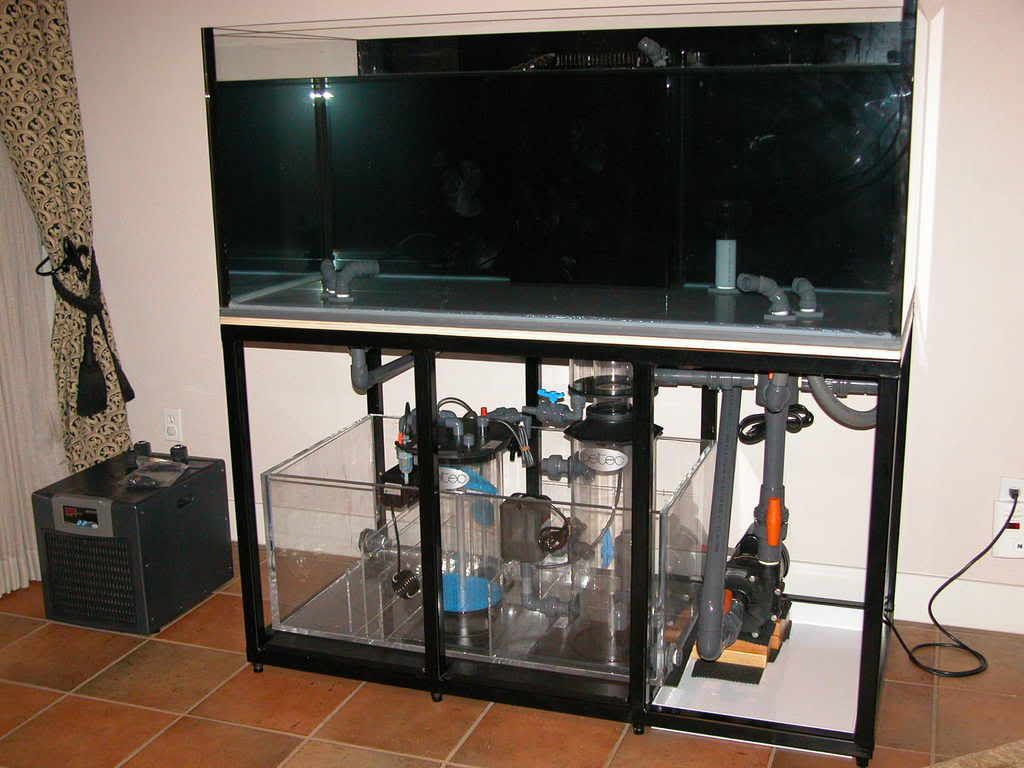
The chiller, a 1/3hp Arctica, is sitting to the side, and I'll plumb it in tomorrow. This will serve as the temporary sole return from the sump, as my primary sump return pump hasn't arrived yet. Hope you enjoy!
-
Where is your RO/DI unit located? How did you get the water to your tank? I have a small 150 I'm working on and would like not mix the salt in separate containers then haul inside the house!
My water maker is in the utility room, about 50 feet from the tank. I was carrying buckets through the house until I finally got smart and bought 75 ft of polyethylene tubing and fed the tank with RO/DI directly. Once the tank was filled I added the salt directly to the tank. In the future, when I do water changes, I'll have to carry buckets of mixed salt water from the garage to the tank, but that'll just be a necessary evil since I don't have a dedicated equipment room in the house.
-
Mojo,
I just read through all 10 billion of your pages on RC and I am a little overwhelmed. I just wanted to say thank you for taking to time to blog on ARC.
Sorry we're gonna miss you at the meeting this weekend, but can't wait to see the aquascaping. If you ever need a hand, just let me know.
Andrew,
I think it's important to post blogs here and not just on the larger sites. There may not be as much feedback locally, but it's good for the hobby, and it's good for the club to share our tanks and experiences with one another. Sure it's great to get help internationally, but when a crisis arises, no one in Seattle or Philadelphia is going to come to my house and help. Oh, and thanks for your offer to help, I may just take you up on that one of these days!
Mike
-
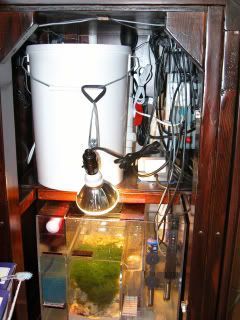
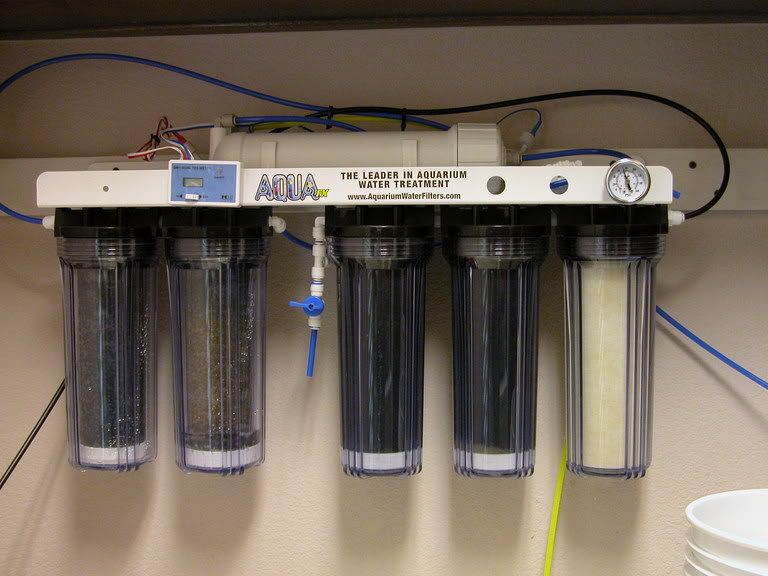
I guess now this will start to be a true marine aquarium. I'm about a day ahead of schedule from where I thought I'd be regarding water production. The RO/DI maker was on since 6:30 this morning, and below is the result.
I'm using a Mako 6-stage RO/DI unit, and I replaced both DI resins, as well as all of the other filters, just prior to filling this tank. The DI's have color-changing indicators so I'll know when they're exhausted, and the 1st chamber is about 3/4 spent. Here's the unit.
Here's the salt I'll be using, at least to start.
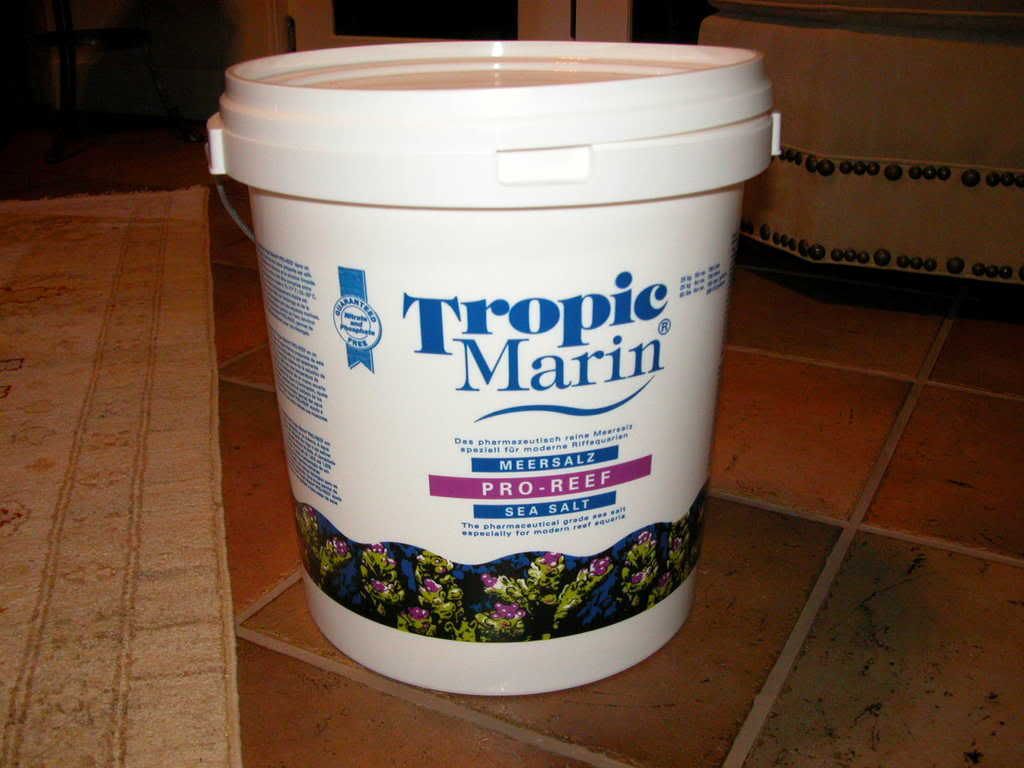
I fired up the 'cuda and added the salt. Here's the salt storm.

I'm amazed at how quickly the salt dissolved and the water has cleared. I'll let it circulate and aerate for several days, and I'm not adding any more water since the sump isn't plumbed into the tank yet. That's it for now, hope you still like!
-
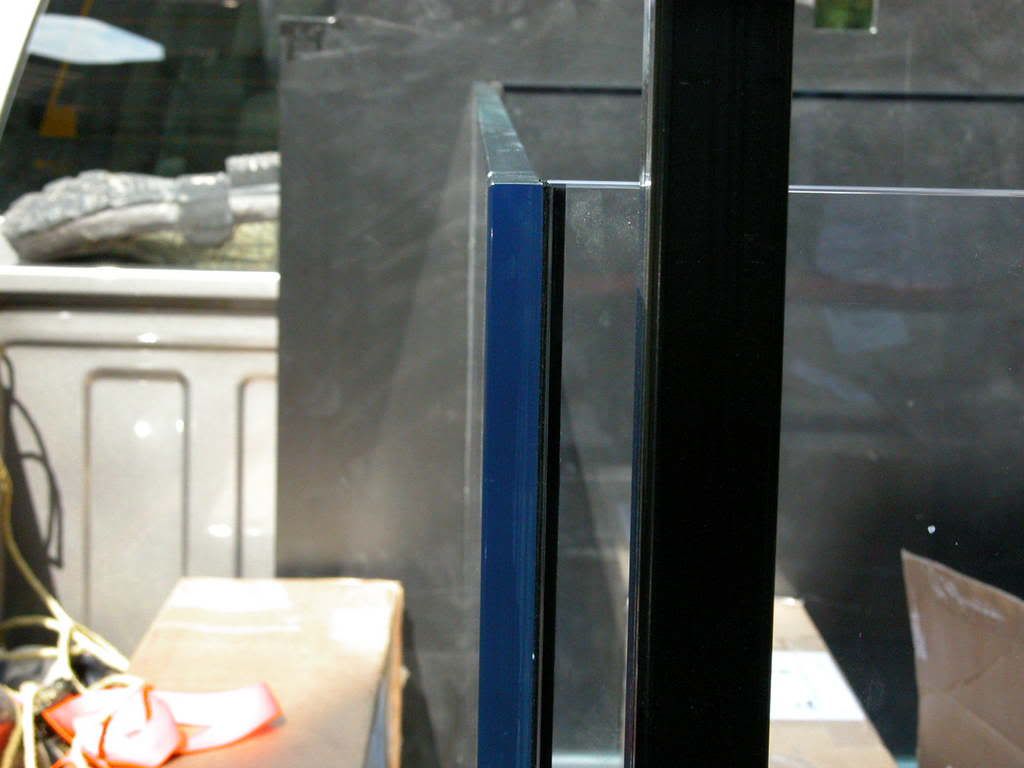
Hi Cindy. I got my tank through Kingfish here in Austin, ph # 371-3366. Give'em a call and they'll get you a quote. The tank was made by AGE and it's made of 3/4" low-iron ("Starphire") glass on the front and both sides. The reason I went with Starphire is for the added clarity. Regular glass tends to cast a greenish hue if you look at it closely, whereas the low-iron glass is as clear as acrylic. It's more expensive but it was worth it to me. If you saw the 2 types of glass side by side you would not be happy with regular glass. I hope this helps and feel free to ask questions. Good luck on your new tank!
Mike
-
I'm hoping to plumb in the sump and do the aquascaping this Sunday. The tank should be full by tomorrow, and I'll start circulating in the salt at that time. BTW, sorry I won't be able to make it to your house for the ARC meeting on Saturday, and I hope to meet you in person at another gathering.
Mike
-
Thanks so much guys, and I appreciate you following along. Please feel free to comment/criticize whenever necessary.
-
Yep, you got it, teflon tape. On the 4-way itself and on the pump I used the heavy-duty tape used for gas fittings. It's much thicker than the standard teflon tape and requires less wraps, but it sure makes a nice seal.
-
I had a fairly productive weekend. I finally got around to making the wood mount for the Barracuda pump. I screwed 2x4's together for height so that the pump would rise above the drip pan, and holes were drilled for the lag bolts, which were countersunk. The wood was then treated with 2 coats of urethane. For vibration control I'm using drawer liner material between the wood and the pump, and between the wood and the pan. The pic shows the bottom and top of the wooden risers. The one without the holes is for the "inlet" side of the pump, which doesn't have holes for mounting.
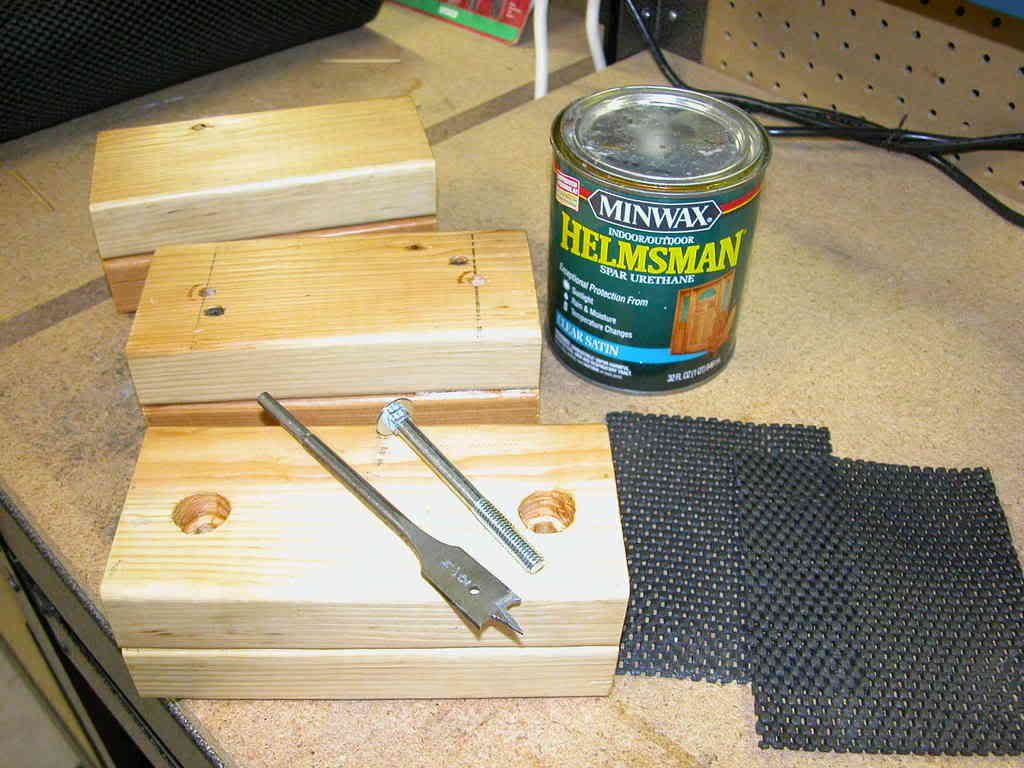
Fortunately my measurements were correct, as the pump was resting on a temporary mount and I didn't mark the holes with pencil. Not the smartest thing, but it worked out fine. The photo doesn't show it, but like I said, I put 3 layers of the drawer liner material between the pump and the wood.
At this point I was ready to photograph the system as it stands, with the closed loop fully plumbed, including the pump. Here's the left side ...
and the right side ...
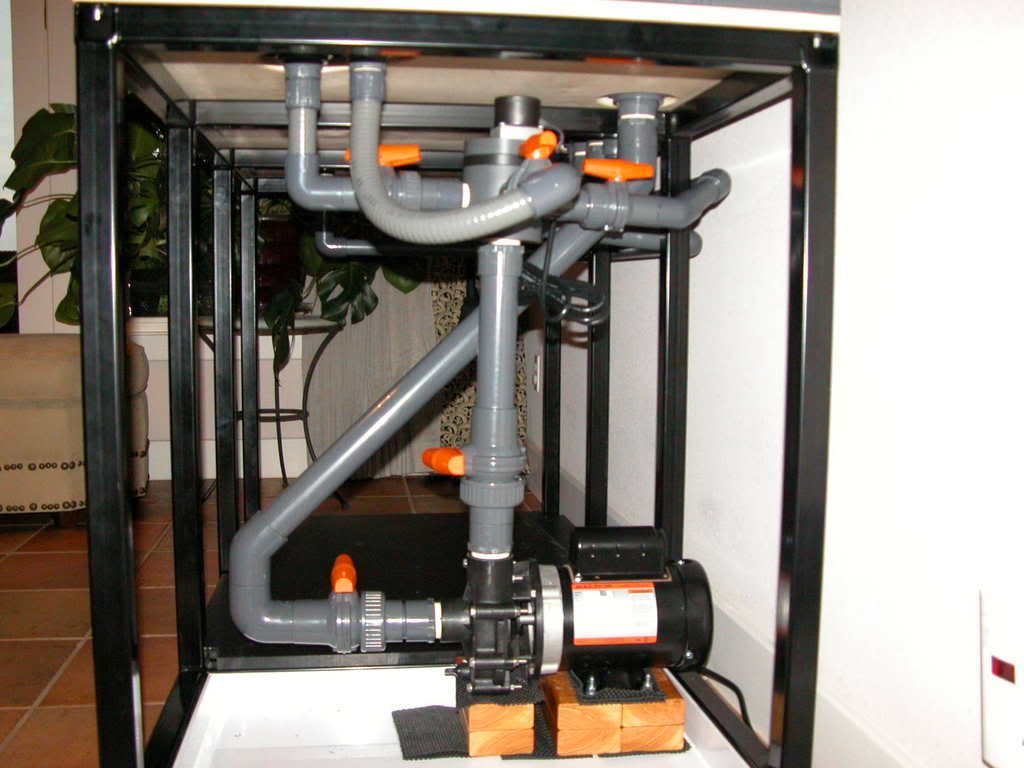
and here it is from the front.
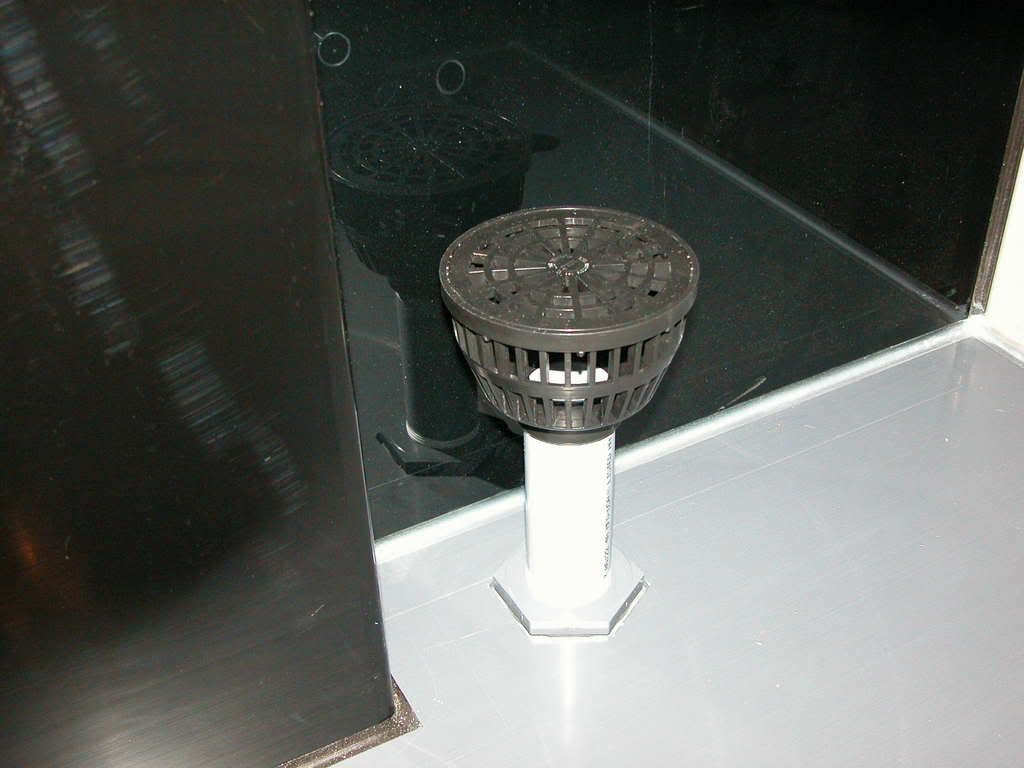
Here's a more detailed view of the CL strainer in its place. That's a 6" riser to help prevent sand from blowing into the CL and potentially clogging the 4-way drum.
Next came the time to add some water and test my plumbing. This would have made a huge mess if there were a problem, but even though I'm a novice I still felt pretty comfortable that everything would be water tight. I have been making RO/DI for a little while and storing it in trashcans. So here's the 1st 80 gallons or so.
Fortunately everything was dry, so it was then time to fire up the closed loop. I aimed all of the outlets sideways since I didn't know if the water would fly out of the top of the tank (wishful thinking, right?). I was psyched to finally see some flow in this bad boy!
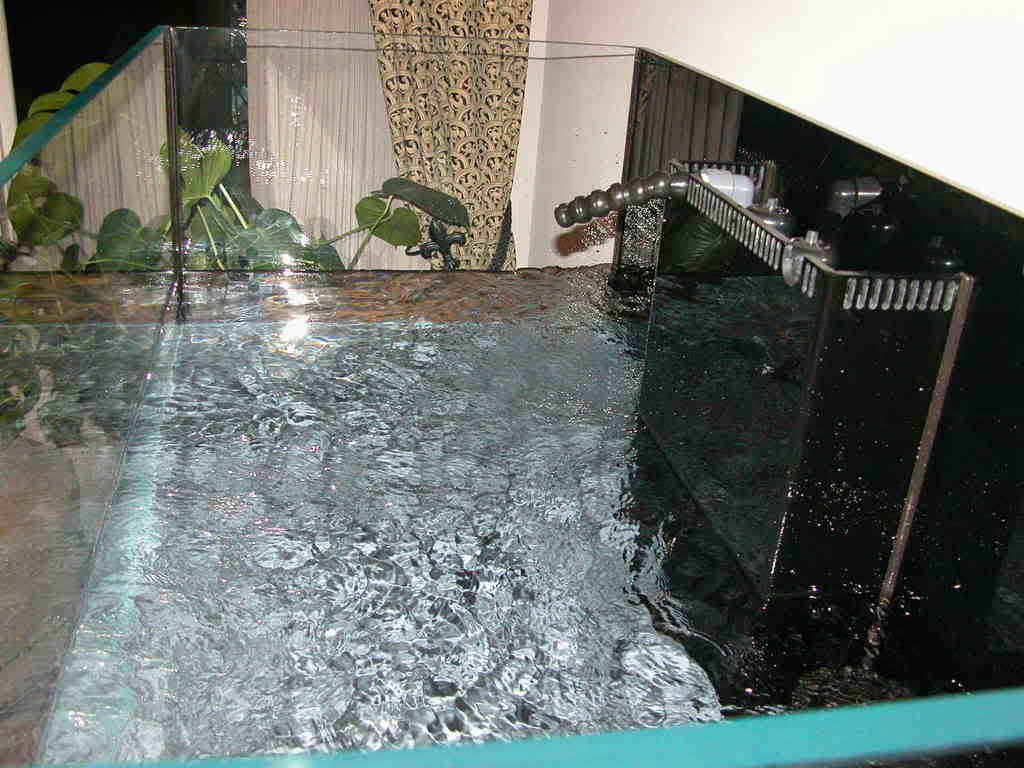
The pump mount worked wonderfully. There was no rattling, and all I could hear was the sweet hum of the Barracuda's fan. Now it's just a matter of making more water and then the aquascaping can begin.
-
Unfortunately I already have plans for that day and won't be able to attend. I was really looking forward to hearing the talks, meeting the 1st-timers and seeing your tank. I'll definitely check out the video. This will be the 1st ARC meeting I will have missed.

-
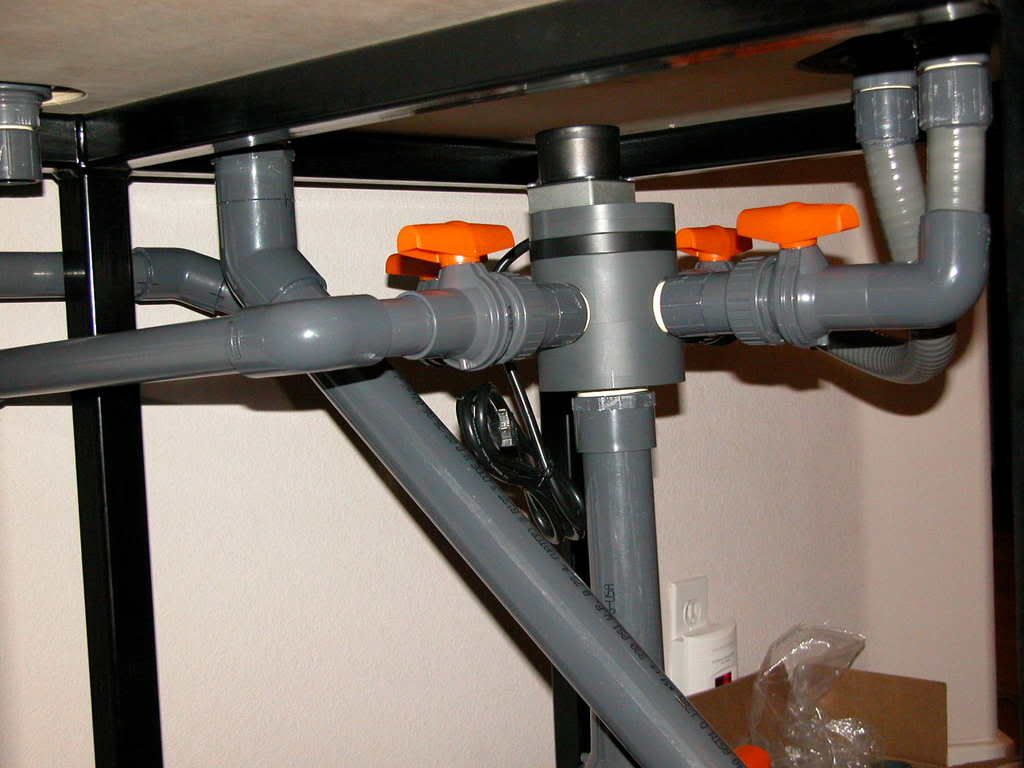
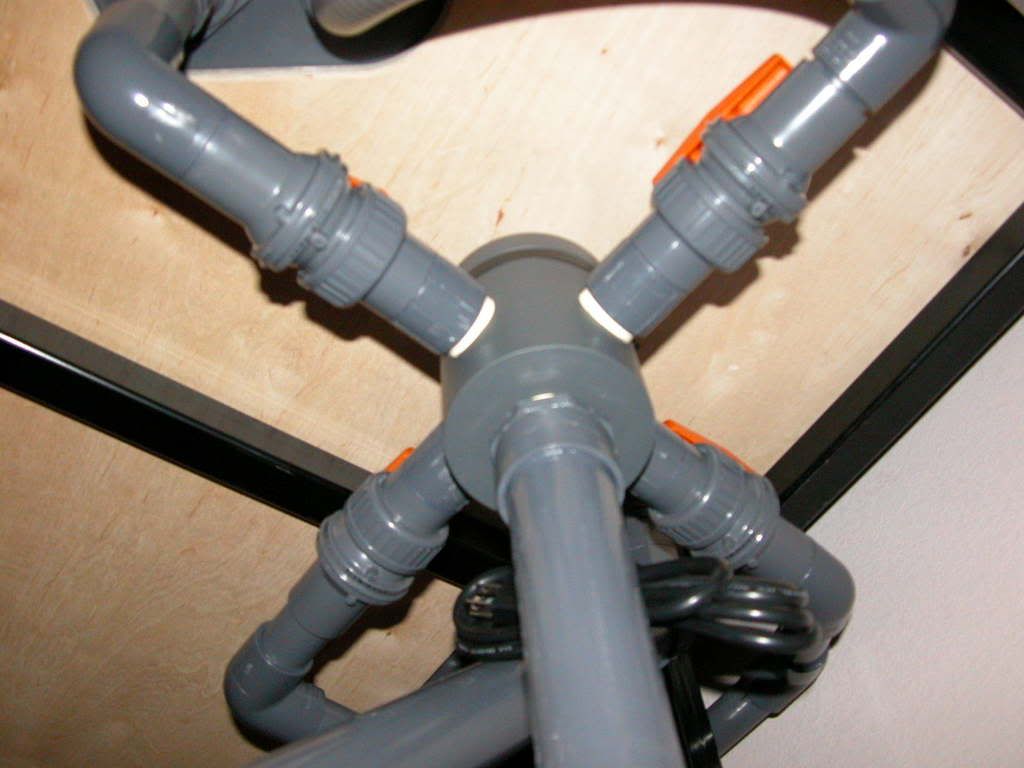
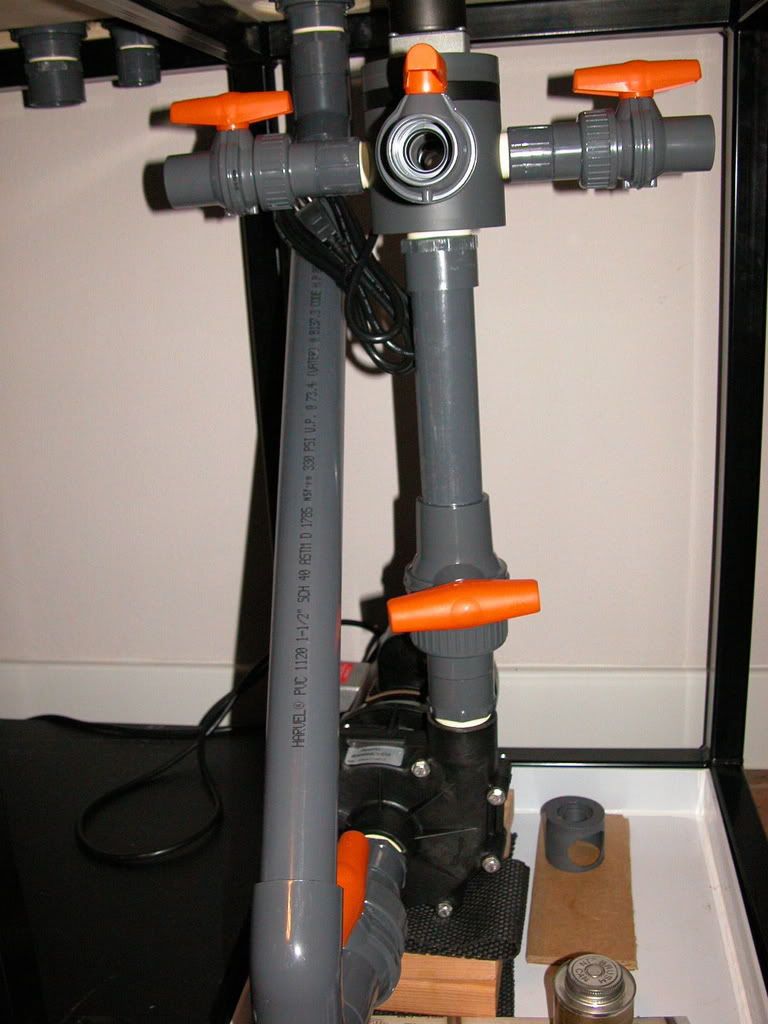
So I finished plumbing the closed loop. I'm no plumbing expert so please feel free to critique. Brian will probably cringe when he sees this, but it's the best I could do. I didn't waste any fittings in the process, and hopefully there will be no leaks. I'm a little concerned due to the fact that there's quite a bit of tension at a few of the joints, specifically at 2 of the connections onto the 4-way and at 1 of the elbows heading toward the left side of the tank. I guess I didn't cut the pipe at exactly the correct length, which forced me to torque the pipe a little at the unions. Should this concern me? Anyway, here's how it came out.
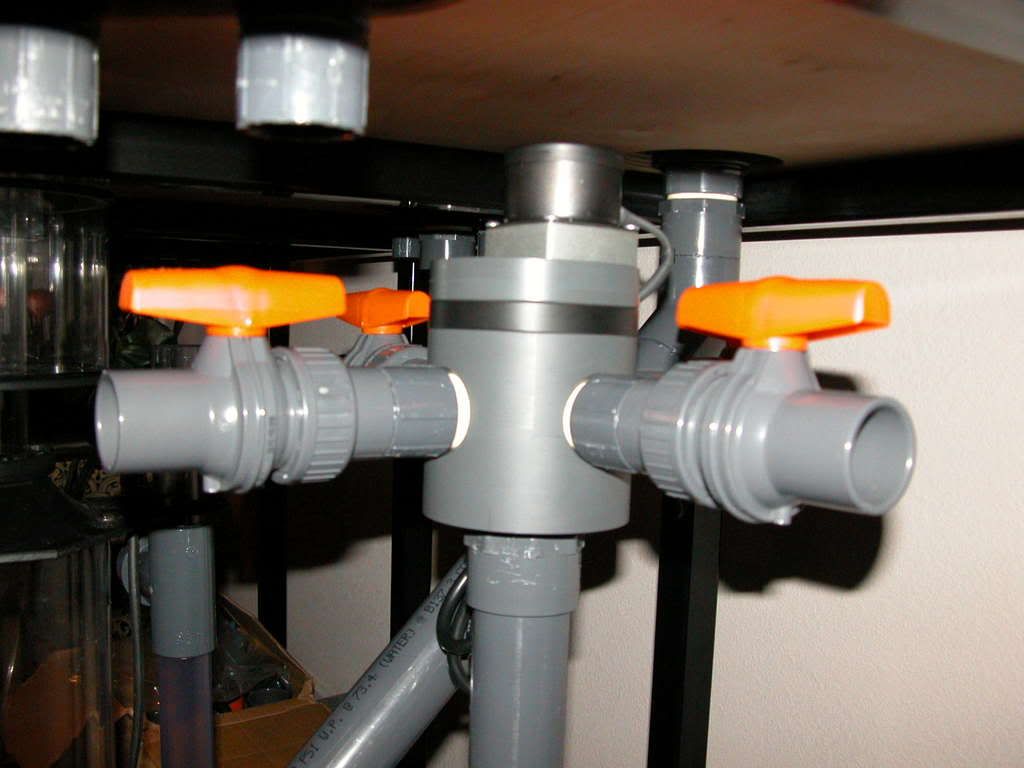
Here are 2 of the 4-way returns, heading to the left side of the tank.
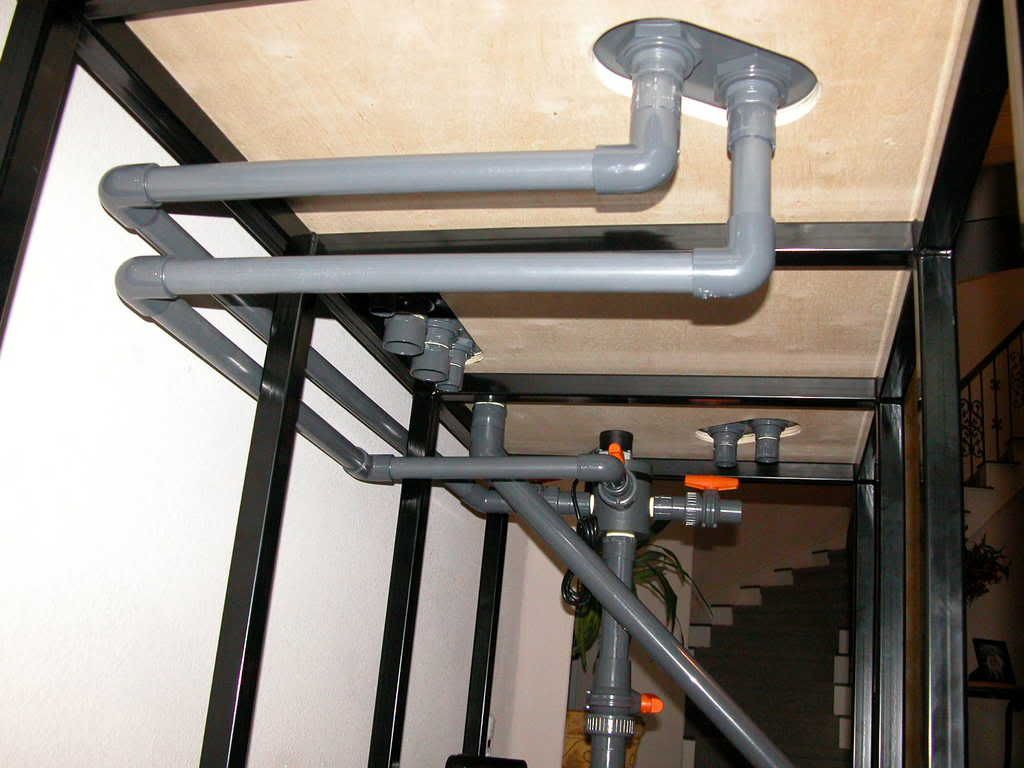
I had to elevate 1 of the returns a little so that they'd both be able to pass behind the stand, offering a little more room inside the cabinet and avoiding the overflow drains.
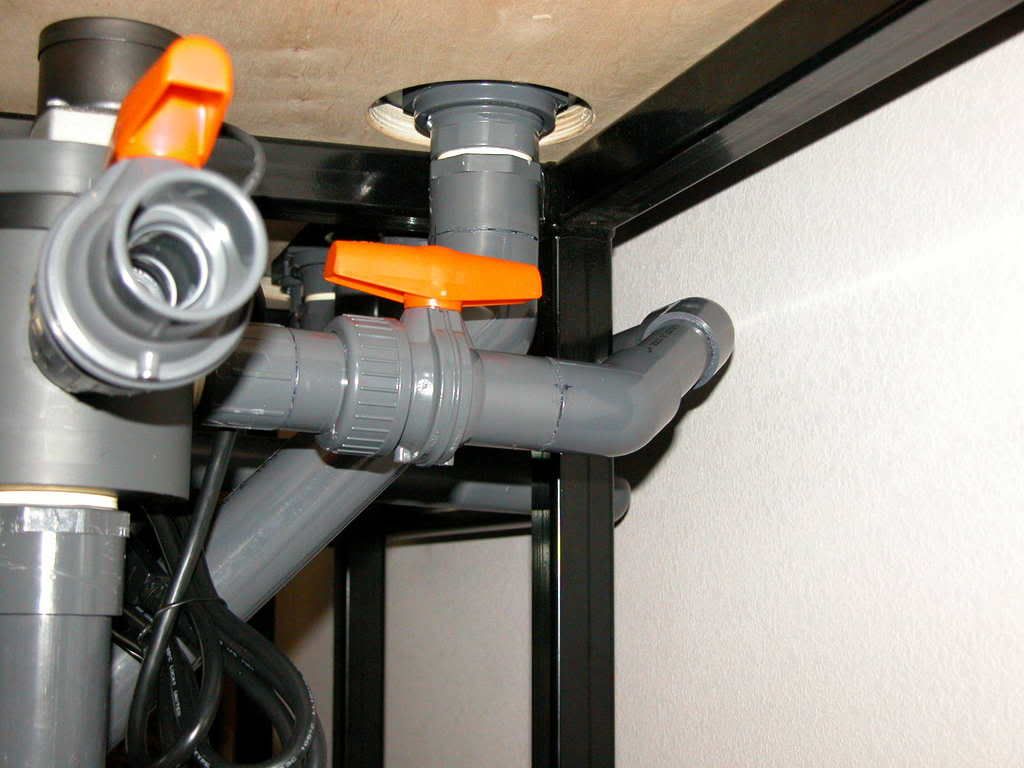
Next came the 2 returns that were very close to the 4-way unit itself. The short distance and odd angles dictated that I use spa-flex, which if you haven't used it before, isn't as flexible as you'd think, or as I had hoped.
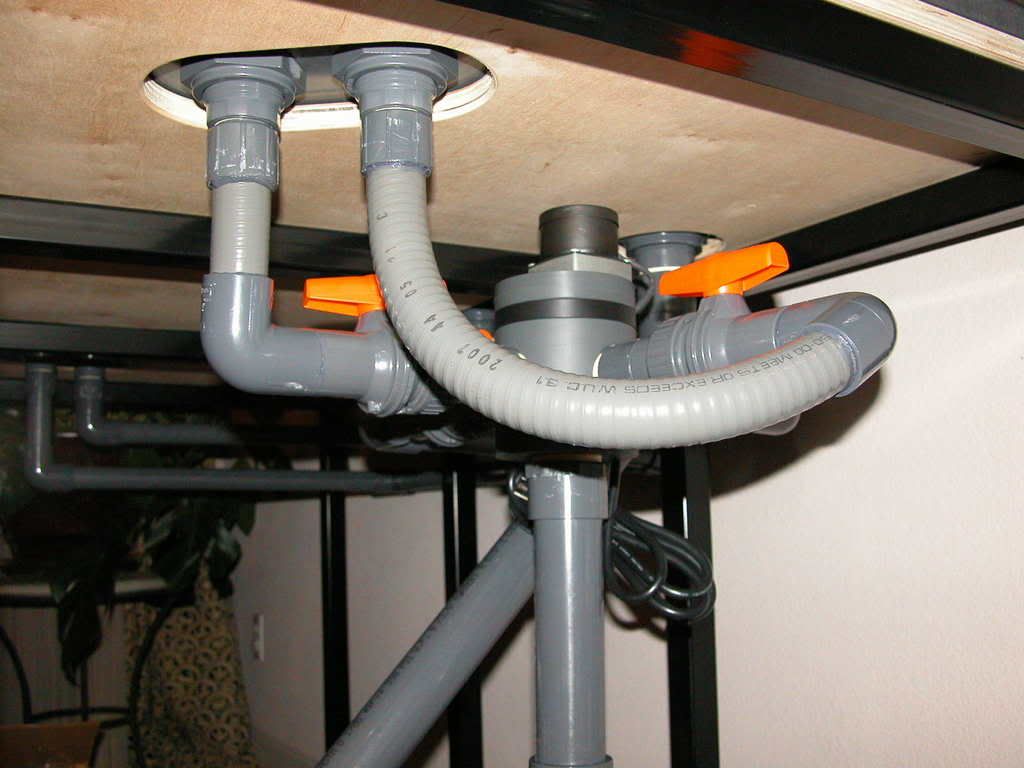
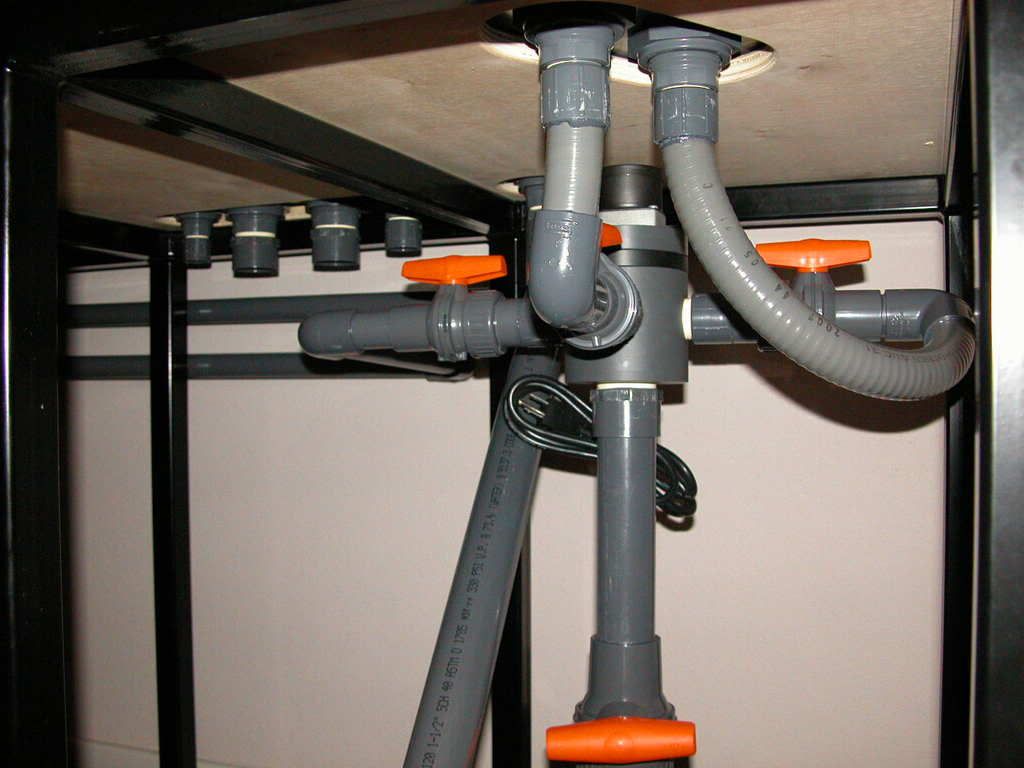
And here's the final picture, looking up from beneath the 4-way.
I realize that I need a photo, a "money shot," if you will, of the pump with all of the closed loop plumbing. I'll get that done tonight. Next step will be adding some water to the system to ensure there are no leaks and to check the flow generated by the 4-way. Wish me luck!
-
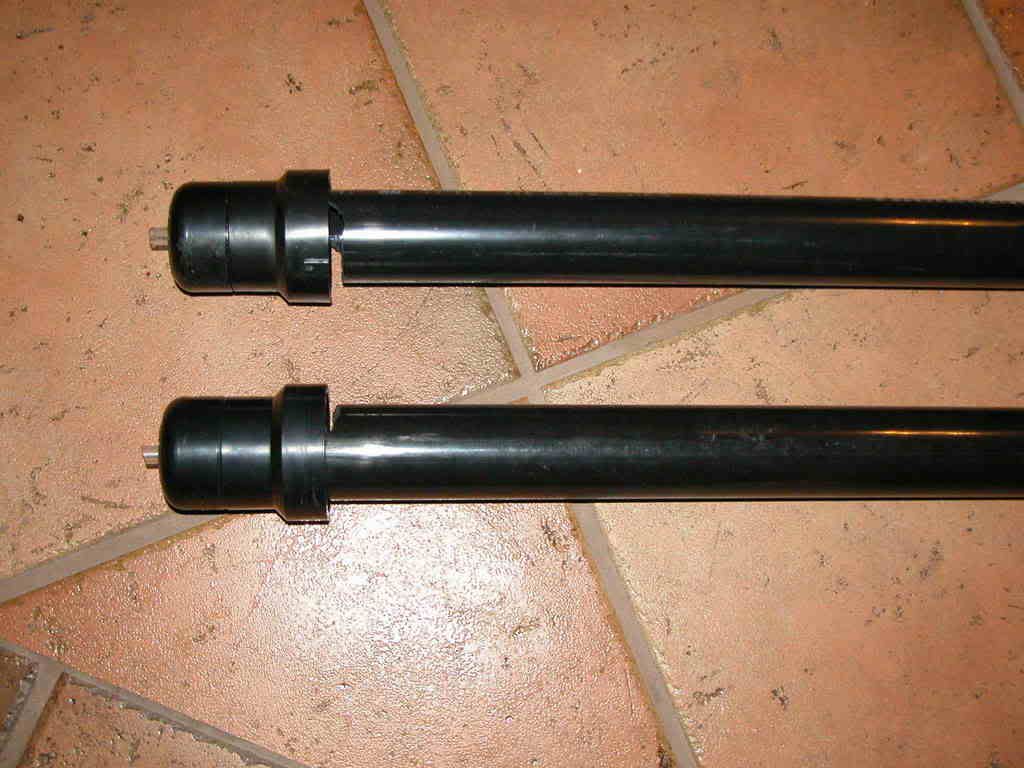
That looks great! The gray plumbing always looks so good. Where did you get the stand pipes? I can't wait to see the tank with water.
Thanks, and glad you like it. Yeah, I've always been a big fan of the gray PVC - looks so much neater and more professional, IMO. I got the stand pipes at nautilusreef.com. The cutouts at the top were a bit uneven, so I just dremeled out one to match the other. I'll let you know how they sound once I fill'er up.
-
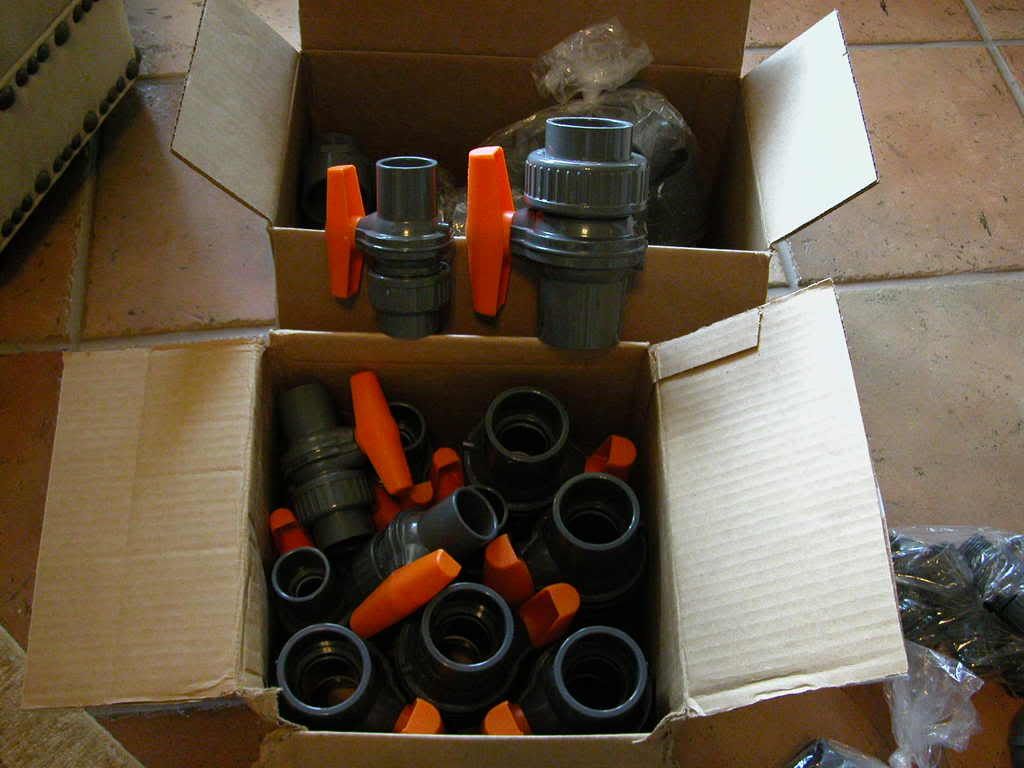
I've been away for a week but just before leaving, John, Clint and I got started on the plumbing. I thought I had everything I needed before starting, but you know how that goes. Anyway, I'll show you what we got done so far. First off, here was the bait for getting some help.

No plumbing project should ever be attempted without these, IMO.
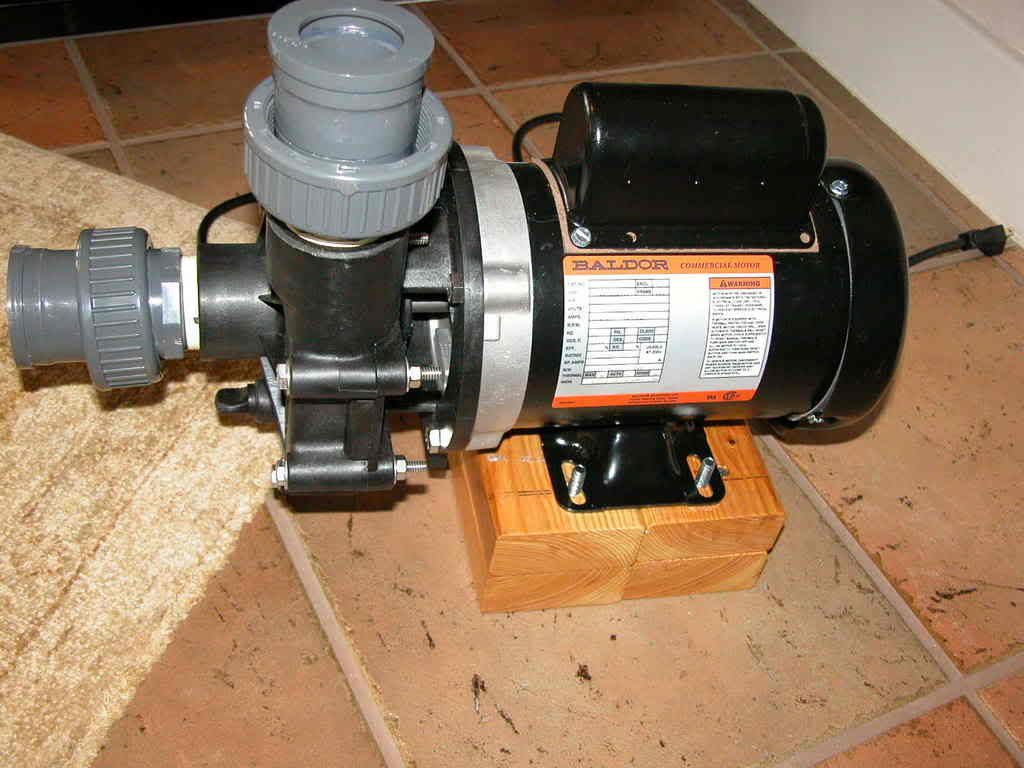
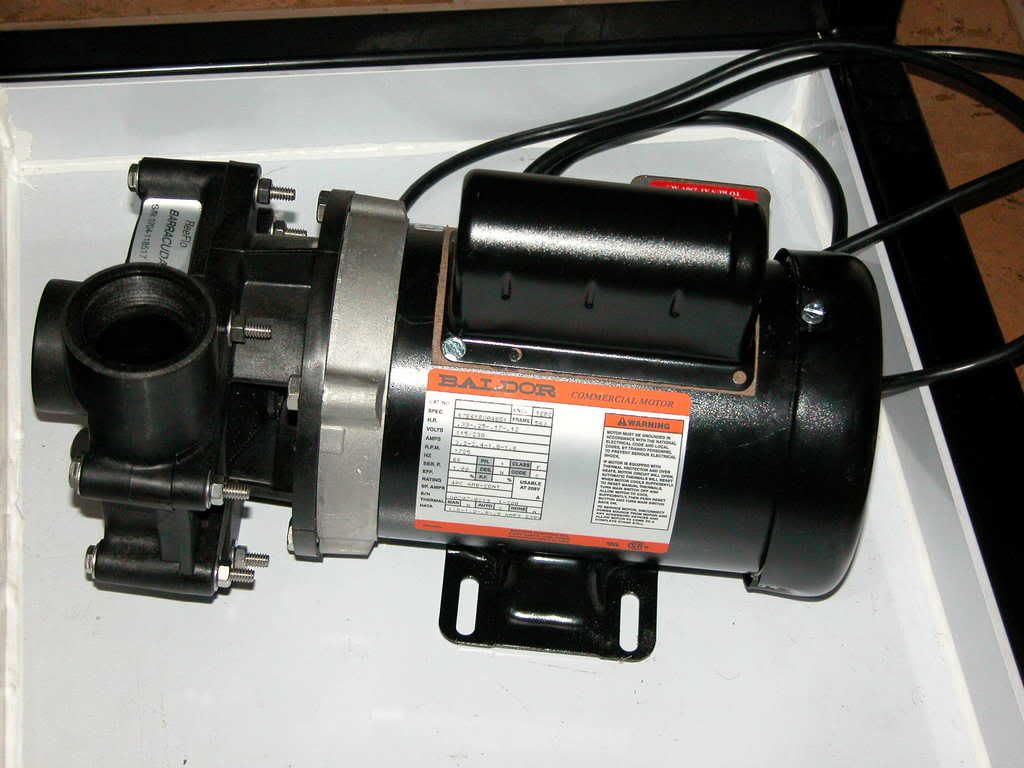
The first thing we did was to move the tank away from the wall to take down the mirror. Everything was re-leveled, then the plumbing on the closed loop began. Here's the CL pump, a Sequence Barracuda.
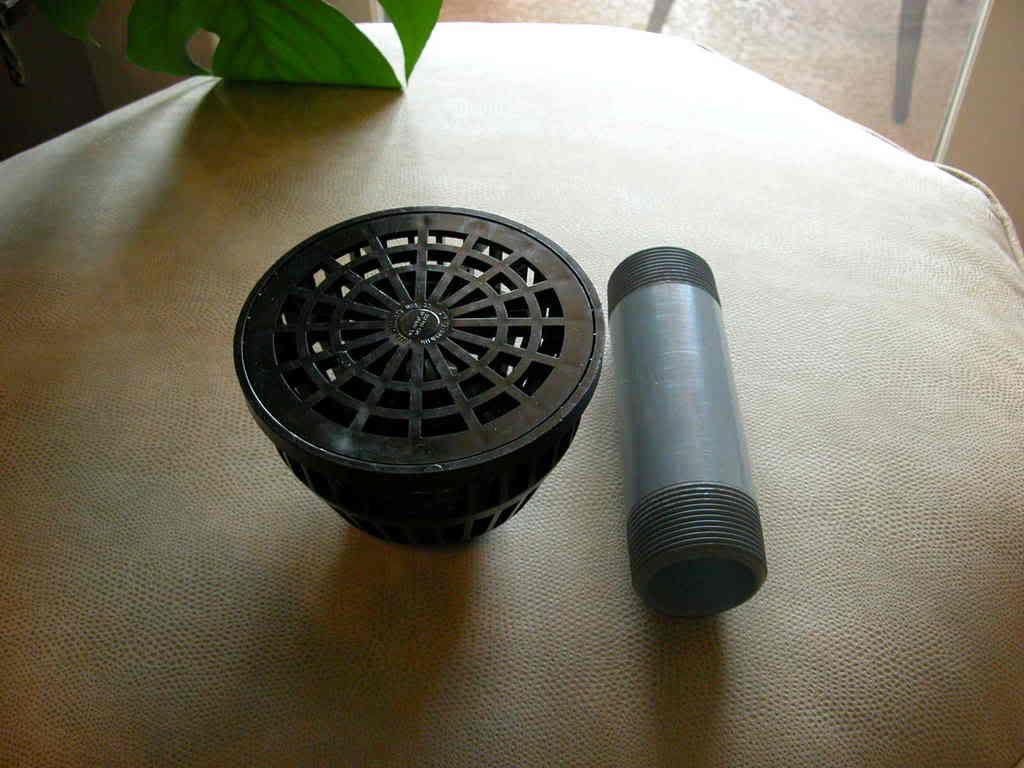
The drain to the pump is 1.5", and critter protection is provided by this strainer. The pipe is double male threaded and screws into the bulkhead and the strainer. This elevates the strainer 6" off the tank bottom to keep sand from being swept up into the closed loop.
Notice in the image above that the Barracuda was resting in the pan. I didn't like that since any drips would accumulate in that pan, and I didn't want the pump to be submerged. The pan is 2 and 1/4" deep, so we just elevated the pump temporarily on a few scraps of 2x4. To account for the extra thickness needed for vibration control, a few layers of drawer liner material was added to both the top and bottom of the 2x4's. Eventually I'll make a more suitable base for the pump to be affixed to, but this worked in a pinch.
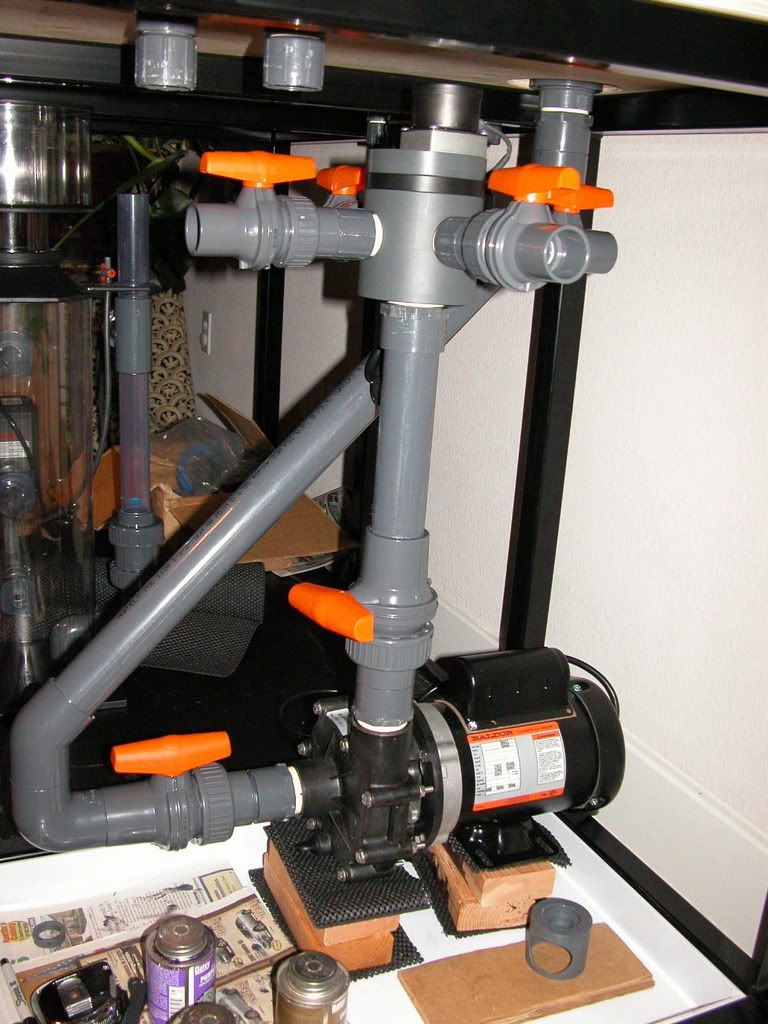
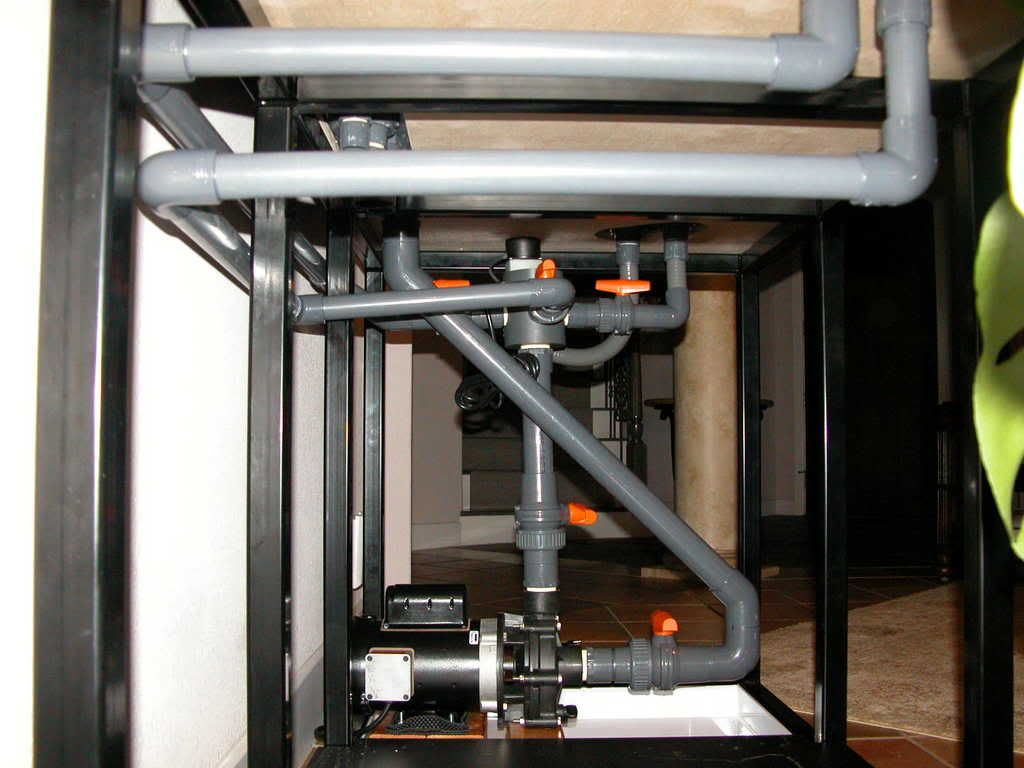
Notice all of the turns that the drain pipes take? This is not ideal, I know, but I really wanted the pump fan to blow out the back of the stand toward the wall, to dissipate heat instead of blowing it into the cabinet. This also made the return plumbing a little easier. Here's another view.
And finally, a close-up of the 4-way with SUBV's at each outlet.
Not pictured is the plumbing inside the overflow box, both the drains and returns. For the drains, I went with CJ standpipes due to the experiences of greenmako and others.
It doesn't look like much was accomplished, but it actually took a while, especially when you include the unwelcome but almost expected trip to Lowes. At that point, progress was severely halted due to a lack of gray spa-flex and not enough gray 1" fittings. I ordered everything I thought I would need and, alas, I still haven't received the spa-flex in the mail. Hopefully it will come later today, and if not then early next week. As always, I'm happy to hear your comments.
-
Andrew, you're welcome to come over any time you like, just shoot me a pm and we can work it out. You may want to wait until the tank's wet, though. I'd like to see your tank in person as well! And yeah, Deltec AP851, can't wait to fire that sucka up.
Headless donkey - Moving that mirror is really gonna blow, but it's essential. Other than that I planned pretty well, and nothing else major will have to move, except for the rug, the coffee table, the couch, a couple chairs, a few lamps, and several plants. Piece of cake.
John - B)
-
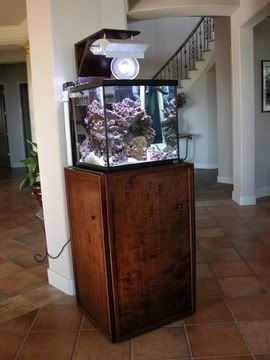
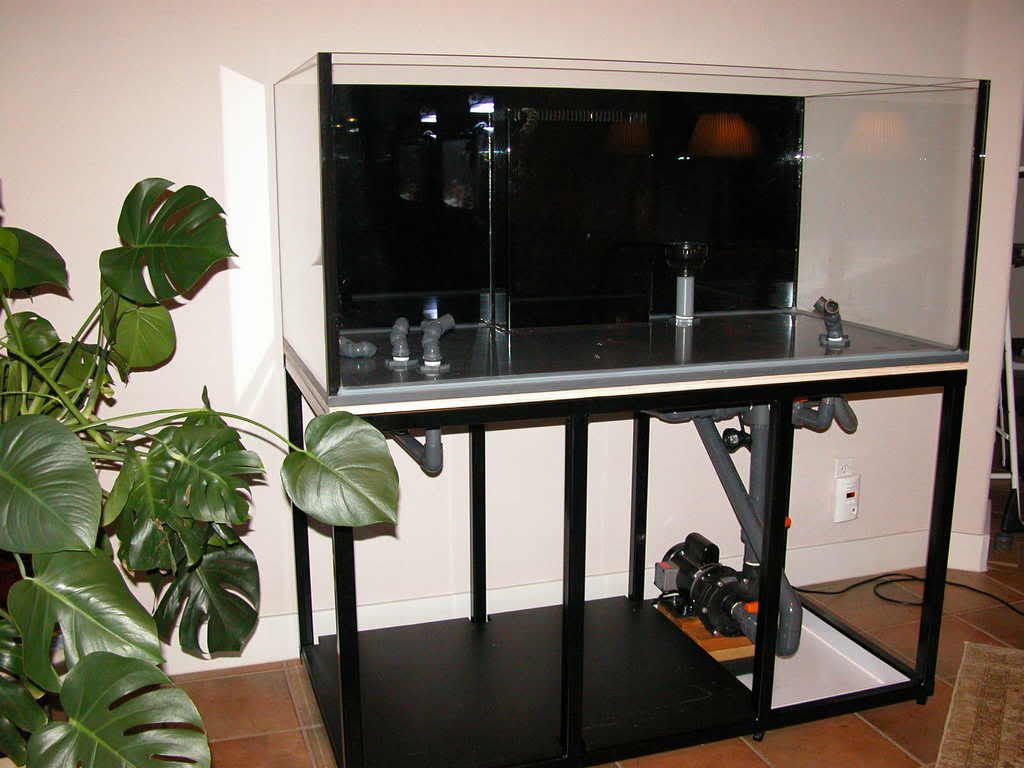
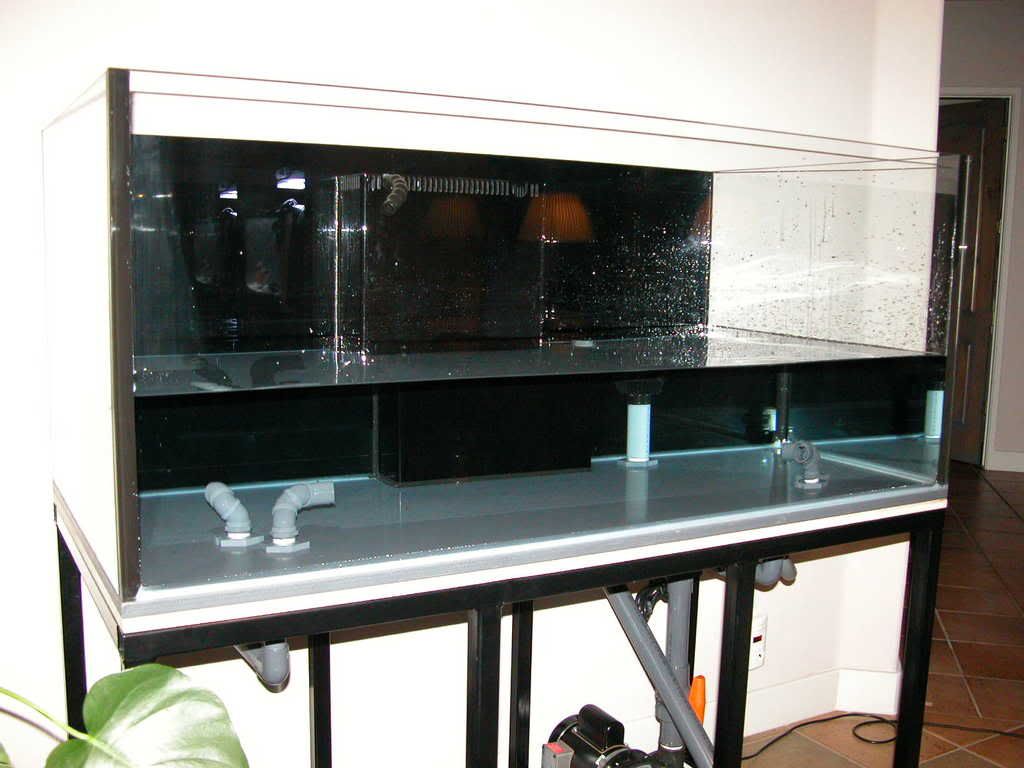
Hey bloggers, hope some of you are still out there. On Sunday 7/8/07 the tank was transported from Kingfish to my house. Brian (Kingfish), Dallas, John (thedude) and Marcus (GMFett) were gracious enough to help me out. Fortunately Dallas has a truck and he volunteered to replace the U-Haul I was going to rent. The thought of driving this beautiful glass tank in an open-bed truck at highway speeds was a little nerve-wracking but all's well that ends well. It was adequately padded and very well secured. Here it is, with the stand and some boxes of plumbing equipment that I had ordered on-line, backed into my driveway.
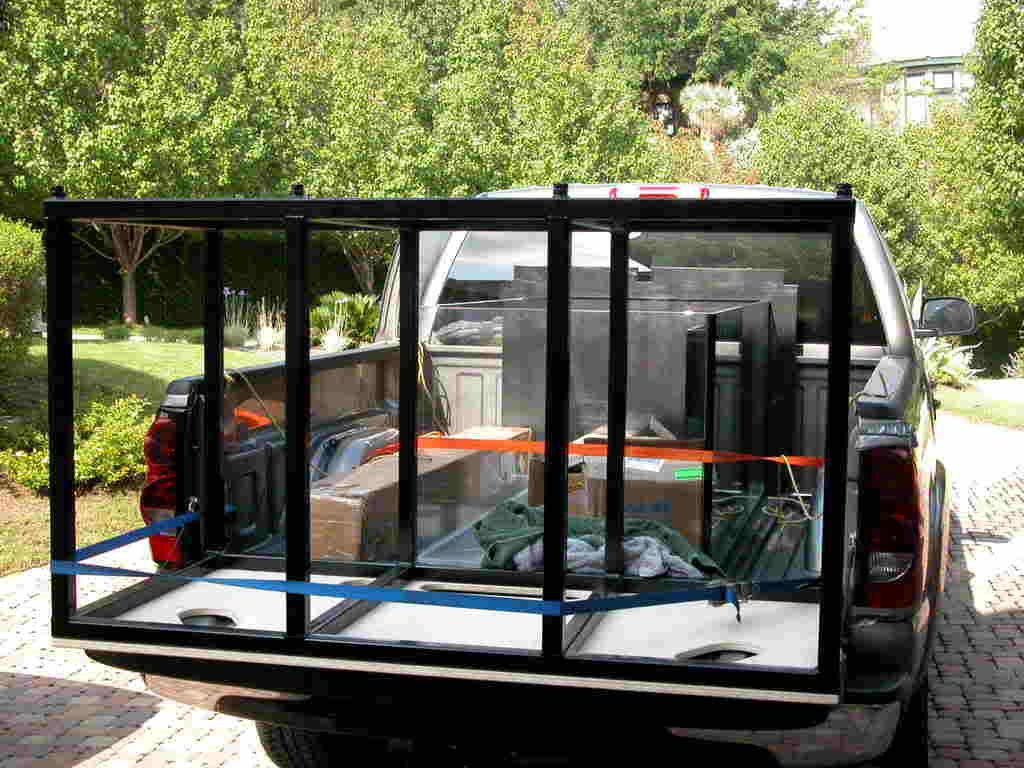
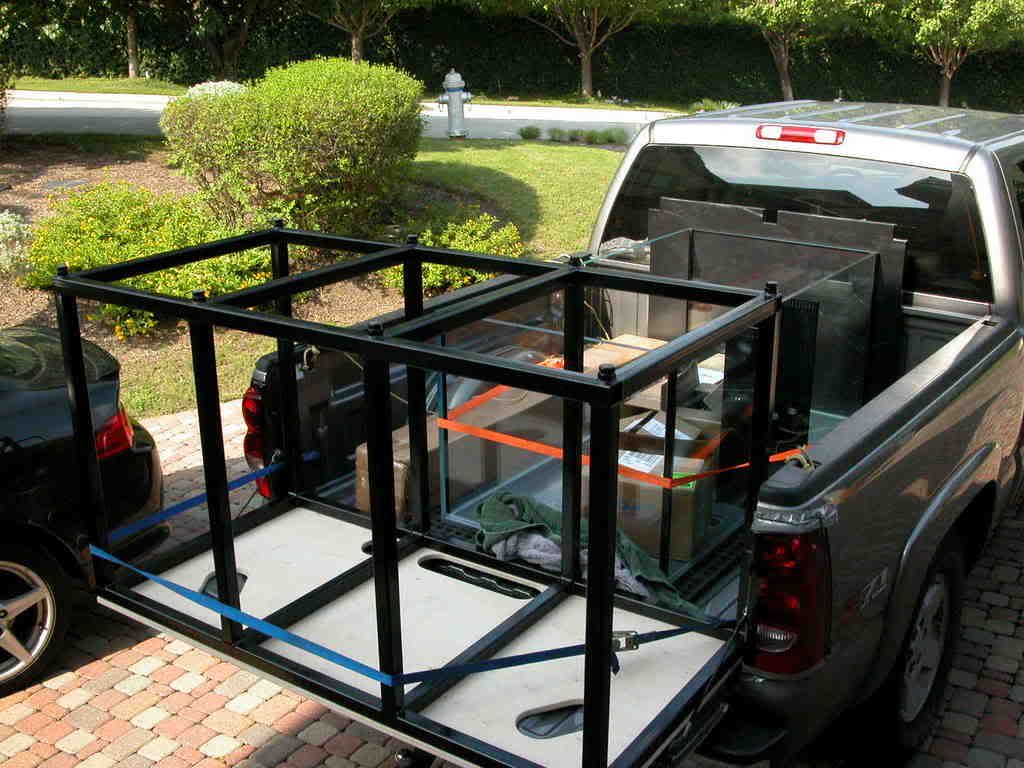
Here's another look at that starphire glass, with one leg of the stand just to the right.
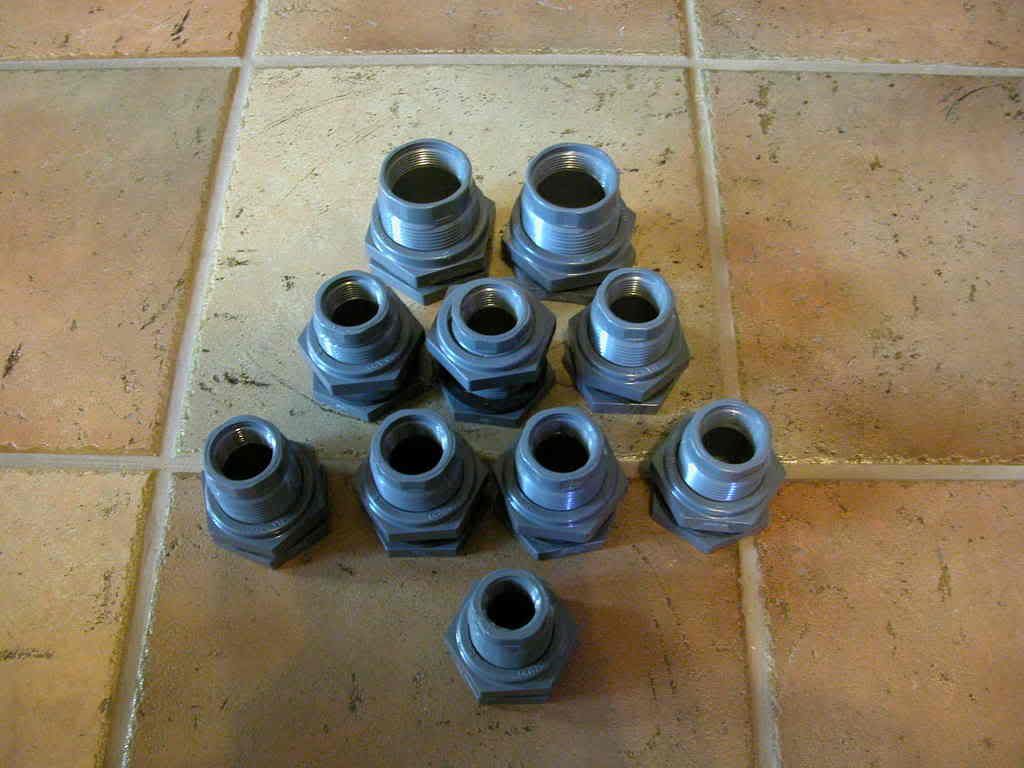
While the tank was outdoors and easily accessible, we applied a black adhesive material to the back glass, the only non-starphire panel. Brian has applied this to numerous tanks in the past, and as a result the actual application process wasn't all that onerous. It looks incredible, just as good if not better than painting, and without the mess or risk of getting paint on other surfaces. The stand was leveled at its desired location, then the tank was taken indoors, with just enough space to squeeze through the front door. We then put Hayward bulkheads in all of the cutouts in the PVC bottom. In case anyone's counting and the numbers don't add up properly for you, it may look as if one 1.5" bulkhead is missing, and there are two extra 1" bulkheads. That's because one of the 1.5"ers was already installed, and the extra 1"ers are for the sump.
The OceansMotions Omniflex CL return nozzles were then plumbed into the bulkheads. Here's the tank on the stand, and note the black background (looks lighter on the right side due to glare, sorry).
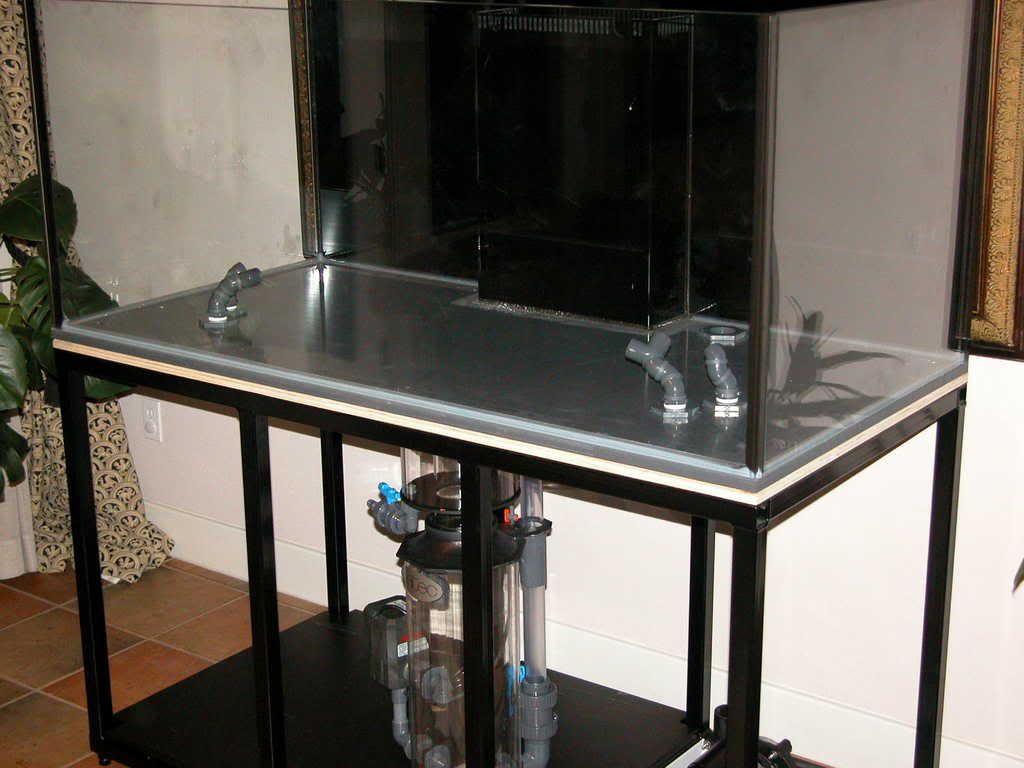
You can barely see a mirror on the wall behind the tank. After a bit of negotiation and tremendous understanding on my wife's part, it will be coming down. Sure, it would have been a lot easier to remove the mirror BEFORE the tank was in place, but at least it's still dry and empty.
-
Thanks, seahorsejl. BTW, I think I met you at Gabriel's house during the last meeting. Did you win that round tank? If that was you, then congratulations.
Mike
-
Welcome to club Starfire. It looks great!
Thanks, Andrew! Missed you at the last meeting, hope to see you soon.
Mike
BTW, your avatar is SICK!

mojo's Blog
in Tank Builds
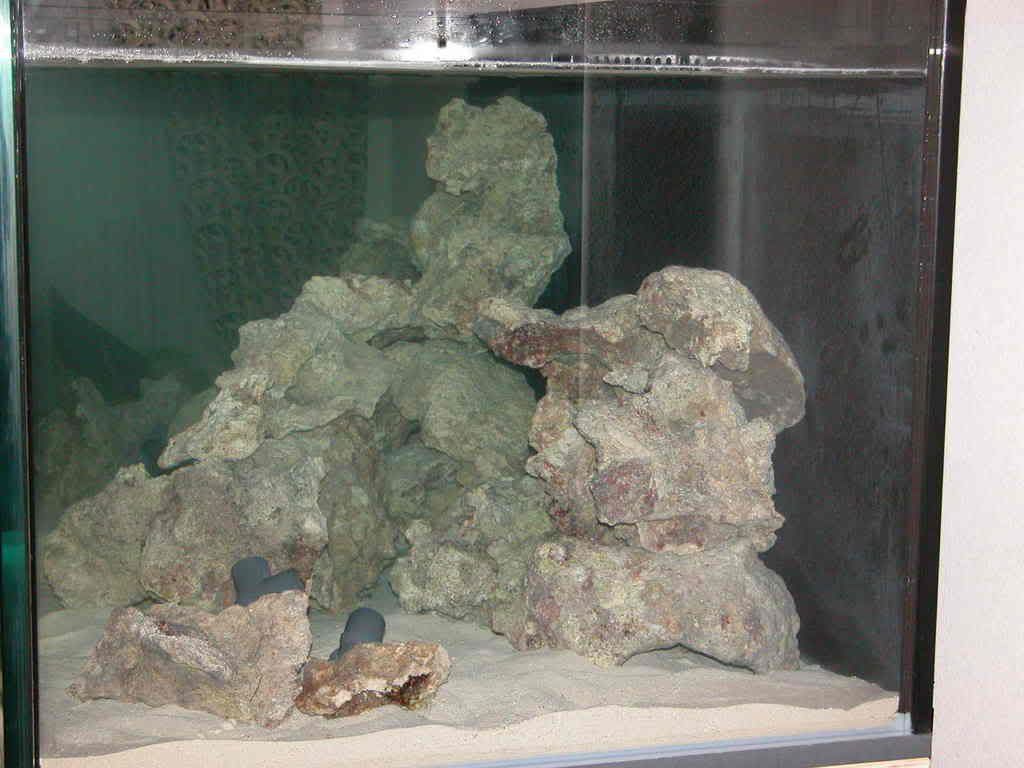
Posted
Yeah, I think I'm going to be very happy with this rock. It's the same stuff that's in my office tank, and I'm very pleased with how it has matured in there.