


fjr_wertheimber
-
Posts
126 -
Joined
-
Last visited
Content Type
Profiles
Forums
Store
Gallery
Events
Local Fish Stores
FAQ
Blogs
Downloads
Posts posted by fjr_wertheimber
-
-
Crossing my fingers for you!
-
That's a sweet setup, man. I definitely need to get my butt out there to check out your system(s).
-
By the way, stopped by the metal fabricator's shop earlier today... Things are progressing!!
-
Dude, JasonJones, you are my new biggest hero and best friend!!! LOVE that link!!
-
Actually, I'm planning on a Royal-Vertex Kone, but couldn't find anyone who carried smaller conical pieces of acrylic. :-)
-
And a sketch of it under the mini-tank:
-
Okay, so speaking of over-engineering stuff, I'm trying to replicate the big tank as much as possible, and that includes making a Bubble King über-mini clone powered by a modded Maxijet 1200 (and yes, I know that the MJ is turned the wrong way, but I realized that after I built the rest of the skimmer so I'm just gonna leave the model as-is for now...). So, here's the plan for it:
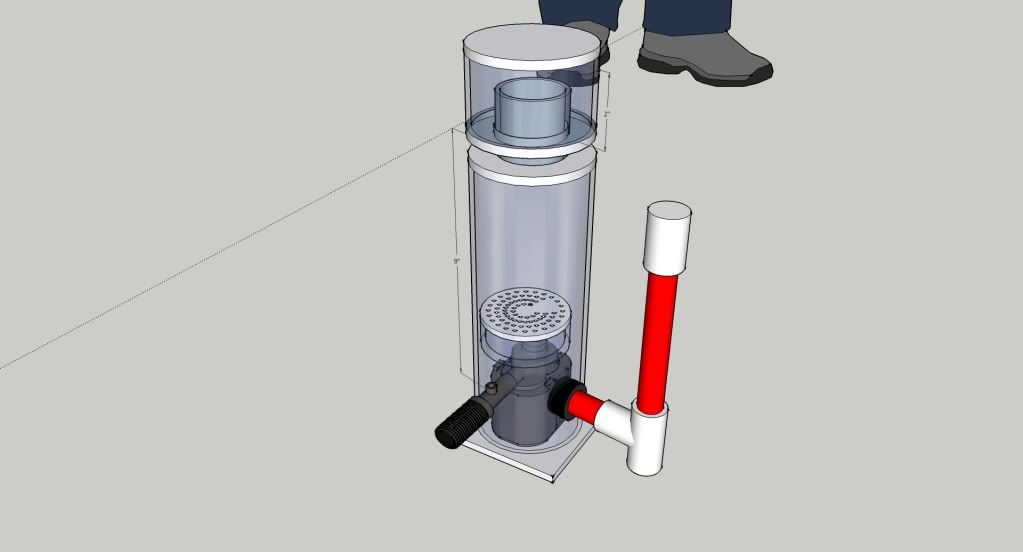
Yes, I know that for a nano or pico (and really, for larger tanks, too) you get much more efficient protein removal from water changes, and that for nanos and picos you don't really get much benefit from a skimmer (especially such a small one), but hey, I thought it was a pretty cool idea, so I'm gonna build it, if for no other reason than I think it will look cool under the tank... LOL
-
Heck, Bannerfish, if you've got 4,400+ gallons worth of coral, I think you could probably get by with a few non-coral-safe fish... LOL
-
Was on the AquaticEco site earlier and came across this... ROFLMAO!!
-
I've got to say, I love Aquatek and RCA, and have nothing but good experiences from them (as said before, Aquatek probably has the best equipment selection in Austin, IMHO) and Jake and Bruce are always great to talk to and bounce ideas off of. One thing I love about Bruce, he will always tell you what he really thinks about something, regardless of how it will affect his sale (hell, I've had him talk me OUT of buying something before, because he felt it wasn't right for what I needed), and I really appreciate that. Also, every single time Wendy and I go to AquaDome we're pleasantly surprised with their saltwater selection. Always at least a few interesting/unique fish you don't see that often, the fish always look healthy, and they have a good wide selection. As always, your mileage may vary, but hey, that's just my experiences.
-
Like the topic title says, does anyone have access to or know someplace that can CNC a very small number (and small size) of CNC parts from acrylic? I'm about to start work on our son's small mini-dropoff pico, and I want to (yes, I know it's unnecessary and overkill and really stupid to do so, but hey, I like overkill, and small projects like this fascinate me) machine a small Bubble King clone using a modified Maxi-Jet (like this here) for the pump... Now, if only Ecotech made an MP5wES... (Although, they might get sued by H&K if they did... LOL Maybe the MP6wES, instead...)
-
Man, wish I could make it... Please post lots of pics of the DIY LED cannon!!
-
-
Jealous of the planned tank, or my mad pseudo-engineering skillz, yo?
 LMAO
LMAO -
LOL I just had a guy over on Reef Central post: "As a Structural engineer your previous post made a lot of sense, do you have an engineering background?" I guess that means I got it right...

-
Yes, overengineering is my friend. :-)
-
Thanks, everyone. I've got to say we're pretty pleased so far, too.
Speaking of which, I've had a few people ask about how the big tank is being constructed, i.e.- why not make it the normal way, why build it this way, why not have AGE/Marineland/etc. make it. Here's why:
Beyond the issues of having to perfectly level the two levels in order to achieve a perfect silicone bond without weak points (if you were to build it the normal glass/silicone way), the other reason it's being siliconed directly to the steel, much like a large-scale commercial aquarium. And no, unlike some people have thought, you don't want it to give, to do so introduces shear forces upon the silicone seal. Ideally, you want to silicone directly against the most stable outer surface as possible, so that the only force being acted upon the silicone is compressive force, where the silicone acts merely as a packer and seal, rather than being held in tension or shear, as most silicone and glass aquariums are. Utilizing silicone in this manner is almost incalculably stronger (assuming a strong outer surface, i.e.- strong welds and well-built structure, to seal against) than utilizing silicone as an adhesive. Not only that, but then your safety factor relies on the strength of the glass between the steel frames, rather than upon the strength of the silicone bond (either in tension or in shear) to retain the shape of the glass and keep it from reaching the point of failure due to deflection. Remember, when calculating required glass thickness, the biggest issue is bending stress, so supporting the top and bottom of the pane of glass reduces (almost to the point of removal) that bending stress at the point where it's most likely, i.e.- the top and bottom shear-held silicone bonds. Really, the only issue relative to the use of metal for the frame is the differential linear coefficient of expansion between glass and most metals, especially steel. To offset this in larger joints (i.e.- those longer than 1 meter on their longest edge, or a bit over 2 meters in this case) the thickness of the silicone seal must be changed to allow linear expansion without the fear of compressive failure. Assuming that plate glass has a linear coefficient of expansion of ~5.0 x 10^6 in/in degrees F, and steel has a coefficient of linear thermal expansion of ~7.3 x 10^6 in/in degrees F, allowing 2-3mm per meter of joint length (i.e.- 5mm seal along the large side plates, and 3mm along the front plate) will allow the silicone to take up the linear expansion differences without failure of the silicone seal.
-
Thanks, Kevin!
-
Dude, that's awesome! I made the mistake of showing this to Wendy, now I can see the "Tito would love that..." gleam in her eye... Uh oh. I'm anticipating a trip to the pet store here shortly... LOL
-
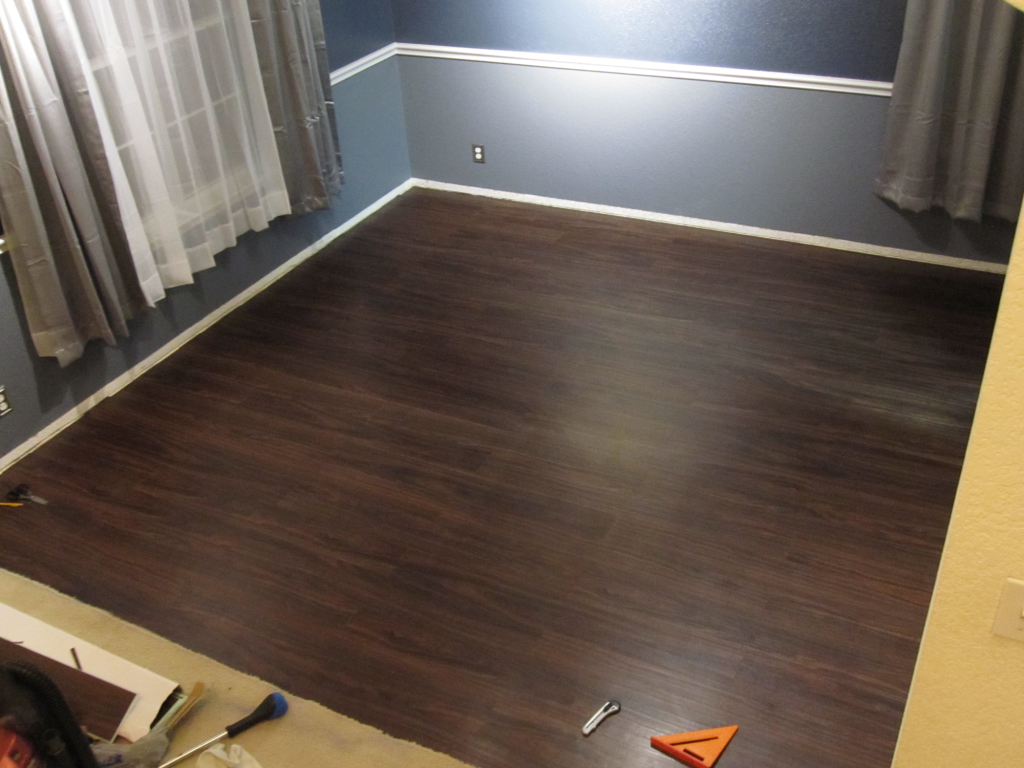
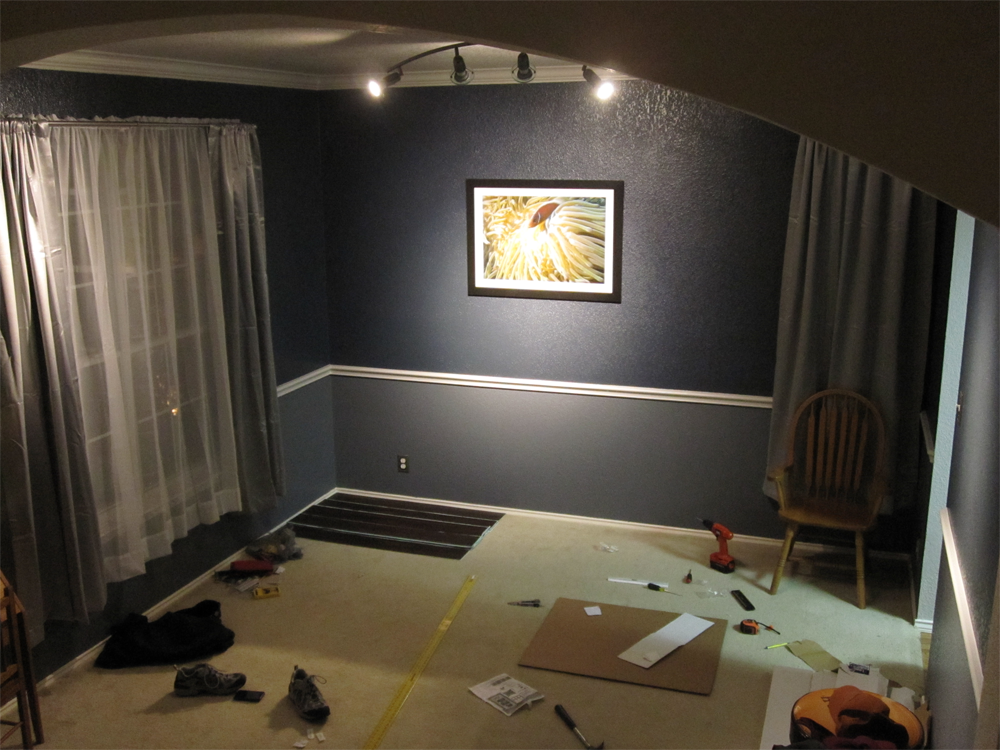
Finally got the floor done and super pleased with how it turned out. Wendy grew up in the flooring business (her parents owned a flooring company) and even she was amazed with how it looks. Now to just find some baseboard I like and put that in, and the room portion of the build is done!

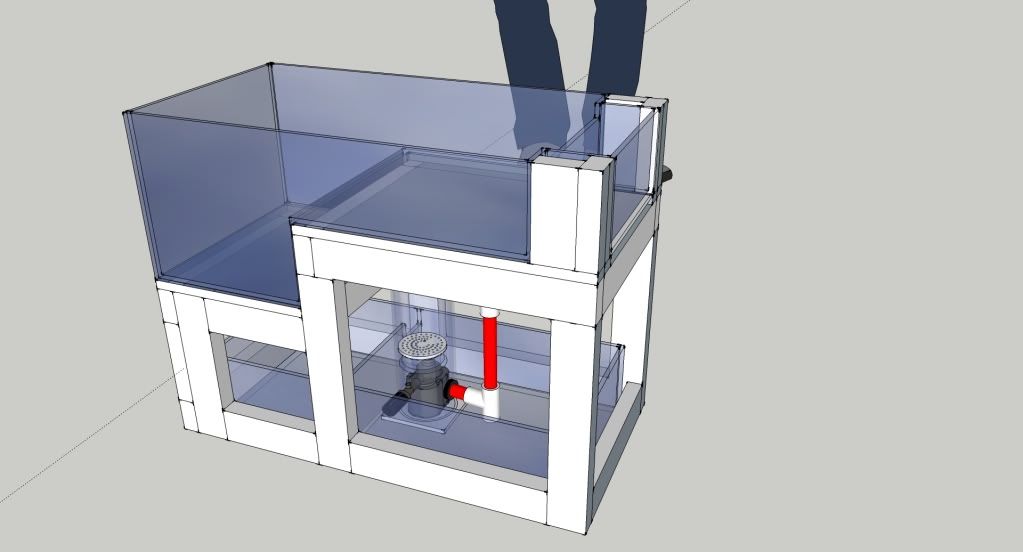
Now, on a (semi) side note... Wendy and I have been talking about putting together a little pico/nano for our son Tito's room. I played around with the idea, and thought, "Hey, why not make a scale version of the big tank?" So, voila!
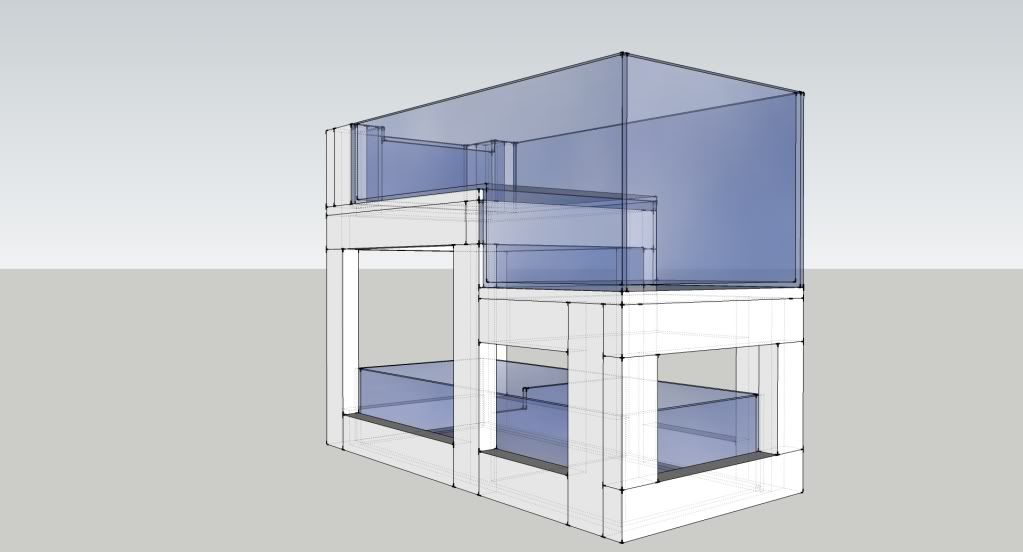
Just need to pick up some 1"x2" for the stand and some 1/4" acrylic for the rest, and we're in business. Hopefully I can put it together this weekend, or at least start on it. I found some great little LED strips that will work perfectly for lighting it, and a great DIY for a pico skimmer, and Hydor makes some great little nano pumps and powerheads that will fit perfectly. Overall size (including stand) is 24"L x 12"W x 18"H.
-
Pretty cool tank and idea... Would be interesting to see you put a surge on that huge tank of yours...
-
Some work in progress pics:
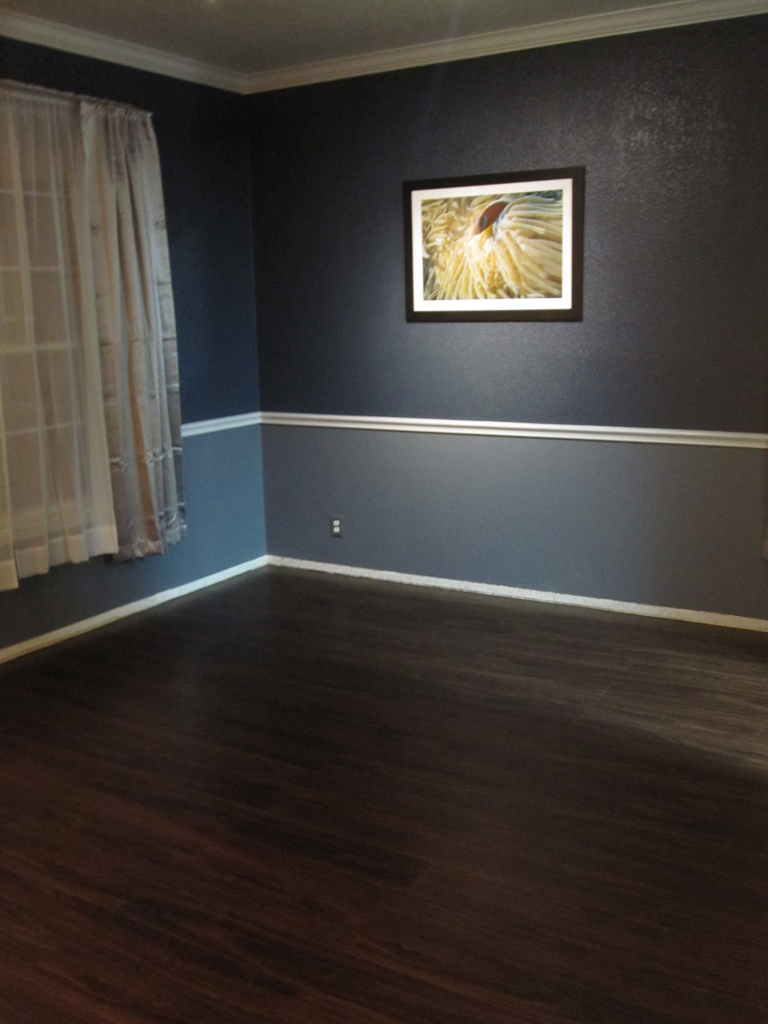
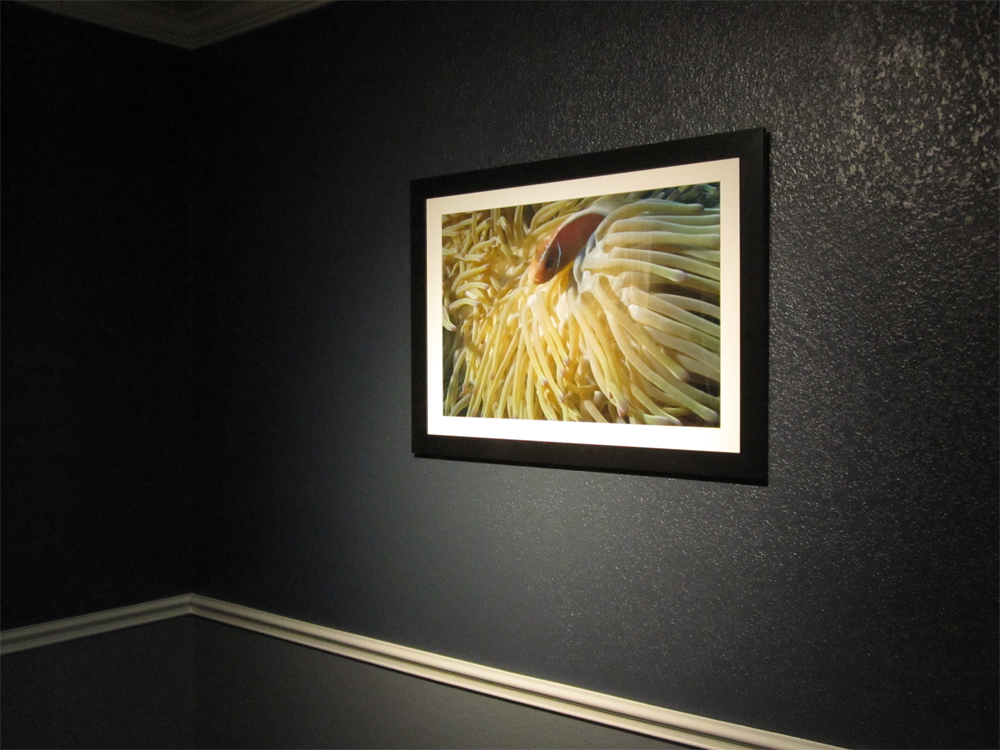
The room as it stands tonight. Got the photo print from Kodak today (20"x30" Pro-Print on metallic paper), got the materials to put together the frame and matting, and put it all together and hung it. We still need to get the smaller frames, possibly tomorrow. Pardon the mess, like I said, it's still a work in progress.
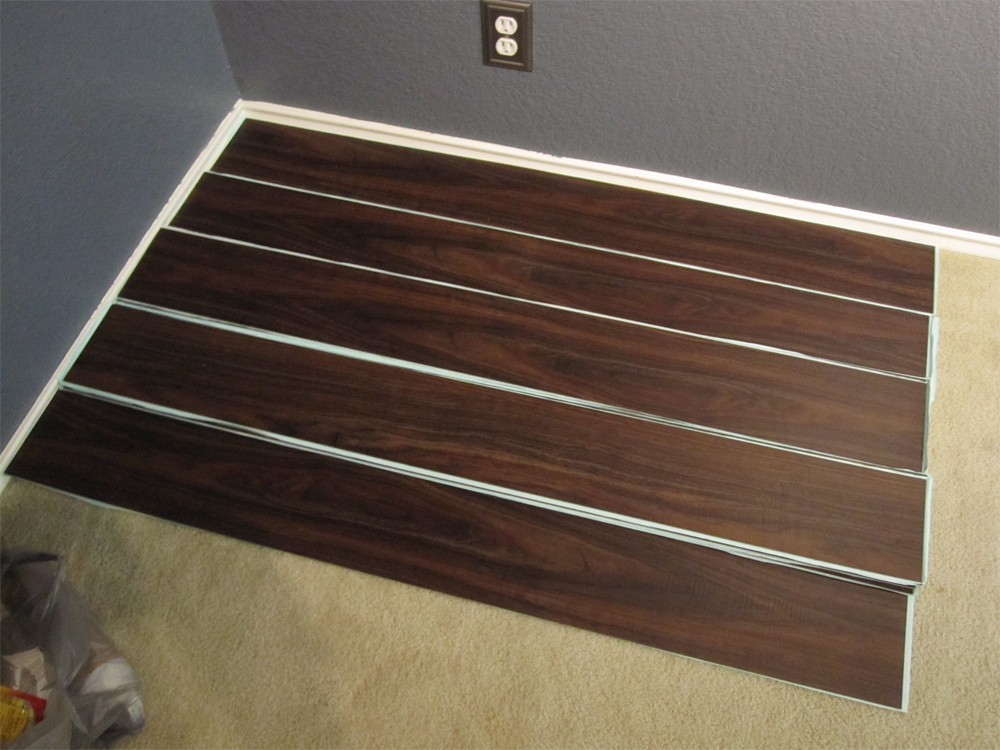
Some of the vinyl planks. Don't worry about the drips on the floorboards, they're all getting torn up and replaced when we put down the new flooring.
The photo lit by the LED light fixture. Looks fantastic (much better than in the photo) in person, almost 3D in appearance. Definitely glad we sprung for the metallic printing.
We also FINALLY (as you can tell from the first pic) found some drapes we liked. Just need to get the steamer out and steam out the wrinkles and we'll be set as far as that goes. Slowly but surely, the room is coming together...
-
Welcome to the addiction!
-
Sorry to hear about that, man. Let us know how things work out.
29G Biocube with HQI tank mount light 500OBO
in Hardware
Posted
****, Woods, that's one helluva deal. Wish I'd seen that!