


lemonyx
-
Posts
48 -
Joined
-
Last visited
Content Type
Profiles
Forums
Store
Gallery
Events
Local Fish Stores
FAQ
Blogs
Downloads
Posts posted by lemonyx
-
-
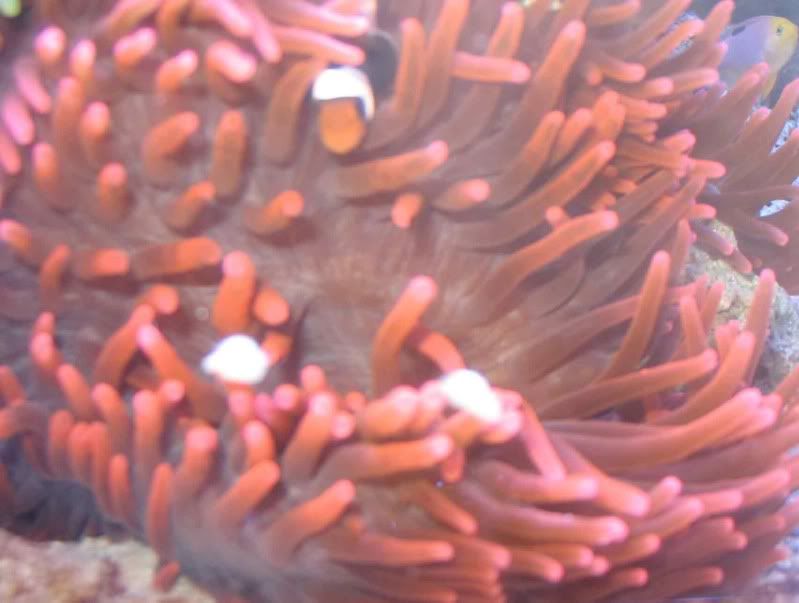
Starting to get this red stuff growing all over the tank, it's short like stubble beard and hard to brush off (I used a wire brush)
Any ideas

-
Genicanthus melanospilos
Members of the genus Genicanthus are planktivores and will not bother corals or clams in the aquarium, making them the perfect reef angel. Females of this species are commonly known as the "Swallowtail Angel", while males are usually called the "Zebra Angel". Still others call it the "Black Spot Angel". Females are yellow above, white below, with dark bands on the upper and lower edges of the tail. Males are white overall with numerous black bands on the head and the body. The Zebra angelfish readily adapts to life in captivity, accepting aquarium fare and acclimating to the conditions found in a well-maintained aquarium. These fish are active and spend most of the daylight hours swimming about in mid-water. Therefore, it is important to provide them with plenty of swimming room. They can be kept in pairs or in small aggregations in larger tanks, but only keep on male per aquarium.
Around 3"-4"
-
Got a pair of Swallow Tails for the tank and here they are
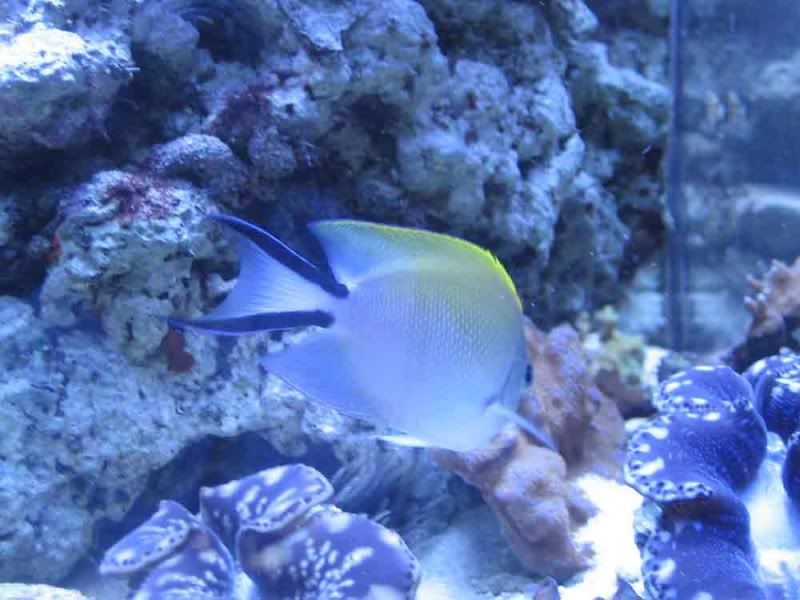
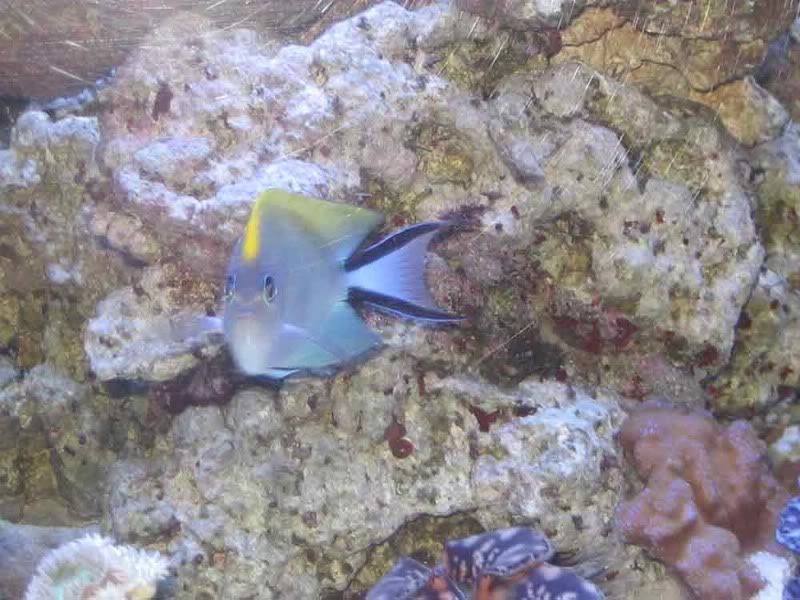
too hard to take pix's of, since they don't keep still long enough for a pose

-
Well the sump is finally finished. Had a nice day with little rain, got the sump routed and edges chamferd. Added 2 media reactors to the return area along with a heater rack
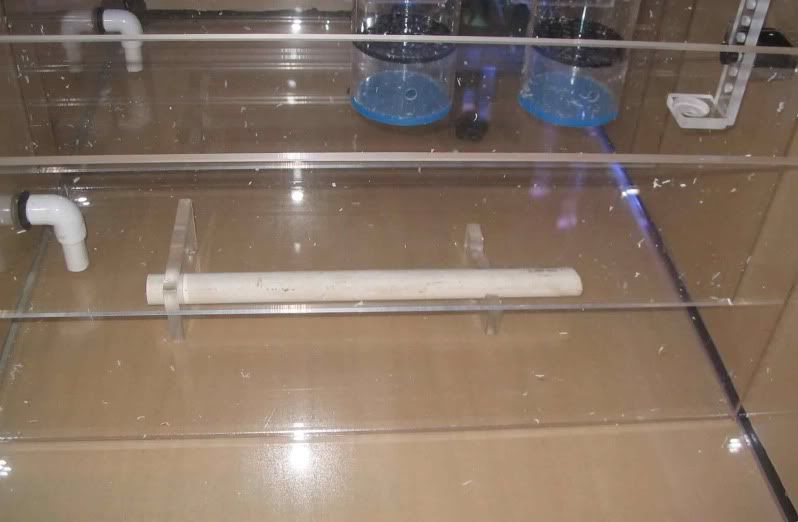
that pvc is where the heaters will sit - those pvc elbows are where the drain is
-
You can use several different types of material, plywood sides and top and bottom or 2x4"s for framing
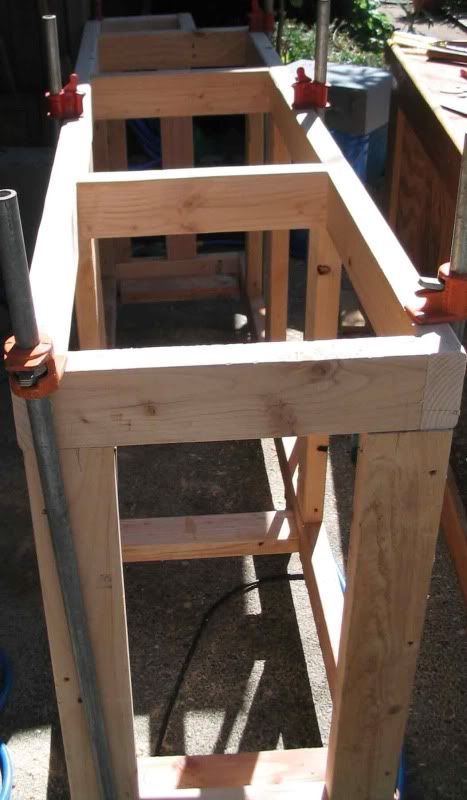
this is a little long but the corners or legs of the stand can be just a simple "L" shape on all 4 corners with the top and bottom part's flat. Sheeting is fine using magnets and some thin ply.
-
Need a pix of the baker's rack you are wanting to use. IMO most of the baker racks will not hold much weight, let alone 2x 55gal tanks @ 465gals ea with water.
-
Are there any side effects of flat wrom exit?
Not the Exit, but when the flat worms die they "emit" a mucus that is poisonous for the tank
Sixlines are nice when small but are PITA when bigger. While at one of the LFS in the main display tank he had lot's of fish but the sixline would only chase after this one wrasse, too hard to get out of a fully stocked 300gal. I'm sure when he has me build him another display tank, that sixline is not going back in
-
I would use the Flatworm Exit as I have used it and no problems with the corals or nem. The six line is a nice looking peaceful when "small" but can be a PITA and chase down other fish. Seen it being done in a LFS main display tank.
If you can siphon as much as you can for a couple of days, then get some carbon ready, follow the instructions in the box, dos and then after a little while add the carbon. It's when they die they secret a mucus that is poisonous for the tank.
hth
-
This is my adapter
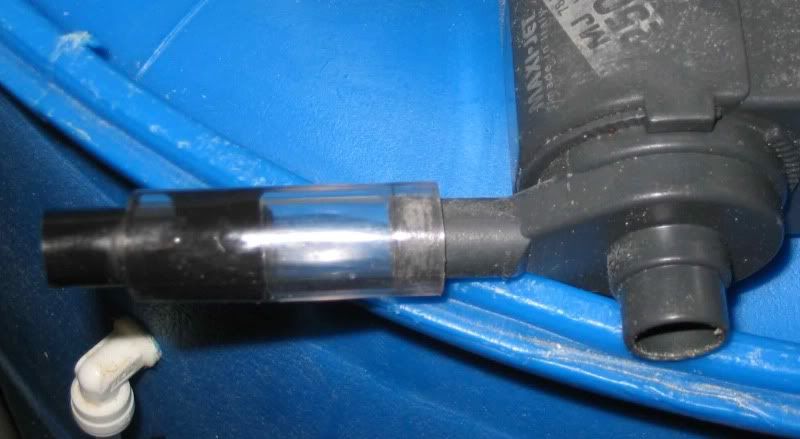
forgot what size I used but just take the bottom to HD or Lowes and match it up. You'll need the black tube as well to bring the size down for the 1/4" ice maker hose
-
I was gonna to suggest large rubbermaid containers or even a couple of stock tanks might workout.
It'll be like moving a tank but staying in the same house

good luck
-
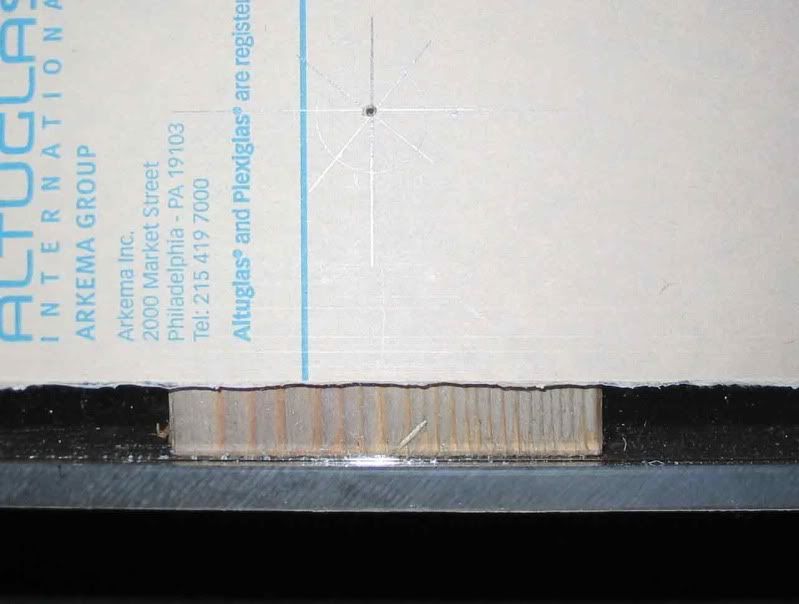
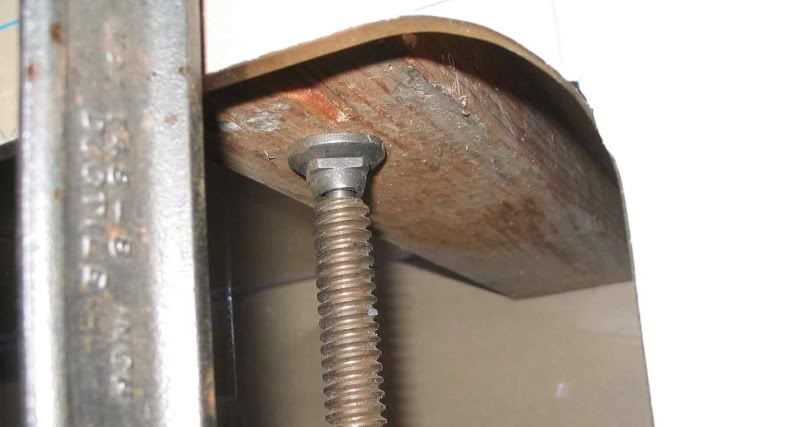
Now since most of the sump is done, I need to drill it for a drain. This is the best way to drill acrylic, with a piece of backing to prevent chip, tear out, I use a piece of scrap 2x4 and a clamp, a good friend helps here if you don't have any clamps.
The wood is centered where the hole will be, just peeking out below the paper mask.
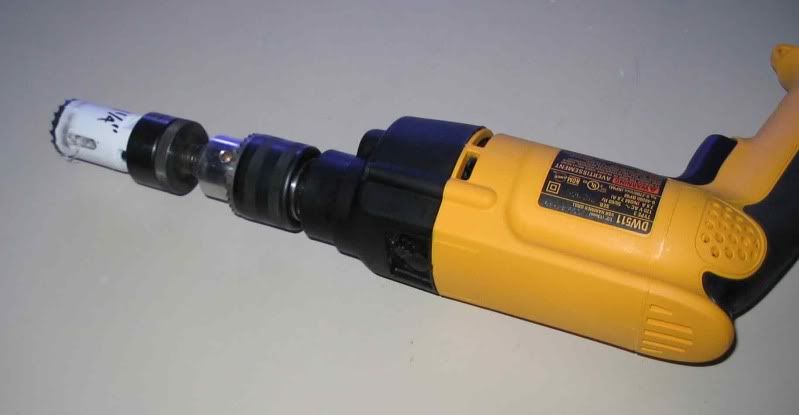
From the bottom up
The tool of choice, it's a 1/2" variable speed drill by Dewalt. I'm using Uniseals so I have the correct size hole saw installed
First hole
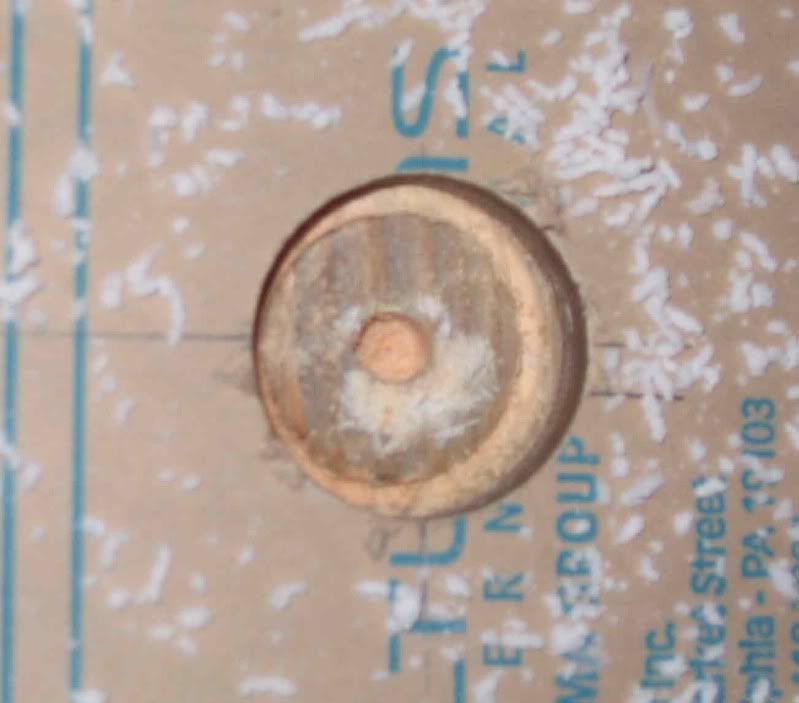
2nd hole
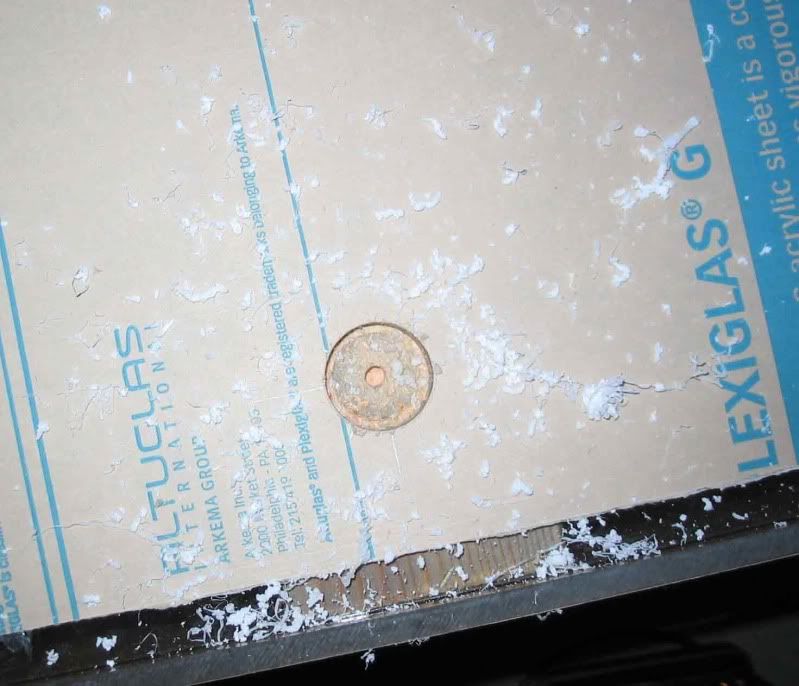
Both holes done
All done. Now to rout the tank and it'll be finished
-
-
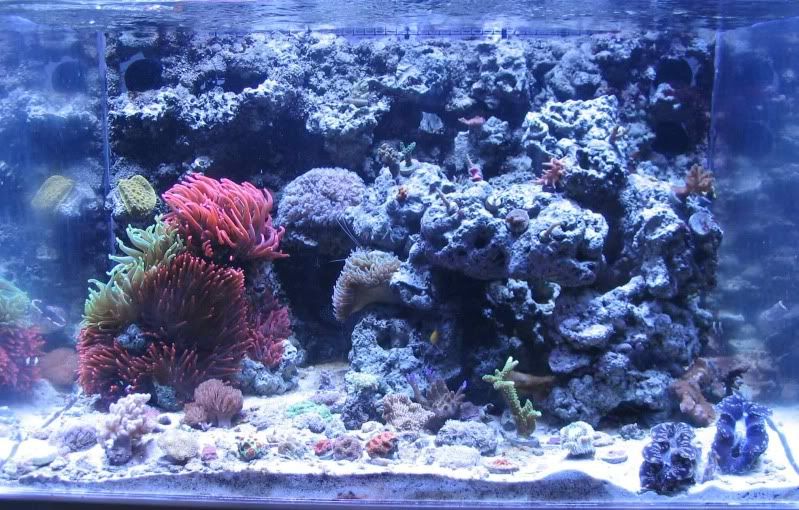
Her's our current tank It's an 80 gal 36"Lx24"Wx22"H with an external overflow using the Bean Animal , the sump is abut a 49gal total with about 30gal working, skimmer with waste collector, calcium reactor Kalk reactor tied to the ATO, hood is a hanging pendant type hood with DIY LumenArcs running 14k Phoenix 250w HQI's
-
Here's a FTS not the best
There is a foam rock wall on the back and three islands also use the Beckett Pond and Stone Foam to 'glue" them together.
This is why I'm starting a 200gal - need more room for clams and other corals and fish.
-
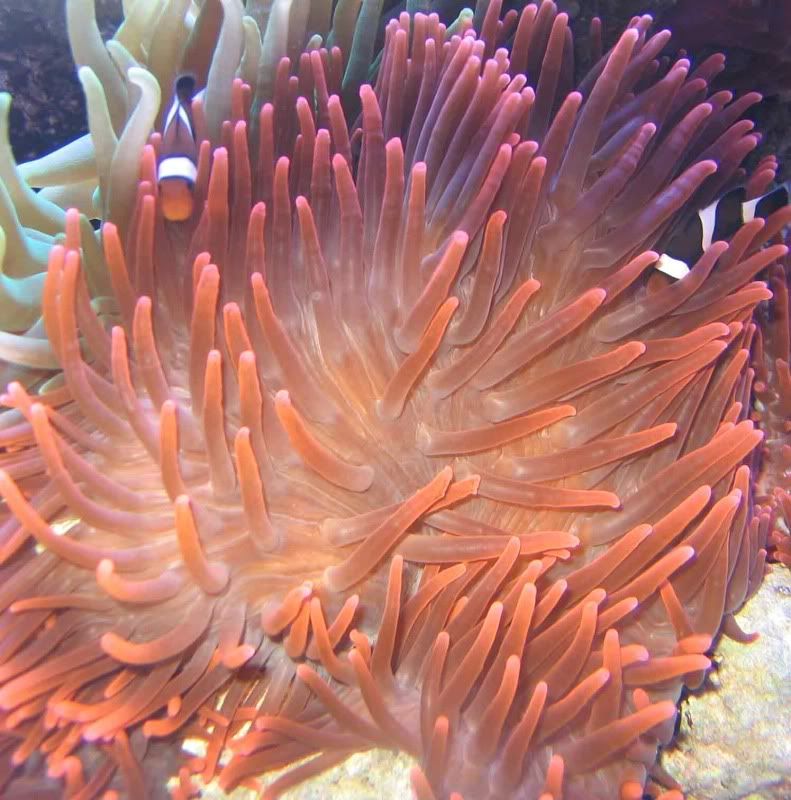
Usually a couple of days - about 10-24 hrs to split, couple of days to heal up and should be eating again in about 4 - 5 days,"your nem may vary". During this time, I keep the current on and run charcoal to help clean the water.
-
Good luck with the shrimp.
Actually if you can remove the rock with the eggs on it and start up a small fry tank about 20gals would be easier. The eggs will turn silver and you'll see the eyes and it's close to hatching. There is a guy up here who has a "clown house" that where I got my Black and White Ocelaris from.
Any way he has about 10 brood tanks just with mated pairs of clowns from Maroon, B/W, Picasso's and Platinum's and the other 40 10gal tanks are for rearing. The clowns lay the eggs on a removable surface and he then put's them in one of the rearing tanks, adds some bubbles for agitation and wait for the hatching.
-
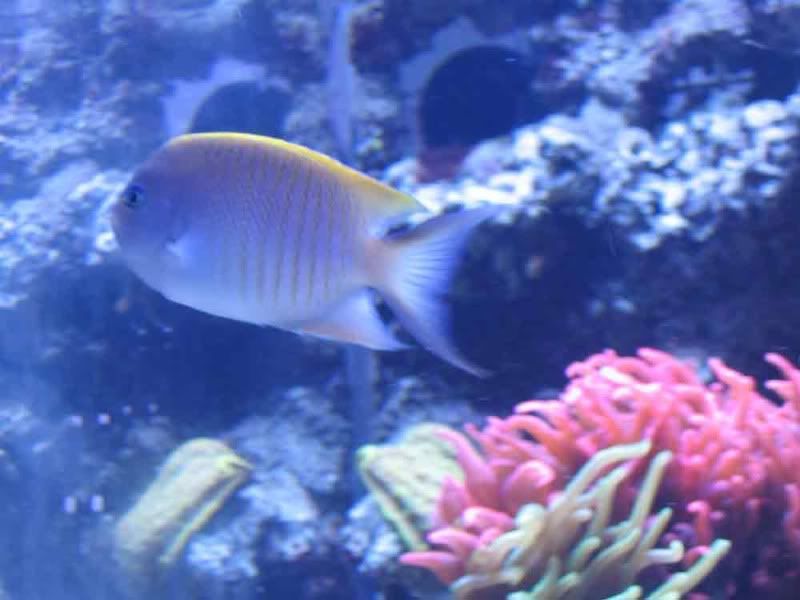
The Family
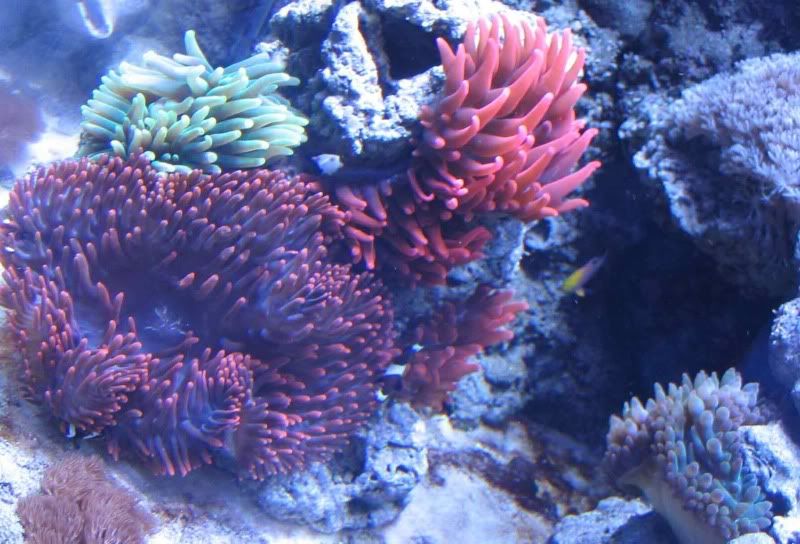
new addition just last night

Not sure if this is the clone or parent, it's it the same place before it split
and this one is just around the corner the left side of the split.
both are healing up and soon will be eating again
that one island is getting kind of crowded, I'll have to make and extension for that island
The count is:
4 variegated RBTA's
2 RBTA's
I Neon GBTA
2 GBTA w/Pink/Purple Tips
-
Or you could use one of those freshwater breeder cubicles - forgot what they're called but it's just some netting over a plastic cage.
-
To bad, I could build you a nice Acrylic one with an external overflow and use the bean animal silent overflow.
good luck
-
The filter/silencer is this thing I made for my current sump and skimmer. Those Siccie (sp) pump draw a lot of air and are noisy.
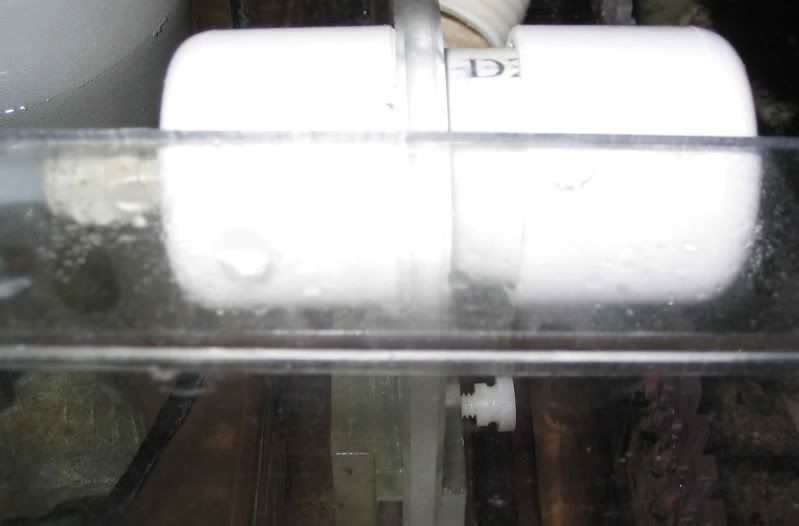
just a 1 1/2" PVC with 2 end caps, one of them drilled and the other end fitted with a JG fitting for easy removal
-
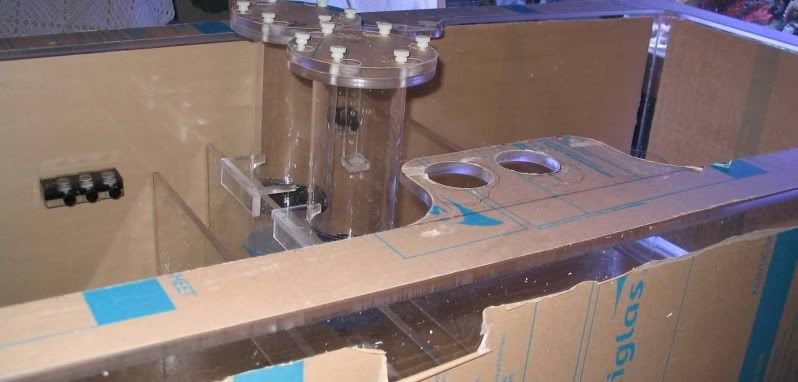
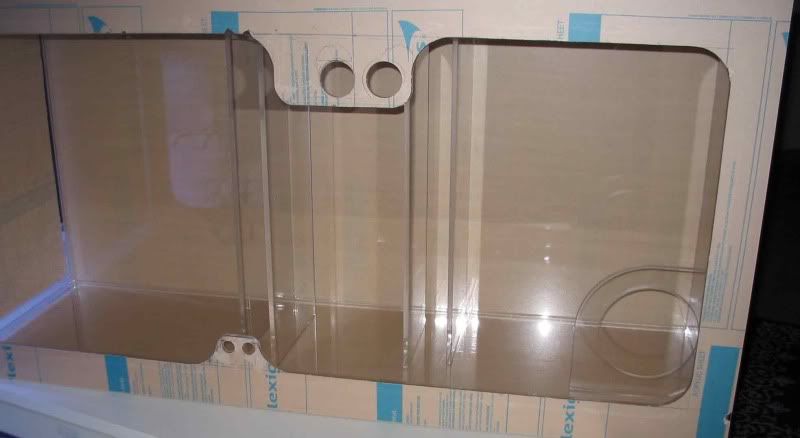
OK, the top, I didn't take any pix's of cutting it out and routing - got lazy
 I had to really think ahead and decided where i was gonna to have everything sit in the sump.
The probe holders, dosing line holders and the ATO float switch are on
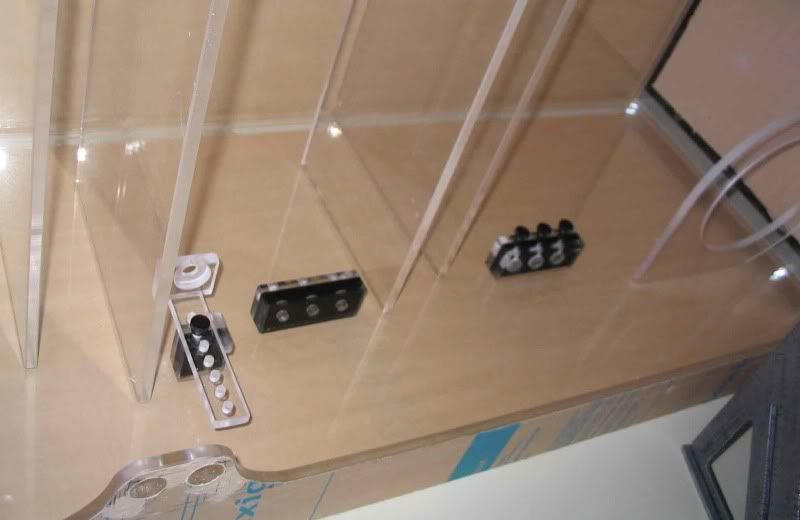
But getting ahead of my self:
that's the top, sitting on the bottom getting shimmed up and ready for "gluing". Remember the needles are there to keep a constant gap all around the parameter of the tank, the razors (or shims) are to close up that gap so the needle slides in and out with a little friction.


Presto, the top of the sump with a 2 3/8" Euro brace
These two holes are for the skimmer pump silencer and filter (there's floss and charcoal in the tube)
or can be a convenient place for 2 cup holders
 and are toward the front of the sump
These 2 smaller holes are for wire management, the probes, heater cords and if enough room the dosing lines (might have to make another one for those)
and these are toward the back of the sump
It's a PITA to drain water from the sump and clean up the junk on the bottom, learned this from my current sump
 so i will be adding this
I'm sure not too many reefers have a drain on their sumps, mine will
It'll just span the skimmer area and return area as the far right side is the fuge and don't want to bother that area.
Almost finished, just have to route the edges, chamfer the edges and I'm done. Corners on acrylic can be "sharp" very sharp I've cut myself many a time on a corner so now everything I do the corners are rounded over and edges chamfered with the router.
-
ooops dbl post

-
That would be doable, just have one of them over the return area and stair step the fuge and the frag area. You'll have to split one of the sump return's to feed the upper deck, not hard to do. Idea - if you have the frag area on top you will just need one light for the frags and fuge - it'll be clear enough that the light will get down to the fuge. Just a thought.
-
I drew up a sketch with your dimensions and there is not room for a frag area. 31" is kind of short for room. My current sump is only 29.5" long and it's crammed. Can you go longer, maybe?

 and are toward the front of the sump
 so i will be adding this
Red (junk) Stubble
in Reef Keeping
Posted
Don't think it's cyno - tanks been treated with ChemiClean